



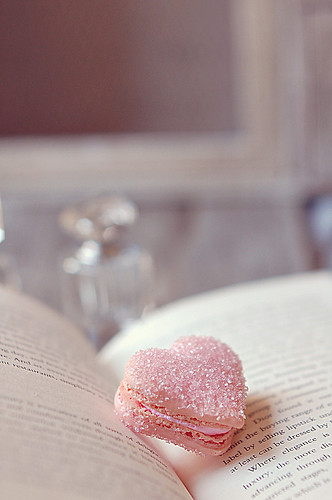
Hello friends!!! Looooong time no see! I haven't forgot about this space but wedding season has been crazy. Will be back soon. If you miss Vi much, come see me here! Before my big return (I mean BIG, giveaways and all), you can make macarons like these one. Heart-shape macarons are such eye pleasers, don't you agree?! For the recipe, click here. Macarons don't have to be just round =)
Until then, ciao~
Kisses,
Vi
Showing posts with label Pâtisseries Française~法式甜品. Show all posts
Showing posts with label Pâtisseries Française~法式甜品. Show all posts
Thursday, October 13, 2011
A quick hello \(~o~)/


Friday, June 17, 2011
Macarons à la rose et crème à la rose ~ 雅致柔美玫瑰風味馬卡龍
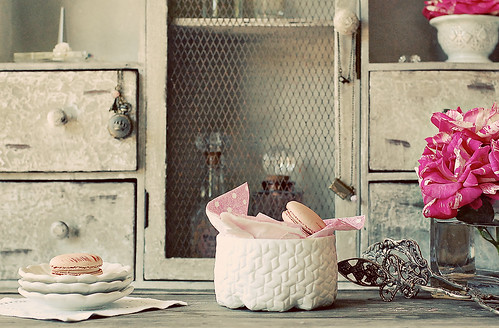
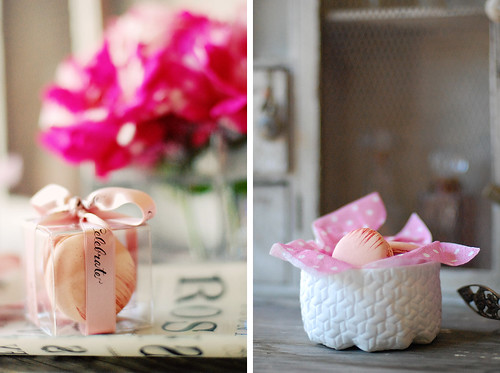
Hello there! I know it has been a while since my quick hello. What has been keeping me away? You know the usual, the shop, small travels, fashion & craft projects and the list goes on & on! The shop has been hectic because of the wedding season in full swing, but I guess it is a good thing since it is a new startup. However, I feel like I have left long enough and better show my face before you all left me! Oh, by the way, I do update my facebook page more regularly so if you want to know what I am up to, come visit me ~
I thought nothing is more fabulous than macarons at the moment so that is what I bring to you. If you are a regular here, you know I am a macaron fanatic. It has become overwhelmingly popular over the last few years and pastry chefs, dessert lovers are not getting tire of it anytime soon. What not to love?! Pretty to look at and so delish!
Not many bakeries in the bay area sell the rose flavor macarons so when I crave it, I have to make my own. I have always loved rose flavored sweets for its elegant sweet fragrance that comes with every bite. For this macaron, I have flavored both the macaron batter & the filling and it is just a mouthful of heaven. Each time I enjoy one, I feel that I’m being transport to the English countryside, where I sip my tea and eat my dainty sweets under the shade of a canopy of climbing roses. Make it and experience it yourself! Now if you excuse me, I am heading back to the rose garden =)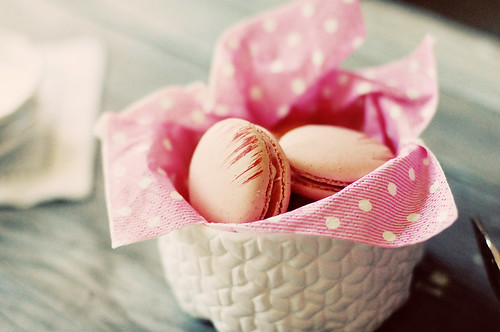
Macarons à la rose – yield about 24 sandwiches
Tant pour tant
125g almond flour
125g powdered sugar
47g egg white
1drop red food coloring
1tsp rose essence
Italian meringue method
125g caster sugar
47g egg white
30g water
Prep:
- On the backside of 2 parchment papers, trace 4cm circles about 4cm apart. Flip them over and line the baking sheets.
- First, sift the almond powder twice first then add in the powdered sugar, and sift again.
I thought you should know:
- Must let the piped cookies sit out until dry to touch, 20 – 30 minutes, before baking to prevent them from cracking during baking.
- Press the piping tip on the baking sheet when piping for uniformly shaped macarons. Do not suspend the tip in the air!
- It is best to consume the macarons within 3 days as it loses its moisture and becomes dry fast.
Tant pour tant how to:
Place the egg white in a clean mixing bowl, add in the red food coloring and rose essence then stir to mix. Add the almond flour mixture, using a rubber spatula, and fold until it forms into a sticky ball, cover with food wrap, set aside.
Italian meringue how to:
Bring water and caster sugar over high heat to a boil and until it thickens and register at 230°F/118°C on a candy thermometer. While the syrup is heating, begin whisking the egg white at high speed in the bowl of a mixer using the whisk attachment, whisk until pale and foamy. Reduce the mixer speed to low speed and begin slowly (very slowly) pouring the syrup down the side of the bowl, being very careful not to splatter the syrup into the path of the whisk attachment. Some of the syrup will spin onto the sides of the bowl but don’t worry about this and don’t try to stir it into the mixture, as it will harden! Raise the speed to medium-high and continue beating until it becomes thick and satiny and the mixture is cool to the touch. When you lift the meringue with the whisk, it should form into a stiff peak.
With a rubber spatula, fold the almond batter to the meringue and fold until completely incorporated. Now it is ready for the macaronnage process. With the rubber spatula, scoop and spread the batter, in a full circle, on the inside wall of the mixing bowl. Repeat this scoop & spread process, for a total of 15 times. Lift some batter with the spatula, it should falls into the bowl in a ribbon fashion, and should look glossy.
Pour the batter into a piping bag with a small round tip and pipe the batter from the center of the drawn circle onto the baking sheets. Pipe about 48 circles. Let dry at room temperature for 30 minutes before baking to allow skins to form. Meanwhile, preheat oven to 300°F/150°C, with racks in upper and lower thirds.
Once the batter is dry to the touch, place into the preheated oven and bake for 12 minutes. Remove from oven and transfer to cool on the cooling rack. Once cooled, slide a knife (fragile, must be careful) underneath the macarons to remove from the parchment paper.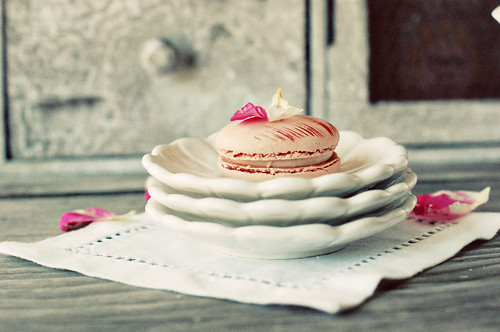
Crème au beurre à la rose (rose buttercream)
33g egg yolks
80g caster sugar
20g water
125g unsalted butter
1tsp rose syrup
Cut the butter into 5mm thick squares, place in a heatproof container and heat in the microwave over medium heat for 10–15 seconds. Butter should be soft to touch but NOT melted. Using a rubber spatula, mash the butter until smooth and creamy (like the texture of mayonnaise), set aside.
Bring water and caster sugar over high heat to a boil and until it thickens and register at 230°F/118°C on a candy thermometer. While the syrup is heating, begin whisking the egg yolk at high speed in the bowl of your mixer using the whisk attachment, whisk until pale yellow. Reduce the mixer speed to low and begin slowly (very slowly) pouring the syrup down the side of the bowl, being very careful not to splatter the syrup into the path of the whisk attachment. Some of the syrup will spin onto the sides of the bowl but don’t worry about this and don’t try to stir it into the mixture, as it will harden! Raise the speed to medium-high and continue beating until the egg batter thicken and cool to the touch.
With the mixer on medium speed, begin adding in the butter. When all the butter has been incorporated, raise the mixer speed to high and beat until the buttercream is thick and shiny. Add the rose syrup, beat for an additional minute until incorporated. Refrigerate the buttercream for 10 minutes before piping.
If stored in an airtight container, it will keep for 5 days and up to a month if frozen. Bring the cream back together before use.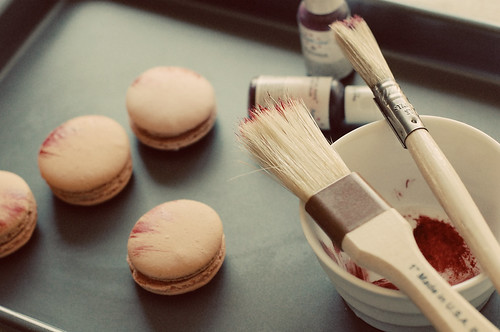
FAQs for making buttercream:
- Wait! My buttercream won’t come together!
Reheat the buttercream briefly over simmering water for about 5 seconds, stirring with a wooden spoon. Be careful and do not overheat. The mixture will look broken with some liquid at the bottom of the bowl. Return the bowl to the mixer and whip on medium speed just until the cream comes back together.
- Wait! My buttercream is too soft!
Chill the buttercream in the refrigerator for about 10 minutes and rewhip. If that doesn’t work, cream an additional 2–4 tablespoons of butter in a small bowl– making sure the butter is not as soft as the original amount, so make sure is cool and smooth. On low speed, quickly add the creamed butter to the buttercream, 1 tablespoon at a time.
Assemble the macarons:
Pair 2 macarons of similar size, pipe about 1 teaspoon of the buttercream filling onto the flat side of one of the macarons then sandwich them, repeat 23 times. Drop a few drops of red food coloring on a clean plate, using a small pastry brush, dap slightly with brush tip and then brush it on smooth side of macaron, repeat 23 more times. Once dry, place in the refrigerator to set. It will keep for 3 days, if stored in the refrigerator and up to 4 weeks if frozen. Let stand at room temperature at least 20 minutes before eating.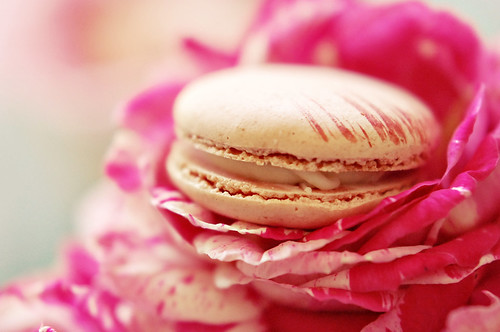
哈囉﹐大家過的好嗎﹖阿Vi有覺潛水潛的太久了(內疚)﹐是時候露一下臉了。。呵呵。。。有沒有很想人家呢﹖ 往後的幾個月﹐阿Vi可有的忙了因為是結婚旺季﹐所以趕快浮上來(笑)。如果你有臉書﹐不妨來那裡找我(點我)﹐比較常更新喔~
是的﹐阿Vi回歸的第一彈帶來的是馬卡龍﹗常來這裡的朋友應該知道我對小巧玲瓏的馬卡龍著迷不已。雖說這幾年它整個大爆發﹐受歡迎的程度破表﹐但對它不膩反而更著迷。實在是太可愛了﹐而且可朔性很高的說﹐對它整個傾心不已。這一次帶來的是外表很嬌悄﹐雅致柔美中帶點甜甜少女味的粉紅馬卡龍。口味是浪漫迷人頗受女生們喜愛的玫瑰風味。我知道很多人對用花卉入餚很抗拒﹐我個人就是愛個不行。每一口都散發著淡雅襲人玫瑰香氣﹐香氣在口腔裡久久不散﹐讓人心醉神迷仿彿讓人置身於一大片的玫瑰花海中﹐不禁讓享用的人自然而然的變成優雅的淑女紳士。不妨你也來體驗一下吧♥
玫瑰風味馬卡龍 – 4cm大約24個
Tant pour tant
125g 糖粉
125g 杏仁粉
47g 蛋白
1滴 紅色食用色素
1茶匙 玫瑰花露
義式蛋白霜
125g 砂糖
47g 蛋白
30g 水
事前準備:
- 杏仁粉過篩2次後和糖粉混合過篩1次﹐備用。
- 準備兩塊烤纸﹐然後在每一張的反面畫上直徑4cm間隔4cm的小圓圈﹐然後鋪在烤盤上。
要注意什麼呢?
- 擠出麵糊後要放置20 - 30分鐘讓表面乾燥﹐才可進烤箱。
- 擠麵糊時先固定一個點﹐從上方擠出是要訣。
- 馬卡龍不宜放置太久﹐否著就會失去濕潤的口感﹐最好在3天內吃完喔。
Tant pour tant:
將蛋白﹑紅色食用色素﹑玫瑰花露攪拌混合。倒進過篩過的杏仁糖粉﹐用橡皮刀從底部往上翻起的方式拌勻﹐然後在麵糊表面蓋上保鮮膜(防乾燥)﹐備用。
義式蛋白霜:
把水和細砂糖混合倒進小鍋中﹐以高火熬煮至出現黏稠狀﹐糖果溫度計達到230°F/118°C或用手指沾黏會牽出糖絲的程度即可。在煮糖漿的同時﹐將蛋白用電動打蛋器以高速打發至起泡但還沒出現尖角的程度。轉低速繼續仔細打發﹐然後邊打發邊細絲般的慢慢地注入滾燙的糖漿(千萬不要讓糖漿直接和攪拌機接觸到﹐要在碗邊注入糖漿﹐這樣就不會結晶了),完全注入糖漿後轉中速繼續打發﹐直到冷卻出現結實尖角的程度至光滑立體狀態為止。
將杏仁麵糊拌入蛋白霜中﹐用橡皮刀從底部往上翻起的方式拌勻。拌勻後進行macaronnage程序。Macaronnage即是將麵糊從底部往上翻起再往拌碗的內壁壓推勻15次至表面紋理細緻且有光澤的麵糊為止。
將麵糊倒進擠花袋中﹐在先前畫了圓圈的烤盤紙上以小口徑的圓形擠花嘴擠出圓形的麵糊。先固定一個點﹐再從上方擠出比直徑4cm稍小的圓形。總共擠出48個。放置30分鐘讓表面乾燥﹐用手摸不沾黏即可。放置的同時預熱烤箱至300°F/150°C烘烤約12分鐘。取出﹐放網架上靜置放涼後用抹刀取下﹐備用。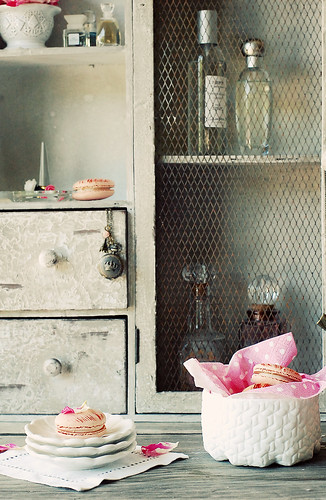
玫瑰風味奶油餡心
33g 蛋黃
80g 細砂糖
20g 水
125g 無鹽奶油
1茶匙 玫瑰糖水
把無鹽奶油切成5mm厚的小方塊﹐然後放進一個耐熱的容器裡﹐再放進微波爐裡加熱10 - 15秒使奶油變軟。絕對不可以加熱到融化﹐手指按下去有壓進去的軟度即可。用橡皮刀用力壓變軟的奶油﹐再攪拌成美乃滋狀﹐備用。
把水和細砂糖混合倒進小鍋中﹐以高火熬煮至沸騰﹐糖果溫度計達到230°F/118°C或用手指沾黏(非常燙喔﹗)會牽出糖絲的程度即可。利用糖漿加熱的時間以電動攪拌機以高速將蛋黃打散至變淡黃。待糖漿達到所需的溫度時﹐轉低速邊打發邊細絲般的慢慢地注入滾燙的糖漿(千萬不要讓糖漿直接和攪拌機接觸到﹐要在碗邊注入糖漿﹐這樣就不會結晶了) 。完全注入糖漿後轉高速繼續打發﹐直到冷卻發泡的程度。將奶油分2次加入蛋糊中﹐以中速打發攪拌至融合﹐拌入玫瑰糖水﹐轉高速繼續打發2分鐘至光滑立體狀態為止。將奶油醬放冰箱冷藏10分鐘即完成。
如果不立刻使用﹐將奶油醬倒入密閉的容器裡放冰箱存放﹐可以保存5天。如果放冰格冷藏可以存放1個月。使用前靜置回溫後打發至光滑立體狀態即可。
製作奶油餡最常遇倒的問題:
- 奶油餡看起來有分離的跡像:
將奶油餡隔熱水加熱5秒﹐看到奶油餡融化時即停止加熱。用木匙稍微攪拌﹐然後用電動打蛋器打發至光滑立體狀態為止。
- 奶油餡看起來太軟了:
將奶油餡放進冰箱冷藏10分鐘後﹐用電動打蛋器打發至光滑立體狀態為止。如果還是不夠立體﹐可以加2 - 4湯匙的奶油 (硬的) 至奶油餡中用低速打發至光滑立體狀態為止。
組合馬卡龍:
在半數的馬卡龍平坦面上擠出約1茶匙的奶油夾心﹐再蓋上另一半的馬卡龍﹐做成24個。將數滴紅色食用色素用滴在陶瓷碟子裡﹐用乾的小毛刷沾一點﹐在馬卡龍表面刷一下﹐等表面乾燥放冰箱至餡心凝固即可。
將馬卡龍包好放密封的容器中放冰箱存放﹐可以保存3天。如果放冰格冷藏可以存放1個月。食用前靜置回溫即。
Tuesday, July 27, 2010
Financier Nature ~ 原味費南雪小蛋糕
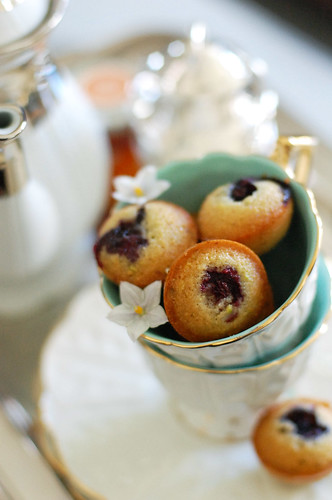
Hello friends, it has been a while (awww~~~ it seem to be the opening line for the last couple posts)! Although I have not been posting regularly but I have been in the kitchen baking away! One of the treats that I have been baking a lot is this dainty, buttery French teacake calls financier, which is financer in English. How did it get its name? It is believed that a baker in the Paris financial district created this and he named the cakes after the traditional rectangular mold, which resembles a bar of gold. These teacakes were also know as brown butter cakes to many because it is made with butter cooked till golden brown (beurre noisette) to give that characteristic nutty flavor. The traditional financiers are made using just brown butter, sugar, flour and egg whites. Now, they come in many other flavors like matcha, sesame, lavender, pistachio, chocolate and whatever you name it. For me, I like the traditional flavor most but I like to top with different toppings, usually berries or tart stoned fruits to cut the oil a bit.
I adopted the recipe from this rocking lady. Traditionally made with flour, her recipe called for a healthier alternative, which is replacing some of the flour with almond meal and pistachio meal. I think it is yummier since it yields a more moist cake. However, I omitted pistachio and used just almond for this particular batch. Depending on the size of the molds, you can make as many as 15 traditional bars or 3 dozens petite four. Also, this is a great do-ahead treat – I bake them in pretty shaped silicon molds and freeze them and just reheat when I have friends over. They are best when share so start baking and invite your friends over =)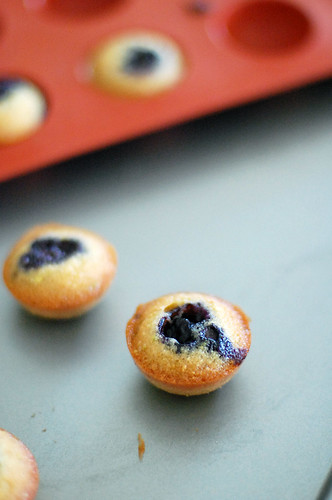
Financier Nature
3 dozens mini cake (silicone mold)
120g egg whites
125g sugar
Zest of half a lemon
30g all purpose flour
80g almond meal
150g unsalted butter, browned and strained, cooled
Cut the butter into big chunks and cook in a small saucepan over medium heat until it starts to foam and dark particles start to form on the bottom of the pan. It will smell nutty. Remove and strain the butter and let it cool.
Whisk the first five ingredients together in a bowl. Slowly add the cooled brown butter and whisk until it is incorporated. Let the batter rest in the refrigerator overnight.
Preheat oven to 375°F/185°C. Pour batter into a piping bag and pipe into silicon molds until almost full, top with either raspberries or blueberries and bake for about 10 minutes or until golden. Time will vary depending on the size of the mold.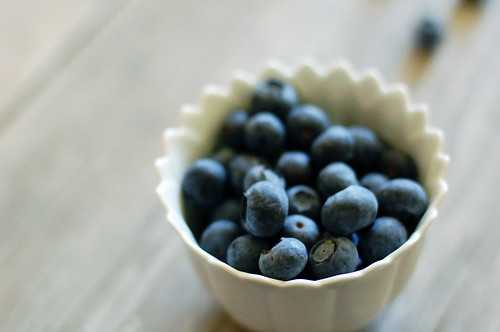
親愛的﹐好久不見啦﹗天呀﹐這快變成每次發文的開場白了(苦笑ing) 。雖然最近不常更新博客﹐我可沒在偷懶﹐我可是不停的在廚房轉。那為什麼沒跟大家分享呢﹖Well ﹐就得了思維阻塞症唄。。。突然就是不知道該寫些什麼(T~T)。。。希望這只是過渡期。。。唉。。。
今天要分享的法式糕點是financier。這financier即費南雪﹐翻成中文就是金融家﹐所以這蛋糕又名金融家蛋糕。聽說是由在巴黎金融區的一名糕餅師傅發明的。他是為了讓在證交所上班的金融家們也能快速品嘗下午茶而發明的一種甜點,所以理所當然就以金融家命名。也有人稱為金磚蛋糕。好像是傳統造型是細長型的,又烤成黃金般的顏色﹐讓人不假思索地聯想到金磚的緣故。 是道簡單卻有著迷人風味富深度的精緻點心。除了小巧討喜的外觀﹐口感細緻溫潤外還帶有濃郁奶油焦香味是它的特色。傳統風味為奶油味但時至今日,費南雪已發展出各種不同特色的風味,像是巧克力﹑芝麻﹑抹茶﹑開心果又或是薰衣草風味等等。我最愛的還是奶油風味的﹐不過為了口感吃起來清爽一點我喜歡加點酸味莓果一起烘烤。
傳統的做法是用麵粉來製作的﹐但我喜歡她用杏仁跟開心果仁粉較養生的做法﹐而且果仁粉除了讓蛋糕體更濃郁舒爽有層次﹐口感也較比麵粉來的溼滑綿密。費南雪多用傳統的長方形烤模來製作﹐不過我喜歡用不同形狀的小巧矽膠模來製作﹐這樣比較賞心悅目。這個食譜可製作出約15個傳統長方形蛋糕或36個迷你蛋糕。不得不說的是這是可以提前操作的一道點心喔 - 將烤好的蛋糕放密閉式容器再放冰庫存放﹐享用前放烤箱回溫即可。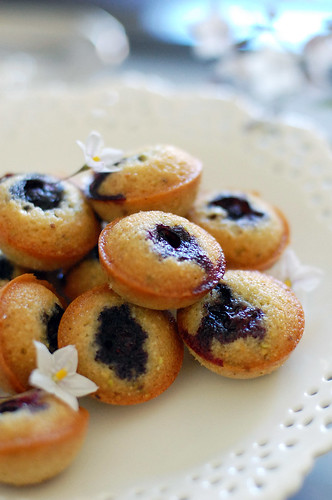
原味費南雪小蛋糕
約36個迷你蛋糕
120g 蛋白
125g 砂糖
半個檸檬的皮茸
30g 麵粉
80g 杏仁粉
150g 無鹽奶油 (焦化﹑濾過﹑放涼)
要注意什麼呢?
- 烘烤時間只是參考而以﹐因為烤箱應不同制造商﹐溫度有差異﹐當然模具的大小也會影響烘烤的長短。
將無鹽奶油切塊﹐以中火煮至冒泡成金黃色還散發出堅果般的香氣就可以了。將奶油濾過放涼﹐備用。
混合蛋白﹑砂糖﹑檸檬皮茸﹑杏仁粉﹑麵粉﹐然後一邊用打蛋器攪打一邊將放涼的奶油倒進麵糊中至呈順滑麵糊狀。將麵糊放冰箱醒麵一個晚上。
將烤箱預熱至375°F/185°C。將麵糊取出倒入沒有擠嘴的擠花袋裡﹐剪去一角﹐將麵糊擠進矽膠模中至約9分滿﹐然後在每個模中輕輕推進一粒藍莓或覆盆子。放進烤箱裡烘烤約10分鐘至金黃色。從烤箱取出﹐擺在網架上稍微放涼﹐翻轉倒扣﹐放涼。
Saturday, February 13, 2010
Rose Blancmange ~ 玫瑰風味法式牛奶凍
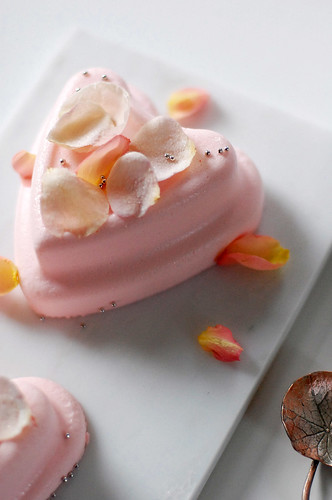
I’ve just come back from a week’s trip to Brazil, which was filled with meeting family, best-grilled beef and shopping. I’ll write all about it next time but for now I wanted to share a lovely dessert that I have taken a liking to recently. Well, you know that I am a huge fan of panna cotta, so it shouldn’t be a surprise that I like blancmange, which is a dessert that has that same creamy texture that I heart. Like panna cotta, it is easy to make and the flavors are endless. Since this dessert is part of a valentine gram that I am giving out, I choose to stick with the official colors of the holiday – red or pink. Flavor? Rose of course =)
I adopted the recipe from Annie Bell’s book - gorgeous desserts. Did I tell you it was easy to make? Bring everything except the heavy cream to a boil, strained, and cooled then whisk together with stiff form whipped cream and chill. It was decorated with meringue kisses and crystallized rose petals but I opted for the later only, plus a little of this and that. Very simple, no surprises but so good!
Hope you enjoy this dessert as much as I did! On a side note, Lunar New Year is the same day as Valentine’s Day this year so my kitchen is madness right now – so much cooking to do! I know I have some catch up to do with your comments but I’ll get to them as soon as I can. Thank you for being patient! Lastly, wish you a lovely Valentine’s Day and a prosperous Lunar New Year~
Rose Blancmange
14g leaf gelatine
1¼ cups whole milk
1½ tbsps rosewater
½ cup caster sugar
1 small lemon
1¼ cups heavy cream
Pink food coloring
Garnish
Crystallized rose petals
Edible rose petals
Silver dragées
Soak the gelatine, let soften in cold water for 5 minutes, and then squeeze off the water.
In the meantime, zest the lemon. Bring the zest, milk, rosewater and sugar to a simmer over medium heat. Remove from the heat and add the gelatine, stir until it dissolves. Strain into a clean bowl, discard solids, and let cool to room temperature.
Beat the heavy cream over medium speed until stiff peaks form then gradually beat in the cooled milk mixture until combined. Using a toothpick, add food coloring little at a time to the cream mixture until you get the desire shade.
Lightly brush the molds (I use cake molds but ramekins will do the work too) with vegetable oil. Pour in the cream mixture, pick up the molds and lightly tap on the counter to release air bubbles. Let them set for at least 3 hours or overnight in the refrigerator.
Dip the molds, one at a time, in a bowl of hot water for 10 seconds, run a knife around the edge, invert it onto a plate and ease the blancmange out. Just before serving, garnish with edible rose petals, crystallized rose petals and silver dragées.
Crystallized Rose Petals
1 medium egg white
Petals of 6 organic spray roses
½ cup caster sugar
Tweezers
Small brush
Wash all the petals then pat dry using paper towels – work with a light hand. Holding a petal with a tweezers, gently brush both sides of the petal with egg whites, and sprinkle each side with caster sugar. Shake off the excess sugar, and place the petal face-up on a parchment lined cookie sheet – repeat. Leave in a cool place to dry overnight. DO NOT place into the refrigerator!
Store the crystallized petals in an airtight container in a cool dry place. They can be stored up to a year.
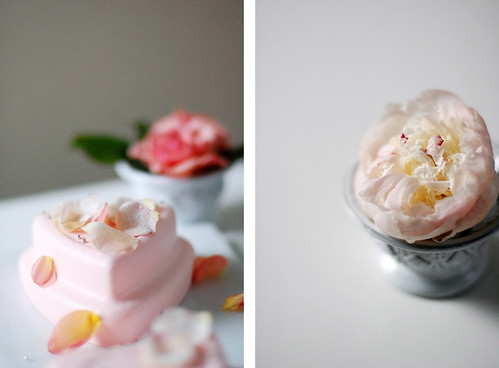
阿Vi現在是元氣滿滿﹐因為剛剛才從巴西度假回來。這趟旅行徹底的讓我對這個南美國家改觀也從新認識一些很久不見的親人﹐吃到很棒的烤牛肉﹐當然還有瘋狂血拼囉。詳細的下回再說﹐現在我想跟你分享一個最近很哈的甜點。你也知道我超愛吃義式奶酪﹐所以對有著同樣細緻軟滑乳狀質地的法式牛奶凍同樣的著迷不已。做法也如義式奶酪簡易﹐口味同樣的很多元。由於這個甜品是要在情人節送人的﹐理所當然要從這個節日的官方顏色就紅色或粉紅色中選一﹐而我就選了較柔美的玫瑰粉紅了。至于口味嘛?當然是玫瑰 =)
甜點的食譜摘自Annie Bell的gorgeous desserts一書。很簡單的一道甜點﹐沒有法式甜點一貫的考究﹐沒有太複雜的鋪陳﹐但味道的精緻度還是那麼精彩。入口即化﹐每一口都散發著淡雅玫瑰香氣﹐仿彿讓人置身於玫瑰園中﹐不禁讓享用的人自然而然的變優雅了。
還有阿Vi在這裡祝福大家有個甜蜜浪漫的情人節外﹐也希望你有個愉快的農曆新年哦~
p.s. 每個留言我都有看喔! 我會儘快回覆的﹐謝謝 :-*
玫瑰風味法式牛奶凍
14g 明膠片
1¼杯 全脂奶
1½湯匙 烹調用玫瑰水
½杯 細砂糖
1顆 小檸檬
1¼杯 鮮奶油
粉紅色食用色素
裝飾用
霜化玫瑰花瓣
有機玫瑰花瓣
食用銀珠
明膠片用冰水泡5分鐘﹐擠掉水分﹔備用。用刷子將模具塗上薄薄的一層沙拉油﹔備用。
檸檬取茸後和牛奶﹑細砂糖﹑玫瑰水一起放入小鍋裡﹐開中火加熱煮至沸騰後熄火。加入泡軟的明膠片,攪拌至融化混合﹐過濾奶漿﹐靜置放涼。
將鮮奶油打發至出現尖角的程度﹐逐漸地倒入放涼的奶漿﹐攪拌順滑均勻即可。用牙籤沾一點食用色素﹐再一點點的拌入奶糊中直到達到理想的顏色為止。倒進模具中至滿﹐用湯匙背推平﹐再輕輕敲一下模具釋放氣泡﹐然後放冰箱凝固3個小時或一個晚上。
將奶凍脫模: 用小刀順著邊劃一下﹐隔著熱水回暖或用熱毛巾將週圍熱敷十秒,然後將模倒轉放於盤子上﹐稍微搖幾下﹐拍一拍模底﹐往上拉脫模。食用前用霜化玫瑰花瓣﹑食用銀珠﹑有機玫瑰花瓣點綴即可。
霜化玫瑰花瓣
1個 蛋白
6朵 迷你有機玫瑰
½杯 細砂糖
鑷子
毛刷
將玫瑰花瓣摘下﹐洗乾淨後用紙巾抹乾。稍微打發蛋白。用鑷子夾起一片花瓣﹐用刷子在正反兩面刷上薄薄的蛋白﹐再將細砂糖灑在花瓣上﹐輕輕搖一下去掉多餘砂糖﹐然後放在鋪了烘烤紙的烤盤上 - 重複。
當所有的花瓣都灑上砂糖後﹐擺放在乾燥處晾乾﹐需時約1天。記住千萬別放冰箱﹐砂糖會溶掉哦!
將霜化玫瑰花瓣排放在烘烤紙間﹐放密閉容器中﹐再放陰涼乾燥處存放- 賞味期1年。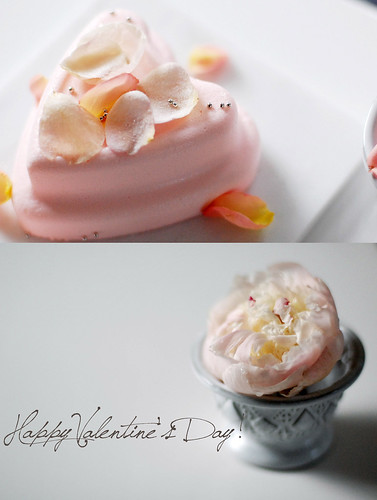
Tuesday, November 3, 2009
Macarons au Chocolat-Mangue ~ 巧克力香芒奶油馬卡龍
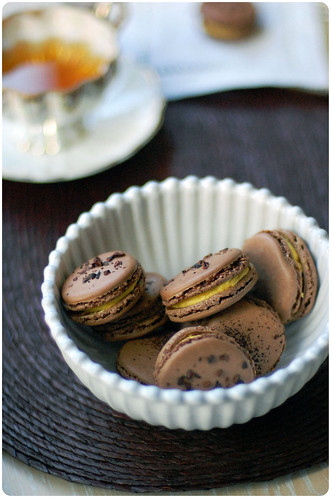
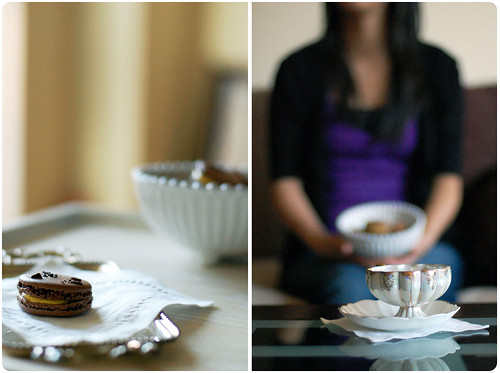
From time to time, you saw these little jewels graced the web page of my blog so you should know that I am a huge fan of Parisian macarons! As it turns out, I am not the only addict - this beautiful bride also is a fan. She requested that macarons be included on the menu of the dessert table that she ordered for her wedding although she didn’t specify what flavors so that left the possibilities wide open. Giving thought that not everyone is into exotic flavors, I have made 2 flavors, raspberry macaron with raspberry confiture – a classic favorite, and a more exciting chocolate mango flavor.
Bursting with flavor, what a fantastic combo! If you haven’t paired the two together, you should definitely give it a try! Based on previous feedbacks from my guinea pigs, many complained that buttercream is a bit dense, so I decided to add mango purée to flavor it, hoping that the acidity would help cut the grease. The result is an incredibly fragrant and flavorful buttercream, which married well with the fruity, bitter undertone of the cocoa used to flavor the macarons. Undeniably, this have become my new golden combo and I am sure I will pair these two again very soon! Also, I have dressed up the macarons with a dash of cocoa nibs – just sprinkle the top of the piped batter before baking! That way, not only do they taste scrumptious but look great too! Again, presentation is very important!
I stressed many time that ingredients play a key role in the food we eat. I would have made my own mango purée but I didn’t find any good one in the markets that have that incredible fragrance that I was looking. Fortunately, I found some les vergers boiron mango purée in the freezer of the Pasta Shop in Berkeley. I have heard so much praise about this line of deep-frozen purées from France that I have been searching for ages. Something that you can’t easily find in the Bay Area so I was very excited that I came across it! What makes boiron’s purées so special? This line of purées is produced from carefully selected fruits at the peak of their ripeness, which are then squeezed and strained. Most importantly, no addictives and retain the full flavor and original color of the fruits. I too, call myself a fan now (^u~)
To find out more, click here~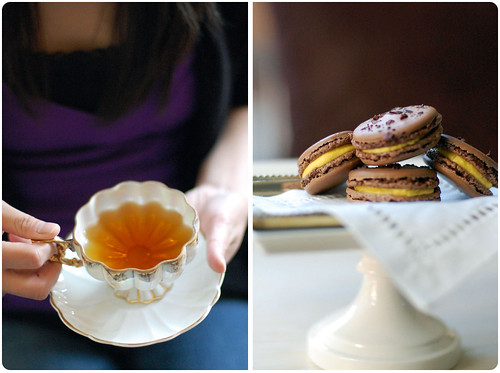
Crème au beurre de mangue (mango buttercream)
1 large whole egg
40g caster sugar
40ml water
100g unsalted butter
70g mango purée
I thought you should know:
Fruit purées are high in water content, when mixed with butter it appears to be separated at first, but keep whisking and the cream will come back together giving a smooth and shiny texture.
Cut the butter into ½ inch (5mm) thick squares, place in a heatproof container and heat in the microwave over medium heat for 10 – 15 seconds. Butter should be soft to touch but NOT melted. Using a rubber spatula, mash the butter until smooth and creamy (like the texture of mayonnaise), set aside.
In a heatproof container, mix the caster sugar with the water then heat over medium heat in a microwave for 1 minute, stir until sugar completely dissolved. Return it to the microwave and continue to heat for 4 more minutes over medium heat. Remove with CARE out from the microwave and stir with a spoon. Spoon a little bit of the hot syrup into some ice water; it should solidify into a little ball. If it does not, continue to heat in the microwave, 1 minute at a time, until it gets to this state.
While the syrup is heating, begin whisking the egg at high speed in the bowl of your mixer using the whisk attachment, whisk until pale and foamy. Reduce the mixer speed to low and begin slowly (very slowly) pouring the syrup down the side of the bowl, being very careful not to splatter the syrup into the path of the whisk attachment. Some of the syrup will spin onto the sides of the bowl but don’t worry about this and don’t try to stir it into the mixture, as it will harden! Raise the speed to medium-high and continue beating until the egg mixture is thick and satiny and the mixture is cool to the touch (about 5 minutes or so).
With the mixer on medium speed, begin adding in the butter. When all the butter has been incorporated, raise the mixer speed to high and beat until the butter cream is thick and shiny. Add the mango purée, beat for an additional minute until incorporated. Refrigerate the buttercream for 10 minutes before piping.
If stored in an airtight container, it will keep for 5 days and up to a month if frozen. Bring the cream back together before use.
FAQs for making buttercream:
- Wait! My buttercream won’t come together!
Reheat the buttercream briefly over simmering water for about 5 seconds, stirring with a wooden spoon. Be careful and do not overheat. The mixture will look broken with some liquid at the bottom of the bowl. Return the bowl to the mixer and whip on medium speed just until the cream comes back together.
- Wait! My buttercream is too soft!
Chill the buttercream in the refrigerator for about 10 minutes and rewhip. If that doesn’t work, cream an additional 2 – 4 tablespoons of butter in a small bowl– making sure the butter is not as soft as the original amount, so make sure is cool and smooth. On low speed, quickly add the creamed butter to the buttercream, 1 tablespoon at a time.
Macarons au chocolat – 20 sandwiches
2 large egg whites
40g granulated sugar
120g powdered sugar
55g almond flour or finely grounded blanch almonds
8g Dutch-process cocoa powder
some cocoa nibs
Prep:
- First, sift the almond powder twice then add it to the powdered sugar and cocoa powder mix, and sift again.
- On the backside of 2 parchment papers, trace 1½-inch (4cm) circles about 2 inches (4cm) apart. Flip them over and line the baking sheets.
- Preheat the oven to 440°F/220°C.
I thought you should know:
- Must let the piped cookies sit out for 10 - 20 minutes before baking.
- Press the piping tip on the baking sheet and pipe for uniformly shaped macarons. Do not suspend the tip in the air.
In a large dry bowl, whip the egg whites on medium speed until foamy and the color turns white. Gradually add the granulated sugar, increase the speed to high and continue to whip until stiff peaks form – the whites should be firm and shiny, about 3 minutes.
With a rubber spatula, fold half of the almond/sugar/cocoa mixture to the meringue, fold until incorporated then fold in the remaining flour mix and fold until completely incorporated. Now it is ready for the macaronnage process.
With the rubber spatula, scoop and spread the batter, in a full circle, on the inside wall of the mixing bowl. Repeat this scoop & spread process, for a total of 15 times. Lift some batter with the spatula, it should falls into the bowl in a ribbon fashion, and should look glossy.
Fit a piping bag with a 3/8 inch (1cm) round tip, fill it with the cocoa batter and pipe the batter from the center of the drawn circle onto the baking sheets, about 40 circles. Sprinkle some cocoa nibs over piped circles. Let dry at room temperature for 10 - 20 minutes before baking to allow skins to form. Meanwhile, preheat oven to 440°F/220°C.
Bake for 4 minutes at 440°F/220°C, then turn it down to 260°F/130°C, continue to bake for 8 minutes. Remove macarons from oven and transfer to cool on the cooling rack. Once cooled, slide a knife underneath the macarons to remove from parchment paper.
Assemble the macarons:
Pair 2 macarons of similar size, pipe about 1 teaspoon of the buttercream filling onto the flat side of one of the macarons then sandwich them. Place in the refrigerator to set. Make about 20 sandwiches. It will keep for 3 days, if stored in the refrigerator and up to 4 weeks if frozen. Let stand at room temperature at least 20 minutes before eating.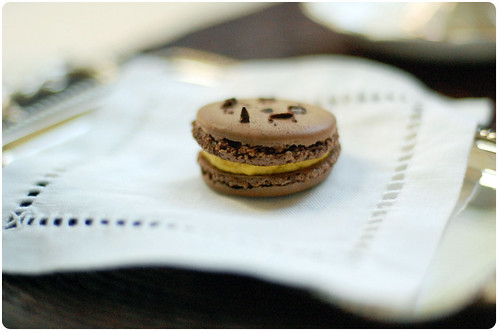
常來這裡的朋友應該知道我對小巧玲瓏的馬卡龍著迷不已﹐所以我就不再強調了。不過現在才知道除了我﹐身邊很多人也很愛﹐這個新娘子就是其一。她要求跟我訂的甜點布斐菜單中必須包含這道小點心﹐而口味卻不挑。我想了很久﹐為了讓人嚐到不同口感與風味的成品﹐決定做兩種口味(要不是時間及人手不充足﹐我還想多弄幾個口味呢﹗)。除了男女老少都愛的酸酸甜甜覆盆子馬卡龍配覆盆子果醬口味﹐另一款就是這個較新鮮的組合 - 巧克力芒果風味﹗
原來濃郁的巧克力跟香氣襲人又帶有酸味的芒果的配對是很有個性的。加了芒果泥的奶油餡甜中微帶一點清新的酸剛好托襯出巧克力的甘苦味﹐還順帶的令口感清爽起來。那芬芳四溢的芒果香氣在口腔裡久久不散﹐讓人心醉神迷﹗除了在皮與餡的組合花了點心思﹐造型上也稍作改變﹐就是在表面灑了些可可豆碎加以裝飾﹐讓整體更富趣味~
至于這個芒果泥﹐我用的是法國boiron牌。耳聞很久了﹐好不容易在Berkeley的Pasta Shop找到的呢﹗不便宜但是果香濃厚襲人﹐顏色鮮艷﹐嚐起來像在吃新鮮的芒果﹐極品呀﹗除了芒果泥我還購入百香果泥和青蘋果泥﹐我想也是擁有極致的品質的﹐值得極力推薦的優質果泥﹗
關於boiron果泥(轉自Gourmet' s Partner):
Les Vergers Boiron是來自法國的天然頂級果泥,於1936年成立,1970年開始創新研發生產冷凍果泥,為市場第一位推出該類型商品的製造商,因為高成本與高品質的緣故,幾乎僅有五星級以上的飯店才會使用,為西點烘焙業的領導品牌。通過ISO 9001與ISO 14001認證,每種果泥口味皆嚴選各國最適合的水果來源及品種,挑選最高峰的採收期採收,因此無論是口味、顏色、重量和紋理,都絕對經過縝密的挑選,以獨特的產品篩選及完善巴氏瞬間滅菌法的保存技術,展現獨具要求的製程技術,採用標準化的萃取精華,混合四個味道,分別是桔子、紅橙、福柑和檸檬。同時強調「產地、品質、色澤」做為產品的最高要求。每批產品都維持一致的完美口感,不會因產季採收、熟成度等外在因素,而影響其口感及成品之表現。同時根據不同的水果種類屬性,研發出不同的製作技術與成分比例,秉持健康天然原則,100%不添加防腐劑、人工色素、濃稠劑等,符合現代顧客追求健康的飲食取向,低糖不膩口,全程冷藏,彈牙爽口不言而喻,嚐起來有天然果香,絕對是果泥中的極致。
篩選全世界最新鮮美味的嚴選水果,使用最完善規模的冷凍技術,Les Vergers Boiron對於天然果泥的堅持,讓世界各國如日本、法國等熱愛精緻美食的先進國家指定購買,有了最完美的果泥,烘焙出讓人安心又幸福的甜蜜糕點,品嚐最健康美味的結晶。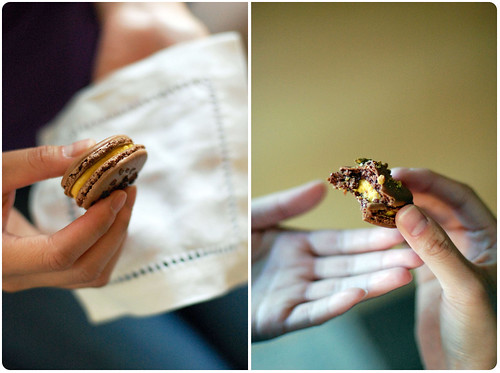
香芒奶油餡心
1個 大的全蛋
40g 細砂糖
40ml 水
100g 無鹽奶油
70g 芒果果泥
要注意什麼呢﹖
水果泥的水份含量高﹐容易在和奶油攪拌過程中造成分離﹐但只要繼續攪拌就會成為滑潤的奶油醬。
把無鹽奶油切成1/2寸(5mm)厚的小方塊﹐然後放進一個耐熱的容器裡﹐再放進微波爐裡加熱10 - 15秒使奶油變軟。絕對不可以加熱到融化﹐手指按下去有壓進去的軟度即可。用橡皮刀用力壓變軟的奶油﹐再攪拌成美乃滋狀﹐備用。
將細砂糖與水混合倒進一個耐熱的容器裡﹐放進微波爐裡加熱60秒後取出﹐迅速拌至砂糖完全溶解。再次放進微波爐裡加熱4分鐘後取出(要小心處理﹐非常燙喔﹗)﹐用湯匙拌勻。舀取一小匙糖漿滴到冷水中﹐取出在手指間搓揉﹐若能成為小球狀的濃度即可。若是沒能搓成球狀﹐再加熱60秒。
利用糖漿加熱的時間以電動攪拌機以高速將蛋打散至起細泡﹐再轉低速繼續打發﹐待糖漿達到所需的溫度時﹐邊打發邊細絲般的慢慢地注入滾燙的糖漿(千萬不要讓糖漿直接和攪拌機接觸到﹐要在碗邊注入糖漿﹐這樣就不會結晶了),完全注入糖漿後轉高速繼續打發﹐直到冷卻出現結實尖角的程度﹐約5分鐘。將奶油分2次加入蛋霜中﹐以中速打發攪拌至融合﹐拌入芒果果泥﹐轉高速繼續打發2分鐘至光滑立體狀態為止。將奶油醬放冰箱冷藏10分鐘即完成。
如果不立刻使用﹐將奶油醬倒入密閉的容器裡放冰箱存放﹐可以保存5天。如果放冰格冷藏可以存放1個月。使用前靜置回溫即可。
製作奶油餡最常遇倒的問題:
- 奶油餡看起來有分離的跡像:
將奶油餡隔熱水加熱5秒﹐看到奶油餡融化時即停止加熱。用木匙稍微攪拌﹐然後用電動打蛋器打發至光滑立體狀態為止。
- 奶油餡看起來太軟了:
將奶油餡放進冰箱冷藏10分鐘後﹐用電動打蛋器打發至光滑立體狀態為止。如果還是不夠立體﹐可以加2 - 4湯匙的奶油 (硬的) 至奶油餡中用低速打發至光滑立體狀態為止。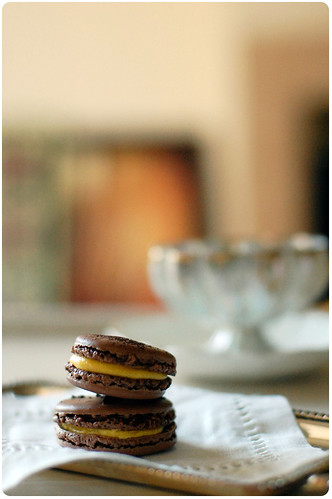
巧克力馬卡龍 - 20個
2個 蛋白(L尺寸)
40g 砂糖
55g 杏仁粉
120g 糖粉
8g Dutch-process無糖可可粉
適量 可可豆碎
事前準備:
- 杏仁粉過篩2次後和糖粉、可可粉混合過篩1次﹐備用。
- 準備兩塊烤纸﹐然後在每一張的反面畫上直徑1 ½寸間隔2寸(4cm間隔4cm)的小圓圈﹐然後鋪在烤盤上。
要注意什麼呢?
- 擠出麵糊後要放置10 - 20分鐘讓表面乾燥﹐才可進烤箱。
- 擠可可糊時先固定一個點﹐從上方擠出是要訣。
用電動攪拌機先以中速將蛋白打發至起泡、顏色變白﹐將砂糖分成2 - 3回加入蛋白中﹐仔細發泡﹐轉高速打至出現尖角成立體型蛋白霜﹐約3分鐘。
將一半篩過的粉類加入蛋白霜中﹐用橡皮刀從底部往上翻起的方式迅速拌勻﹐加入剩餘的粉類﹐攪拌至粉末完全消失為止。進行macaronnage程序。Macaronnage即是將麵糊從底部往上翻起再往拌碗的內壁壓推勻15次至表面紋理細緻且有光澤的麵糊為止。
將可可糊倒進裝上直徑3/8寸(1cm)的圓形擠花嘴的擠花袋中﹐在先前畫了圓圈的烤盤紙上擠出圓形的可可糊。先固定一個點﹐再從上方擠出比圓形稍小的可可糊﹐總共擠出40個。在可可糊上面灑上些許可可豆碎﹐放置10 - 20分鐘讓表面乾燥﹐用手摸不沾黏即可。放置的同時預熱烤箱至440°F/220°C。
用440°F/220°C的烤箱烘烤4分鐘﹐然後降溫到260°F/130°C繼續烘烤8分鐘。取出後放網架上靜置放涼﹐用抹刀取下﹐備用。
組合馬卡龍:
在半數的馬卡龍平坦面上擠出約1茶匙的夾心﹐再蓋上另一半的馬卡龍﹐做成20個。放冰箱至餡心凝固即可。
將馬卡龍包好放密封的容器中放冰箱存放﹐可以保存3天。如果放冰格冷藏可以存放1個月。食用前靜置回溫即可。
Thursday, July 16, 2009
L’ Atelier Vi turned 2 & giveaway!! L’ Atelier Vi 兩歲了之週年慶送禮物 =)
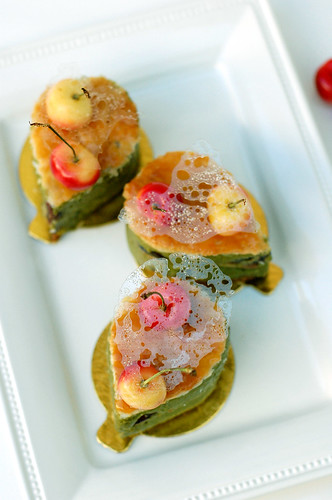
L’ Atelier Vi turned 2!! Time seems to have gone by so quickly! I’d like to thank all the readers of my little blog for your support. I would not have gone this far without you. I’ve been inspired by all your feedback and truly grateful to your kind comments over the year!!
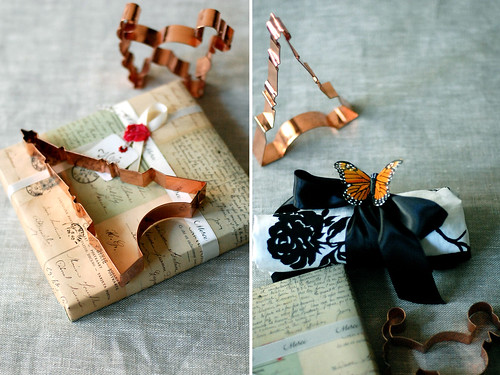
As this being said, it calls for a celebration!! Besides whipping up a little something to celebrate the anniversary, I also got you a little something in return of your continuing support of this little blog of mine. Remember what I did for the 1st anniversary? Well, you don’t have to do anything this time…umm…other than leaving a mark on the comment page of this post so that you can be enter into the drawing by 7/31!!! As for the gifts I picked out for you, there are 2 sets – each consists of a box of 2 copper cookie cutters and a simple apron of black rose pattern (sewn by me). I hope you’ll like them =)
Now, let’s talk about the little something I made for the anniversary. Giving this special occasion, I attempted something from my too-hard-to-do list! A dessert conjured of layers of feullitage and pistachio cream from a pastry book written by Chef Koji Yamamoto of Patisserie Les Planetes. Feullitage or puff pastry as known to most, is not something myself and most people would have the leisure to make regularly given its lengthy method (precise technique too). I have been dragging until this very day to finally give it a try because I was repeatedly told by many baking enthusiasts that all I need to master fabulously flaky feullitage is flour, butter and plenty of time and patience - the repetitive roll-fold-rest process will take up a good amount of time (a day & a half to be exact).You know how people said about good things need time? They were right! Indeed a lot of time but the end result worth every minute of it. The lengthy process yields a layered pastry structure of unparalleled lightness and flakiness and once you take a bite into the ultimate buttery goodness, you’ll be hooked for life!!
As for the pistachio mousseline, it is relatively easy. The hardest part was trying to find the pâte de pistache, which I found here (I just love this place!). As for the griotte cherry in liquor (another hard to find item in the States), I happened to find it in a local specialty shop in Berkeley; however, you can replace this by using Bing cherries or Rainier cherries coated lightly with Kirsch and a sprinkle of vanilla sugar. Because both the pistachio mousseline and mille-feuille are loaded with butter, you can imagine how rich and creamy this dessert is. I suggest serving it with some sorbet high in acidity (like lemon or passion fruit) to cut the creaminess.
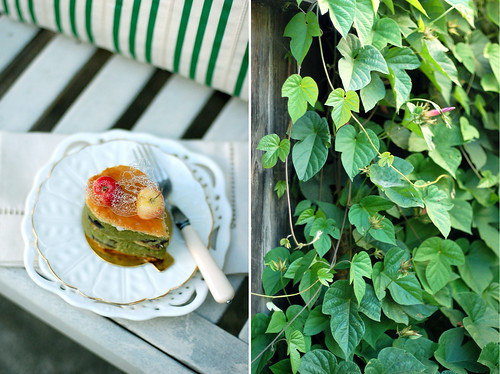
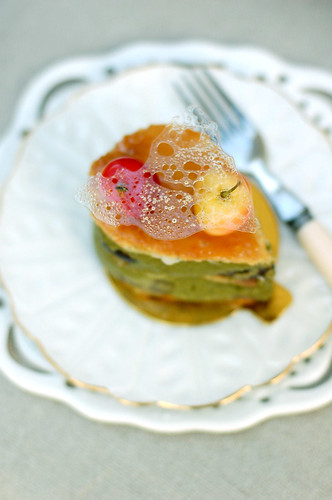
Mille-feuille Pistache Griotte (Napolean with Pistachio Mousseline & Sour Cherry) makes 5 single serving cakes
Feullitage
I use tear drop shaped mousse rings to cut out puff pastry and served them as individual cakes as opposed to cutting them into sheets. Yield about 15 tear drops.
185g bread flour
125g cake flour
50g unsalted butter, cubed
5g salt
140g ice cold water
225g blocks of unsalted butter, each thinly sliced lengthways
Crème pâtissière (vanilla custard)
340g whole milk
1 vanilla bean, split & seeds scraped
55g egg yolks
85g granulated sugar
30g cornstarch
Crème mousseline à la pistache (pistachio mousseline)
150g crème pâtissière
50g pâte de pistache (pistachio paste)
75g unsalted butter, room temperature
20 griotte cherry in liquor, cut into halves
For garnish
Some apricot jam, Isomalt sugar decoration, and fresh rainier cherries
For the Feullitage:
Night Before
Arrange the butter slices into a square on a piece of plastic food wrap, put another piece of food wrap on top then mash the butter into 1 big square using a rolling pin; refrigerate it until firm. Make the base also known as a détrempe next. Using a food processor, process flours, cold butter cubes, water and salt until the dough is well combined. Turn onto a lightly floured surface and form dough into a ball. Wrap the dough in plastic food wrap and leave to firm up overnight in the refrigerator.
Next Day
Roll out pastry dough on a floured surface to a square slightly bigger than the butter block then arrange the butter block in the center, pull in all 4 corners toward the center then flip it over and roll it out to a rectangle. Fold the top third of pastry to the middle third then fold up bottom third. Turn counter clockwise so opening is on the right, roll out pastry to a square, cover with plastic wrap, refrigerate until firm (1-2 hours). Repeat 5 more times, resting in between.
Divide the dough into 2 halves, wrap 1 half in plastic food wrap, store it in a airtight container and place it in the freezer, it will keep for months. Roll out the other half of pastry dough to 3mm (1/8 inch) thick, prick dough all over with a fork and let chill for 15 minutes or until the dough is firm enough. Meanwhile, preheat oven to 400°F/200°C. Place dough in a jelly roll sheet pan lined with parchment paper, place a wire rack on top (to prevent dough from puffing) and bake for 30 minutes or till nicely browned and cooked through. Remove and let cool.
For the crème pâtissière:
Combine milk, vanilla pod and seeds in a medium saucepan. Bring to a simmer over medium heat. Meanwhile, in a large bowl, whisk together the egg yolks, sugar until mixture turns pale yellow. Add in the cornstarch and whisk until combined.
Remove the milk mixture from the heat and add a little to the yolk mixture to warm it first, whisking constantly to keep the yolks from cooking. Pour the rest of the hot milk into the egg mixture, whisking constantly as you pour. Strain the mixture into a clean saucepan.
Return the custard to the stove and cook over low heat, whisking constantly. Let the custard cook for 1-2 minutes until it is thick enough to coat the back of a wooden spoon. Using a fine sieve; strain the mixture into a clean bowl. Cover the surface with plastic wrap and refrigerate until chilled.
For the pistachio mousseline:
Using a handheld mixer, beat the chilled crème pâtissière over medium speed until smooth. Fold in the pâte de pistache, beat until combined then fold in the unsalted butter and beat until combined. If not being use immediately, please refrigerate (just whisk until smooth before use).
Assemble:
Place a tear drop shaped mousse ring on top of the puff pastry, trace the outline using a paring knife and cut out 15 pieces. Spoon the pistachio cream inside a piping bag fitted with a round tip. Arrange 5 tear drop shaped mousse rings on a sheet pan, put 1 piece of puff pastry inside each ring, arrange some griotte cherry halves, pipe a layer of cream on top, level with the back of a spoon, put in another piece of puff pastry, press down lightly to release any air bubbles, arrange some more griotte cherry halves, pipe another layer of cream almost to the top, level with the back of a spoon, put another piece of pastry on top and press down lightly to release any air bubbles. Refrigerate until firm.
Brush a layer of warm apricot jam on the top then carefully push out the cakes from the rings. Arrange 2 rainier cherries on top then a piece of Isomalt sugar decoration, viola!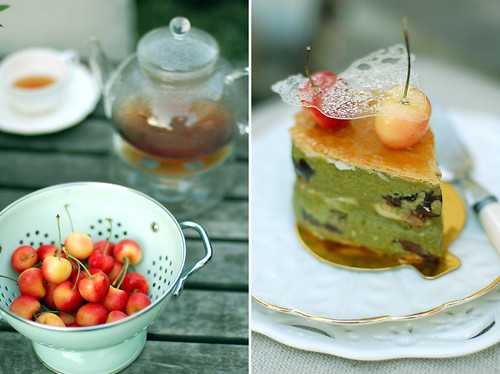
又到七月了﹐也就表示我的部落格邁入第二個年頭了﹗我的天呀﹐兩年過的真快﹐真不敢相信 L’ Atelier Vi已經兩歲了﹗ ﹗希望以後還有無數個兩年可以在這個平臺跟你們分享切磋製作甜點的心得。最重要是不管你是從一路走來的舊友﹐還是剛剛到訪的新知﹐衷心感謝你們不時送上鼓勵加油的話﹐感動死了 ~.~
為了回饋大家的支持﹐阿Vi準備了一點小禮物送你。有別於去年週年慶的競賽﹐今年你無須參加任何比賽﹐因為是以抽獎形式送出。 如果你想收到阿Vi為你準備的禮物﹐只需在美國西岸時間7月31日的限期前在這個post的留言版畫個丫﹐說明你想參加抽獎即可。至於禮物嘛﹐是一套以巴黎為主題的餅乾模和我以黑玫瑰圖樣亞麻布縫製的手工圍裙(有照片喔)﹐共送出2份。希望你會喜歡~
現在來說說為了這個特別的日子製作的甜點吧﹗當在Patisserie Les Planetes 的甜點主廚山本光二師傅著作的書中看到這個以開心果櫻桃組合做成的千層派﹐就深深的迷上這個看起來高雅又帶有清涼感的甜點。可是看到需要自己動手製作千層派皮時卻步想放棄﹐因為我沒耐性挑戰這個高難度﹑耗時﹑需要繁複的製作過程的麵糰。可很多培烘同好不斷地游說說要做出酥脆美味的千層派皮並不如想像中的困難﹐最後被說服決定嘗試磨煉一下自己的能耐。耗了我一天半的時間反覆摺疊製作而成的千層派皮有著超級酥脆的口感﹐無比細膩層次的特質﹐咬下去的瞬間所散發出來的奶油香讓我覺得付出的時間是值得的。現在終於明白人們說好的東西是需要同等的時間去準備的道理了 =)
我是頭一次製作開心果奶油慕斯。開心果奶油慕斯的質地很柔滑﹐味道帶點草腥味﹐頗有個性。不知道是不是先解決了高難度的千層派的關係﹐相比下奶油慕斯製作過程很容易﹐well…除了搜購開心果糊這部分﹗不得不說很多日語書所需的食材在美國是很難找的﹐不過好在自從發現這家店後絕少讓我失望。另外酒漬櫻桃也很難找﹐不過月前無意間在Berkeley的一家market給我找到。若是找不到﹐用以適量櫻桃白蘭地﹑香草砂糖稍微醃漬的新鮮櫻桃代替可不能不加﹐由於千層派和奶油慕斯用上相當份量的奶油﹐口感雖香酥濃郁可對亞洲人來說應該有點厚重﹐而微酸的櫻桃可以中和讓味道清爽一點﹐最好還搭配酸味重一點的冰品享用﹐好讓味道更滋味多元。
櫻桃開心果千層派 – 5個小蛋糕
捨棄傳統的條狀而將它做成小蛋糕主要是為了方便食用。
千層派皮
185g 高筋麵粉
125g 低筋麵粉
50g 冰凍無鹽奶油﹐切成小方塊
5g 鹽巴
140g 冰水
225g 夾入用無鹽奶油
奶油蛋糊
340g 全脂奶
1條 香草荳﹐開半刮籽
55g 蛋黃
85g 砂糖
30g 玉米粉
開心果奶油慕斯
150g 奶油蛋糊
50g 市售開心果糊(膏)
75g 無鹽奶油 - 切成小方塊﹐室溫放軟
20粒 酒漬櫻桃﹐橫的切成兩半
裝飾用
適量的杏果果醬﹑烤糖片裝飾﹑金黃櫻桃
千層派皮的做法
前一晚:
將無鹽奶油縱向的切厚塊﹐放置在一片保鮮膜上成正方形形狀﹐再蓋上一片保鮮膜﹐然後用桿麵棍敲打使其成方磚狀﹐包好冷藏備用。跟著製作千層派皮的外層麵糰基地 (détrempe)。將高﹑低麵粉﹑鹽水﹑丁狀無鹽奶油用食物調理機攪拌勻成奶油糰塊。取出﹐放在撒上少量高筋麵粉的工作台上﹐快速揉成球狀﹐蓋上保鮮膜﹐放進冰箱靜置一個晚上醒麵。
第二天
從冰箱取出奶油麵糰﹐放在撒上少量高筋麵粉的工作台上﹐用桿麵棍桿開成比奶油磚稍微大一點的正方形﹐然後將奶油磚交錯地放置在上﹐再將麵糰的四個角拉向中央。不要讓空氣進入其中地將麵皮拉緊折疊﹐並且將各個邊緣逐一捏緊。將糰塊翻面﹐用桿麵棍各以直向﹑橫向桿開來﹐使麵糰和奶油可以相互緊密結合﹐然後將麵糰從中央向前後桿開成長方形條狀。將麵糰折疊成3折﹐稍壓一下﹐再90度扭轉麵糰 (封口向右)﹐用桿麵棍各以直向﹑橫向稍微拉長﹐用保鮮膜包好﹐放冰箱靜置60分鐘以上醒麵。重複這組各以直向﹑橫向桿開來﹐折疊成3折﹐90度扭轉﹐再直向﹑橫向拉長﹐包好﹐放冰箱靜置的程序5次(合共6次)。
預熱烤箱至400°F/200°C。取出麵糰﹐切半。一半包好冷凍保存﹐一半麵糰桿開成約厚3mm或1/8寸的薄片﹐再用叉子戳刺氣孔﹐放入鋪了烘烤紙的烤盤裡﹐蓋上保鮮膜﹐放進冰箱冷藏約15分鐘定型。取出﹐在麵糰上放上網架(防止烘烤時過度的膨脹)﹐放入烤箱烤30分鐘或至派皮呈金黃色。取去擺放在網架上放涼。
奶油蛋糊的做法
將牛奶﹑香草荳和籽混合倒進小鍋裡,以中火煮至剛沸騰即離火﹐蓋上鍋蓋燜幾分鐘。將蛋黃和砂糖一起攪打至顏色變白﹐再加進玉米粉﹐充份地攪拌均勻。
將熱奶漿逐一加入蛋糊中﹐並同時用打蛋器不間斷地攪打。過濾奶蛋糊﹐再倒回小鍋中以低火加熱。用打蛋器持續不斷地攪拌至變稠﹐並可以在木匙背劃出清晰的線條時(約2分鐘)就完成了。將奶油蛋糊過濾後在表面蓋上保鮮膜(黏著蛋糊)﹐放進冰箱冷藏備用。
開心果奶油慕斯的做法
將奶油蛋糊取出﹐用攪拌機以中速攪打至軟滑﹐拌入開心果糊﹐用橡皮刀源邊往下刮翻切拌勻﹐再拌入室溫放軟的奶油﹐用攪拌機以低速攪打至混合呈光滑狀﹐放冰箱備用。使用前﹐再攪打軟即可。倒進密閉的容器裡﹐放冰箱可存放2個星期。
組合及裝飾蛋糕
事前準備:
- 將千層派皮用淚滴形狀慕斯模切割出約15片派片﹐備用。
將5個淚滴狀慕斯模放置在烤盤上﹐在各個模中鋪放一片派片﹐再隨意的放一些酒漬櫻桃粒﹔備用。將拌軟的開心果糊倒進裝有圓形擠花嘴的擠袋中﹐先擠些開心果糊填滿模具至4分滿﹐用湯匙背推勻鋪平至模具邊緣﹐再在各個模中鋪放一片派片﹐輕輕壓一下釋放氣泡﹐再放些櫻桃粒﹐再擠入一層開心果糊至模具8分滿﹐推平﹐鋪上第三片派片﹐往下輕按﹐然後放入冰箱冷卻定形。
取出蛋糕﹐在派片表面塗抹一層微溫的杏果果醬﹐然後用手指將蛋糕往上推出脫模。在各個蛋糕上擺放2粒金黃櫻桃再放一片烤糖片即可﹐放冰箱冷藏存放。
Sunday, May 17, 2009
Mad about strawberries - Macarons à la fraise ~ 吃草莓之馬卡龍﹑果醬﹑甘納許
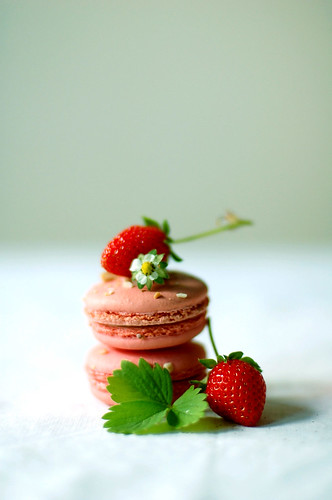
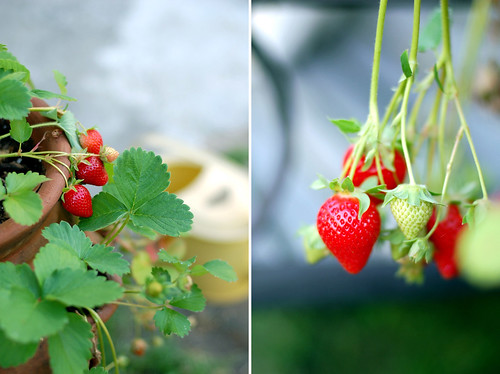
Every Spring I pick up these Sequoia June-bearing strawberry plants from a local nursery. The reason that kept me returning every spring is because this variety produces bountiful, luscious and juicy fruits that are exceptionally sweet, aromatic, which just perfect for making dessert and jam. Normally, they bear fruit in June over a period of just a few weeks into mid July but this year, I found some of the plants already bearing fruits and this give the perfect reason to bust out my long list of must-try fruit recipes^^
The first thing that came across my mind was making jam, a first for me. I found a tempting recipe in Mes Confitures, a book which many claimed is the bible of jam making. The author of this book is Christine Ferber, whom people in France and food lovers all over the world refer to as the fairy godmother of jams and jellies. She has been known to use only the best, freshest, seasonal fruits and ingredients from local farmers and that she produces only small batches at a time by hand in her small boulangerie-pâtisserie, Au Relais des Trois Epis in Niedermorschwihr in Alsace, France. I have not come across any of her confitures at my local markets or specialty stores but I am already won over by the interesting flavor combinations presented in this book: wild blueberry + pinot noir + licorice, white peach + lemon verbena, black cherry + eucalyptus honey + fresh mint and that just to name a few! I picked out the seemingly easy recipe to start with - strawberry with black pepper & fresh mint. The recipe called for 2 pounds plus strawberries but unfortunately, this early harvest didn’t produce enough strawberries and I had to buy some. So you ask the taste of this jam? Très délicieux!! I must admit that it is an elevation from the really good strawberry jam I buy from A.G. Ferrari. I wonder if it is the recipe or just because I made it ;p
Macarons à la fraise or strawberry macaron is next up on my must-try fruit recipes. I just love these dainty little jewels! After looking through all my books on macaron, I found that strawberry macarons are actually vanilla macarons with red coloring paired with either strawberry jam or strawberry buttercream!! I always thought the macaron was flavored with strawberry! Well, I just learn something new. So for this recipe, I have added dehydrated strawberry powder that I got from this wonderful store to the batter to make real strawberry flavor macarons. As for the filling, I tried a new recipe – white chocolate ganache with a hint of strawberry flavor. To do so, I infused the cream with sweet and fragrant strawberry tea leaves overnight. I also paired the macarons with the jam for variation. For an intense burst of strawberry flavor, pair both the ganache and jam with the macarons!
Macarons à la fraise – yield about 30 sandwiches
Italian meringue method
55g egg white
150g caster sugar
40g water
Tant pour tant
150g almond flour
150g powdered sugar
10g dehydrated strawberry powder
55g egg white
1 drop red food coloring
Some chopped raw almonds
Prep:
- On the back side of 2 parchment papers, trace 3cm/1 ¼in circles about 3cm/1 ¼in apart. Flip them over and line the baking sheets.
- Prepare 2 sheets of foil the size of the baking sheets.
I thought you should know:
- Must let the piped cookies sit out until dry to touch before baking to prevent them from cracking during baking.
- Press the piping tip on the baking sheet when piping for uniformly shaped macarons. Do not suspend the tip in the air!
- It is best to consume the macarons within 3 days as it loses its moisture and becomes dry fast.
Sift together almond flour, strawberry powder, and powdered sugar twice then place the mixture in a large mixing bowl. Add 55g egg white to the flour mixture and stir until it forms into a sticky ball, set aside.
Heat water and caster sugar over medium heat until it thickens and register at 230°F/116°C on a candy thermometer. While the syrup is heating, begin whisking the egg white at high speed in the bowl of a mixer using the whisk attachment; whisk until pale and foamy. Reduce the mixer speed to low speed and begin slowly (very slowly) pouring the syrup down the side of the bowl, being very careful not to splatter the syrup into the path of the whisk attachment. Some of the syrup will spin onto the sides of the bowl but don’t worry about this and don’t try to stir it into the mixture as it will harden! Raise the speed to medium-high and continue beating until it becomes thick and satiny and the mixture is cool to the touch, about 5 minutes. When you lift the meringue with the whisk, it should form into a stiff peak. Dilute a drop of red food coloring with a tablespoon of water, adding a little by little to the meringue until it reaches the desired pink hue, fold until incorporated.
With a rubber spatula, fold 1/3 of the almond/sugar/strawberry flour mix to the meringue, fold until incorporated then fold in the remaining flour mix and fold until completely incorporated. Now it is ready for the macaronnage process.
With the rubber spatula, scoop and spread the batter, in a full circle, on the inside wall of the mixing bowl. Repeat this scoop & spread process, for a total of 15 times. Lift some batter with the spatula, it should falls into the bowl in a ribbon fashion, and should look glossy.
Pour the batter into a piping bag with a small round tip and pipe the batter from the center of the drawn circle onto the baking sheets. Pipe about 60 circles. Sprinkle some chopped raw almonds over piped circles. Let dry at room temperature for 30 minutes before baking to allow skins to form. Meanwhile, preheat oven to 400°F/220°C, with racks in upper and lower thirds.
When the batter is dry to the touch, place into the preheated oven and bake for 2 minutes, then quickly turn it down to 300°F/150°C, bake for 5 minutes, then rotate the baking sheets (upper and lower racks), cover the sheets with foil, and continue to bake for 7 minutes. Remove from oven and transfer to cool on the cooling rack. Once cooled, slide a knife (fragile, must be careful) underneath the macarons to remove from the parchment paper.
Assemble cookies:
Pair 2 macarons of similar size, pipe about 1 teaspoon of the ganache filling or spoon 1 teaspoon of jam or both onto the flat side of one of the macarons then sandwich them. Let them set in room temperature or refrigerate to set. Make about 30 sandwiches. If refrigerate, let stand at room temperature at least 2 hours to soften before eating.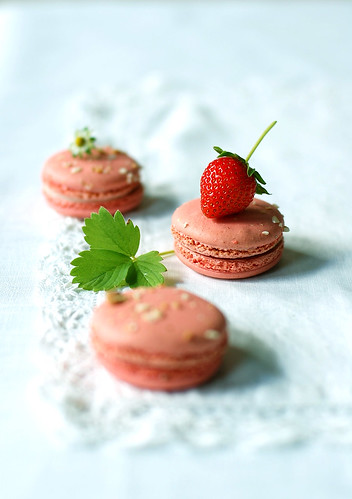
Ganache chocolat blanc à l'infusion de thé à la fraise
(White Chocolate Ganache flavored with Strawberry Tea)
150g quality white chocolate
150g heavy whipping cream
1tsp loose strawberry tea leaves
The night before, add the tea leaves to the whipping cream and let infuse overnight in the refrigerator.
Strained the tea mixture and discard the solid. Bring the whipping cream to just a boil over medium heat and pour it over the chopped white chocolate. Let seat for 1 minute before stirring the hot mixture with a rubber spatula until completely melted and has a satiny look. It is ready to pipe when it registers 70°F/35°C on the candy thermometer.
Strawberry with Black Pepper & Fresh Mint Jam
Adopted from Mes Confitures: The Jams and Jellies of Christine Ferber
2 ½lbs strawberries
1 ¾cup granulated sugar
Juice of 1 small lemon
5 fresh mint leaves
5 black peppercorns, freshly ground
Day 1
Rinse the strawberries under cold water then dry with a towel and hull them. Let the strawberries macerate with the lemon juice and the sugar in a ceramic bowl covered with a piece of parchment paper overnight in the refrigerator.
Day 2
Bring the preparation to a simmer over medium-high heat in a preserving pan. Pour it back into the ceramic bowl, cover with a piece of parchment paper and refrigerate overnight.
Day 3
Sterilize the jam jars by putting them in boiling water and cook for 3 minutes, drain, then dry with paper towel.
Pour the preparation into a sieve. Bring the collected syrup to a boil in a preserving pan, skim and continue cooking on high heat. When the syrup appear concentrated and register at 221°F/105°C on the candy thermometer, add the half cooked strawberries from the sieve, fresh mint and pepper; return it to high heat. Skim and bring back to a boil for about 5 minutes, stirring gently. The strawberries will now be translucent, remove from heat then quickly spoon the jam into prepared jars to almost full, lightly tap them to release air bubbles and seal. Flip the jars upside down and let cool completely. Store in a cool, dry place, and out of light.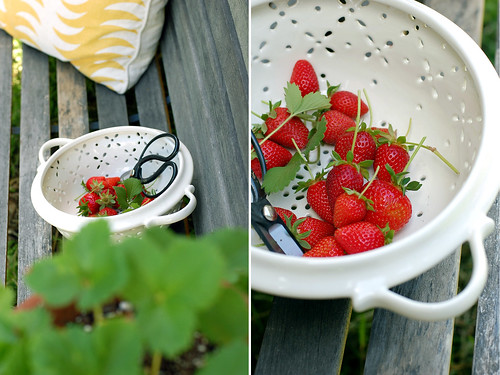
每年的春天我都會在家附近的花圃買入Sequoia June-bearing品種的草莓苗回家種植。這品種所培植出來的草莓不僅色澤紅亮﹐滋味豐腴甜美﹐更有著迷人的甜蜜果香﹐非常討喜。樣子紅灩灩的又精緻剔透﹐還有著清甜柔軟的口感﹐無論是製作甜點﹑果醬又或是裝飾蛋糕都是不二之選。本來每年六月到七月間才是收成的季節﹐可今年五月中就有少部分的草莓已經結果了。也好﹐終於有了藉口好好清一清我那必試水果甜點食譜清單的機會。
最先在我腦中閃過的就是很早就被列在必試清單上的草莓果醬。這還是生平第一次嘗試做手工果醬哩﹐所以定必找個很棒的食譜才行﹐而我在被稱為果醬聖典的Mes Confitures 一書中找到了。這是在法國無人不知﹐被美食圈中人稱為果醬教母的Christine Ferber所出版的果醬食譜書。她之所以被稱果醬教母﹐原因在於她的果醬及果凍配方獨特﹐又採用當地各種優質上選時令水果﹑花朵﹑香料﹑蜂蜜﹑酒等食材加上繁複的手工製作過程熬煮而成。值得一提的是不同於其他的名廚﹐她沒有華麗的店面或包裝﹐她的店只有一家﹐就是當年太祖父開在法國阿爾薩斯鄉間的Au Relais des Trois Epis甜點店。舖子很小﹐但所推出的各款果醬卻是名聞全球擁有很多星級粉絲像法國料理教父Alain Ducasse﹑甜點界的畢加索Pierre Hermé等。雖然我還沒有那個福分吃到她的果醬(好像美國沒有售賣的說)﹐以她書中果醬的配方涵藏著的無限的可能性及精彩度﹐也足以令我臣服了。我所選擇的配方是書中比較簡單操作的了﹐堪稱草莓果醬變奏版。配方需要2磅多的草莓﹐比採收到的數量多﹐只好向超市購買填補了。吼~~~~加了黑胡椒跟新鮮薄菏熬煮的草莓果醬﹐味道質地口感比我從A.G. Ferrari花$8USD買的好許多。味道濃郁﹐果香襲人又隱約嘗到薄菏的香氣﹐都不知該如何形容才好了﹐我想還是你自己嘗味才行﹗
另一個清單上必試的水果食譜就是草莓風味的馬卡龍。翻過家裡所有和製作馬卡龍有關的書籍﹐居然記載的草莓馬卡龍配方都是香草馬卡龍加色素的做法﹐原來所謂的草莓馬卡龍根本只是指它的草莓餡心吧了﹗為了做出有著草莓香氣及味道的馬卡龍﹐在L’ Epicerie買來乾燥處理過的濃縮草莓粉來實驗。呵呵。。。這次烤的馬卡龍折損率偏低﹐我好像捉到竅門了﹗至於餡心﹐嘗試了新的配方﹐就是添加了草莓花茶的白巧克力甘納許﹐讓人吃的滿嘴是優雅迷人草莓奶香﹗為了讓草莓風味更濃郁突出﹐我將有著不同口感的草莓果醬跟甘納許一同作為餡心﹐組合成名符其實的草莓馬卡龍 =)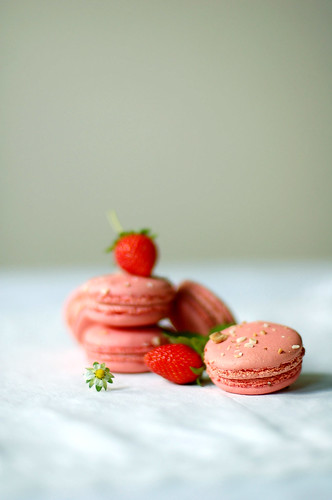
草莓風味馬卡龍 - 30個
義式蛋白霜
55g 蛋白
150g 細砂糖
40g 水
Tant pour tant
150g 杏仁粉
150g 糖粉
10g 草莓粉
55g 蛋白
1滴 紅色食用色素
裝飾用切碎的生杏仁隨意
事前準備:
- 準備兩張烤纸﹐然後在每一張的反面畫上直徑3cm/1¼in間隔3cm/1¼in的小圓圈。鋪在烤盤上。
- 準備兩張相等於烤盤大小的鋁箔紙﹐備用。
要注意什麼呢?
- 擠出麵糊後要放置到表面乾燥為止才可進烤箱。
- 擠麵糊時先固定一個點再擠出是要訣。
- 馬卡龍不宜放置太久﹐否著就會失去濕潤的口感﹐最好在3天內吃完喔~
混合草莓粉、杏仁粉、糖粉﹐過篩2次後倒進一個大的拌碗中。將55g的蛋白倒進粉中﹐用橡皮刀確實攪拌勻成膏狀後靜置備用。
把水和細砂糖混合倒進小鍋中﹐以中火熬煮至出現黏稠狀﹐糖果溫度計達到230°F/116°C或用手指沾黏(非常燙喔﹗)會牽出糖絲的程度即可。在煮糖漿的同時﹐將55的蛋白用電動打蛋器以高速打發至起泡但還沒出現尖角的程度。轉低速繼續仔細打發﹐然後邊打發邊細絲般的慢慢地注入滾燙的糖漿(千萬不要攪拌糖漿不然會結晶),完全注入糖漿後轉中速繼續打發﹐直到冷卻出現結實尖角的程度至光滑立體狀態為止﹐約5分鐘。將1滴紅色食用色素用1湯匙的水拌稀﹐再一點點的拌入蛋白霜中至達到理想的顏色為止。
將3分1的草莓杏仁粉拌入蛋白霜中﹐用橡皮刀從底部往上翻起的方式拌勻﹐再分兩次加入剩餘的草莓杏仁粉﹐拌勻後進行macaronnage程序。Macaronnage即是將麵糊從底部往上翻起再往拌碗的內壁壓推勻15次至表面紋理細緻且有光澤的麵糊為止。
將麵糊倒進擠花袋中﹐在先前畫了圓圈的烤盤紙上以小口徑的圓形擠花嘴擠出圓形的麵糊。先固定一個點﹐再從上方擠出比直徑3cm稍小的圓形。總共擠出60個﹐然後將切碎的生杏仁粒撒在麵糊上。放置30分鐘讓表面乾燥﹐用手摸不沾黏即可。放置的同時預熱烤箱至400°F/200°C。
待表面形成薄膜後用400°F/200°C烘烤2分鐘﹐然後迅速降溫到300°F/150°C繼續烘烤5分鐘。迅速取出烤盤各自覆上包裝鋁箔紙﹐放回烤箱時將烤盤調換 (上下烤架) 好 讓馬卡龍烤的均勻﹐再烘烤7分鐘﹐取出﹐放網架上靜置放涼後用抹刀取下﹐備用。
組合馬卡龍:
在半數的馬卡龍平面上擠出約1茶匙的夾心﹐再蓋上另一半的馬卡龍。做成30個。可放室溫或冰箱至餡心凝固。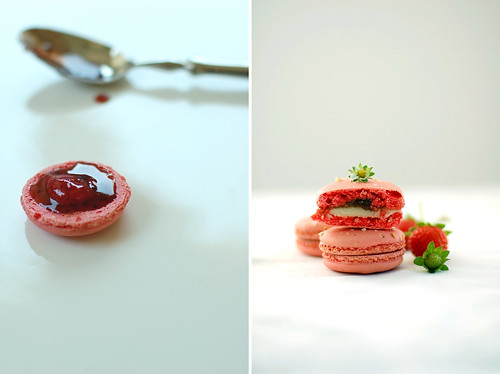
草莓風味白巧克力甘納許餡心
150g 白巧克力﹐切碎
150g 鮮奶油
1茶匙 草莓花茶葉
鮮奶油與茶葉混合,放進冰箱冷藏泡浸一個晚上。
白巧克力切碎後﹐放進一個耐熱的碗裡。將奶漿從冰箱取出﹐過濾後倒進小鍋﹐開中火煮至剛沸騰後熄火。將滾燙的奶漿注入切碎的白巧克力中﹐靜置1分鐘﹐然後用橡皮刀攪拌至完全融化順滑的狀態為止。放涼至70°F/35°C﹐這是擠花的適當軟硬度。
草莓+黑胡椒+薄菏手工果醬
食譜源自果醬女主廚 Christine Ferber的Mes Confitures: The Jams and Jellies of Christine Ferber
2 ½磅 草莓
1 ¾杯 砂糖
1個 小檸檬﹐榨汁
5片 新鮮薄菏葉
5粒 黑胡椒粒﹐磨碎
第1天
把草莓洗乾淨﹐抹乾﹐去蒂。將草莓﹑檸檬汁﹑砂糖混合倒進陶瓷碗內﹐全體充份拌勻後蓋上烘培紙﹐放進冰箱糖漬浸軟一個晚上。
第2天
將浸軟的草莓和汁倒入銅鍋中﹐開強力中火熬煮﹐不間斷地邊煮邊攪拌至沸騰後離火。倒回陶瓷碗內﹐蓋上烘培紙﹐放進冰箱浸泡一個晚上。
第3天
將果醬罐子消毒: 燒開一鍋水﹐然後將果醬罐子放進滾燙的水中煮3分鐘﹐取出﹐用紙巾抹乾備用。
將網篩架在一個有深度的大碗上﹐將草莓倒進網篩中過濾﹐撈起草莓﹐僅加熱糖漿。將糖漿倒入銅鍋中﹐開強力中火熬煮﹐不間斷地邊煮邊攪拌至變稠(約221°F/105°C) ﹐此時才將草莓﹑薄菏﹑胡椒加進糖漿中一同熬煮。不間斷地邊煮邊攪拌至沸騰後﹐繼續煮5分鐘至草莓呈現剔透模樣為止﹐離火。將熱騰騰的果醬舀入罐子內直到罐口處﹐將罐子輕輕敲一下去除氣泡﹐緊栓住瓶蓋後倒立放置冷卻。將果醬放日光無法直射的陰涼處存放。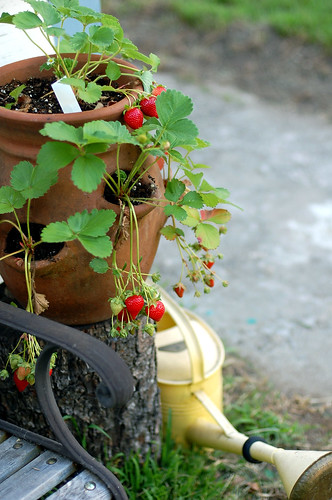
Friday, May 8, 2009
Vanilla Mascarpone Coeur à la Crème with Edible Flowers and Fruit Sauces ~ 法式香草軟乳酪心佐雙色果醬

Though coeur à la crème (cream heart) has long been a part of the classical French repertoire; it is far from being haute dessert like most French desserts. It is so simple to make that it debunks the myth that French desserts are, without exception, complex and difficult. How simple? One can make this dessert in less than 30 minutes (chill time not included)!!
As I learnt, traditionally, this dessert is made from unsweetened soft white cheese set into porcelain heart-shaped molds with perforated bases for the whey to drain and firm up overnight. They are then unmolded and served with cream poured all over and with a generous amount of sugar sprinkled all over.
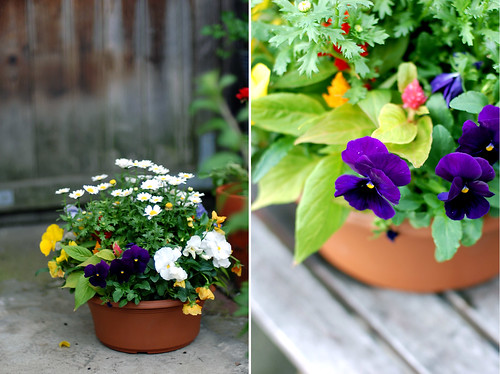
My version of this much loved classic French dessert is an adoption of Christine Manfield’s version found in this book. She made hers using a combination of mascarpone cheese, cream cheese and yogurt instead of the traditional unsweetened soft white cheese. She stated that this combination has a more complex, sharp and interesting flavor than the traditional version. Btw, she used homemade mascarpone in this recipe but of course, you can substitute with the store brought kind. If you are not in favor of her combination, try replacing the mascarpone with cottage cheese, ricotta, or crème fraîche and it may yield a different and intrigue texture and flavor. I have never had this dessert before so I don’t know how it suppose to taste like but I am leaning more to CM, where she served them with fresh berries and fruit sauce instead of the traditional way.
The dessert was just as delicious as CM promised. It has an extremely smooth and airy texture and the sweet-tangy sauces works in heady harmony with this creamy dessert and helped on cutting down on the creaminess giving it a perfect balance. It is absolutely scrumptious!
I hope that you’ll give this a try. Please don’t be put off from making this sophisticated tasting dessert if only because you can’t find these traditional porcelain molds. You can make this dessert with any mold, as long as it has draining ability. If you have none of such molds then just simply wrap the cream mixture in muslin, making them a more free form affair. As for me, I got these traditional porcelain molds from sur la table just in case you’re interested =)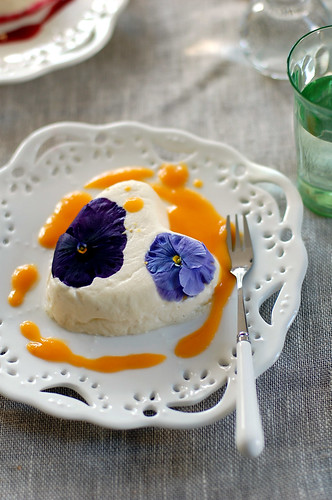
Vanilla Mascarpone Cream Heart with Edible Flowers and Fruit Sauces – makes 6
150g vanilla mascarpone
100g cream cheese
125g caster sugar
250ml heavy whipping cream
125g plain yogurt
Some edible flowers such as pansies and nasturtiums
Some raspberry sauce
Some mango sauce
Some roasted pistachio, coarsely chopped
Blend the vanilla mascarpone, cream cheese, and caster sugar in a food processor until smooth; occasionally scrape the side of the bowls to ensure the mixture is evenly distributed, about 3 minutes. Add the plain yogurt and cream and blend until incorporated.
Line 6 porcelain heart-shaped molds with perforated base with a layer of wet muslin, press the muslin onto the walls then arrange 1 to 2 edible flowers in each mold. Spoon the cream mixture into the molds until full and even; lightly tap them on the counter to release air bubbles. Place a wire rack inside a sheet pan then place all the molds on the rack and cover with plastic food wrap then let set in the refrigerator for at least 8 hours before serving.
Lift the cream heart out of the molds by lifting on the muslin, invert them onto the center of the serving plates then carefully remove the muslin. Spoon some fruit sauce onto the plates, sprinkle some toasted pistachio if you fancy and serve immediately.
Vanilla Mascarpone – makes 700g
If you want to make plain mascarpone, simply just omit the use of vanilla bean.
2 limes
1000ml whipping cream
1 vanilla bean, split and scraped
1tsp scant citric acid or strained fresh lemon juice
Zest and juice the limes. Bring the zest, cream and vanilla bean to a vigorous boil over medium heat; continue to boil until the cream separated, about 5 minute, add the lime juice and citric acid or lemon juice and bring it back to a boil. Let cream mixture simmer for a minute then remove from heat.
Line a mesh sieve with a piece of muslin then pour the hot cream through the sieve into a bowl. Place the bowl in the refrigerator and leave the cream to set; about 5 hours.
Position a mesh sieve lined with 2 layers of muslin over a large bowl. Remove the set cream from the refrigerator and pour it into the sieve. Cover the sieve and bowl with plastic food wrap, put it back into the refrigerator to let drain allowing the whey to separate from the curd for 24 hours.
Discard the whey and scoop the curd into an airtight container and let refrigerate until ready to use. The mascarpone will keep for a week.
Raspberry or Mango Sauce - makes 300ml
500g raspberries or mangoes
100ml sugar syrup
25ml strained fresh lemon juice
Make the sugar syrup: bring equal amounts of sugar and water to a boil and let simmer for about 15 minutes. Allow to cool before use.
Puree the raspberries or mangoes, with the sugar syrup and lemon juice in a food processor or blender. Pass the puree through a fine-meshed sieve and discard the solids.
The sauce can be stored in an airtight container and keep refrigerated for up to 3 days before the puree separates from the syrup.
在這個被譽為世界甜點之都﹐於美食甜點文化上足以傲視群倫的法國,甜點的複雜鋪陳度﹑精緻度、多樣化、與細膩考究程度都是眾所週知的事實﹐可這道易操作卻美味無比的coeur à la crème甜點卻破解了以上所陳列的種種。比起那些需時1-2天製作的點心﹐這可以在30分鐘內就可完成的甜點是那麼的讓人驚訝及在意料外的事。
據說這道點心的正宗傳統做法是將一種軟的原味白乳酪用心形陶瓷模具盛著﹐靜置隔去多餘的水份凝固定型﹐再淋上鮮奶油加砂糖一起食用﹐簡單的享受新鮮的滋味。雖然很想嘗試這個簡單的做法﹐可我偏向較精緻的Christine Manfield’s版本。她起用的材料比較多元﹐味道上有別於正宗的風味。以馬斯卡朋﹑奶油乳酪﹑和原味優格的組合來取代原味白乳酪﹐據她說味道更豐富多元富層次﹐質地更細緻軟滑。不得不說她用自製的馬斯卡朋﹐相對的讓這道甜點更富挑戰性﹐當然市售的馬斯卡朋也可以。如果以上的組合不是你的那杯茶﹐可以嘗試用以下的軟白乳酪像美國的cottage cheese(農村乳酪?﹗)﹑ 意大利的瑞可達乳酪﹑又或是法國酸奶油乳酪crème fraîche等﹐我想味道也是值得期待的。因為從未吃過這道甜點﹐所以無法比較它的味道口感但我偏向CM提議的享用法﹐就是捨棄濃郁的鮮奶油加砂糖取佐解膩的酸味較重的新鮮漿果與果醬。
果然就如CM說﹐這道法式香草軟乳酪心的成品有著絕佳軟滑質地,並和各式酸味果醬交揉互映間取得完美的均衡與和諧﹐真的是一絕﹗希望你們不會錯過這麼美味的甜點喔﹗
法式香草軟乳酪心佐雙色果醬 – 6人份量
食譜源自Christine Manfield的Desserts
150g 香草馬斯卡朋
100g 奶油乳酪
125g 細砂糖
250ml 鮮奶油
125g 原味優格
適量 食用花卉如紫羅蘭﹑金蓮花
適量 覆盆子果漿
適量 芒果果漿
適量 烤開心果仁, 切碎
將香草馬斯卡朋﹑奶油乳酪﹑和細砂糖倒進食物調理機中打至順滑﹐約3分鐘。加進鮮奶油和原味優格﹐攪打至均勻融合備用。
在6個底部穿孔的心形陶瓷模具裡鋪上一層濕的紗布﹐按壓出氣泡讓紗布完全貼服﹐然後再隨意的擺放1~2朵食用花卉(花瓣朝下黏著紗布)。將乳酪糊舀進模具中至滿﹐用湯匙背推平﹐再輕輕敲一下模具釋放氣泡。將一個網架擺放在蛋糕卷專用模具裡﹐再將模具放在網架上蓋上食物保鮮膜後放冰箱靜置凝固最少8個小時隔掉水份。
取出﹐兩手拉著紗布往上提脫模﹐將香草乳酪心翻轉倒扣在碟子中心﹐再慢慢撕掉紗布。分別淋上喜歡的果醬﹐也可以撒些開心果仁碎一起食用。
關於這個底部穿孔的心形陶瓷模具: 若你人在北美﹐這模具在sur la table有售。就算沒有做這道點心的模具也沒關係﹐任何一種有洞可去水份的模具和容器也行﹐就算沒有也可簡單的用紗布裹著。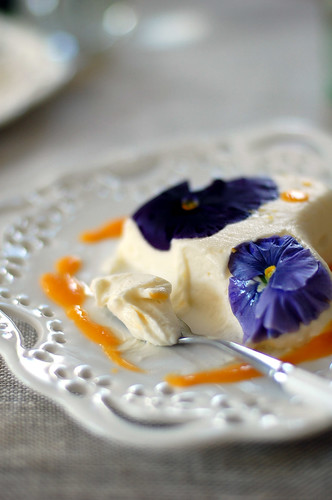
香草馬斯卡朋 – 約700g
要是想做原味的﹐不加香草荳即可。
2個 青檸檬
1000ml 鮮奶油
1條香草荳﹐開半刮籽
1茶匙煮融化的食用檸檬酸或檸檬汁
將一片紗布鋪進網篩備用。將青檸檬取茸榨汁。
將青檸檬茸﹑鮮奶油和香草荳跟籽一同倒進小鍋裡﹐以中火煮至沸騰後繼續煮5分鐘至奶漿出現分離的跡象時加進青檸檬汁跟檸檬酸(或檸檬汁)﹐再煮至沸騰後離火﹐約1分鐘。將奶漿倒進鋪了紗布的網篩中過濾﹐然後放冰箱冷藏最少5個小時以上至完全凝固。
網篩中鋪進兩層的紗布再架在一個有深度的大碗上。將已凝固成乳酪狀的奶糊倒進網篩中﹐蓋上食物保鮮膜後放冰箱靜置24小時慢慢隔掉水份即成馬斯卡朋乳酪。將乳酪舀取進密閉容器中﹐放冰箱存放可保存約1個星期。
覆盆子﹑芒果果醬 – 約300ml
500g 覆盆子或芒果
100ml 糖漿
25ml 檸檬汁﹐濾過
製作糖漿: 將同等份量的砂糖跟水(各1杯)倒進小鍋﹐以中火煮至融化沸騰後再煮15分鐘即可﹐放涼即可。
將覆盆子或芒果﹑檸檬汁和糖漿一同倒進食物調理機中﹐攪打成泥状﹐然後用網篩濾過﹐倒進密閉容器中﹐放冰箱可存放約3天。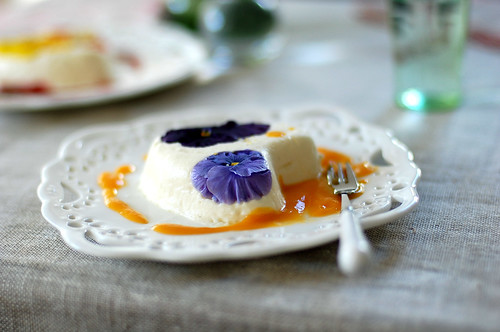
Friday, February 13, 2009
St. Valentine’s Day: Coup de coeur ~ 草莓花蜜慕斯蛋糕
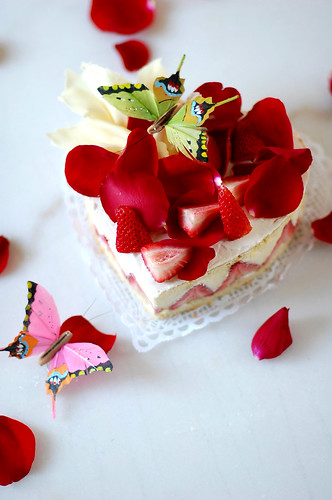
Happy St. Valentine’s Day, everyone! This is my Valentine’s gram to you =)
This is a remix version of the classic French fraisier or strawberry shortcake! Instead of filling it with crème patisserie, I filled it with honey mousse, something I have been tempted to do since I got myself a copy of Christine Manfield’s Desserts. There isn’t a fraisier recipe in her book but when I saw the recipe for the honey mousse I immediately thought of it as a substitute for the cream filling. It is so much lighter! However, I can’t guarantee that it is skimmer^^ I also used her génoise sponge recipe but made some adjustment to it. The recipes were easy to follow but the end result is marvelous!
Coup de coeur
yields 2 - 6x2in cakes
Almond Génoise Sponge Cake
5 large eggs, separated
150g granulated sugar
80g almond flour
70g all purpose flour, sifted
1tsp vanilla essence
50g unsalted butter, melted and cooled
Preheat oven to 320°F/160°C. Grease a 24cm round cake pan with generously with butter and line it with parchment paper.
Sift together almond flour and flour. Whisk the egg yolks with the sugar until pale and creamy. Add in the sifted flour mix, vanilla essence, the melted butter; stir until combined after each addition. In another bowl, whip the egg whites until stiff peaks form then gently fold it into the cake batter with a spatula, fold until incorporated.
Pour the batter into the prepared pan, tap the pan slightly on the counter to release any air bubbles, bake for 20 minutes or until golden. Turn out onto a wire rack to cool completely. Slice it into 10mm thick rounds then stamp it with the heart shaped mousse ring.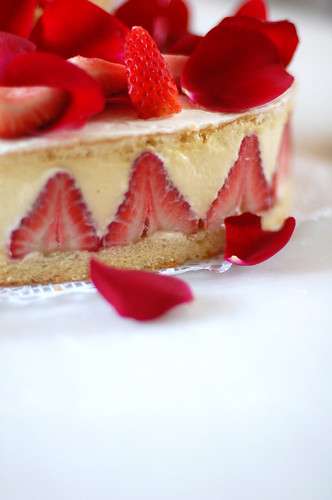
Acacia Honey Mousse
320ml whole milk
60g *Miele di Acacia (Acacia Honey)
4 egg yolks
100g granulated sugar
7g gelatine leaves
250ml heavy cream
*Elegant and rich, Acacia honey is called the "moonflower honey" in Italy. It has a clean, light vanilla flavor. It tastes delicious with coffee or tea, also great drizzled over toast, ricotta cheese or shaved hard cheeses.
First, bring a pot of water to boil then reduce to low heat once boiled. Bring the milk and honey to just boil over medium heat; stirring constantly to avoid burning the mixture. Remove the honey milk mixture once reached simmering point. Meanwhile, whisk the egg yolks with the sugar in a bowl then whisk in the honey milk slowly. Place the bowl over the pot of simmering water and stir gently until the mixture thicken into a custard or until it coats the back of a wooden spoon then remove from heat. Stir in the pre-soaked gelatine leaves, stir until completely dissolved. Pass the custard through a fine meshed sieve and place into a bath of icy water to cool. Whisking constantly to keep it aerated as it cools.
Whip the cream until stiff peaks form then fold 1/3 of this into the cooled custard, mix until combined. Fold in the rest of the whipped cream until combined. Spoon the mousse into a piping bag without a tip, set side.
Kirsch Syrup
2tbsp granulated sugar
4tbsp water
2tsp Kirsch (cherry liqueur)
Put sugar and water in a heatproof bowl then place it in the microwave to dissolve the sugar, about 30 seconds. Let cool until adding kirsch to the mixture, stir until combined.
Rose Flavor Chantilly Cream
200ml heavy cream
2tbsp caster sugar
1tsp rose essence
Place the cream, sugar and rose essence in a bowl and whip until semi-stiff peaks form.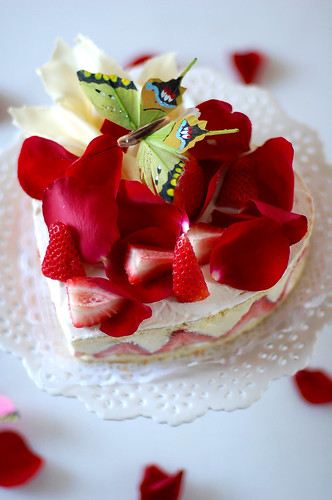
Assemble and decorating the cake:
Place the mousse molds on a tray then put a cake base inside each mold then brush a layer of kirsch syrup on top. Arrange the strawberry halves cut side to the side of the mold, pipe the honey mousse in between the strawberries and fill up to about 1/2 of the height of the moulds. Arrange strawberries on cake base until full, pipe more mousse until almost to the top, take another piece of cake, brush a layer of syrup then place it on top with syrup side facing down. Push it down slightly with your palm to take out any air bubbles then place in fridge to set for 1 hour.
Remove from fridge. To unmold the cakes, wrap a hot towel around the mold for 10 second then use your fingers to push the cake upward. With an icing knife in hand, spread the cream onto the cake center, move the knife over the top to get a smooth finish. Decorate with white chocolate ruffles, rose petals and fresh strawberries.
情人節快樂﹗這是阿Vi送你的情人節禮物喔~
這個蛋糕是法式經典草莓蛋糕fraisier的變奏版。由原本奶油餡心(crème patisserie)改成了花蜜慕斯﹐口感清爽許多。不知為啥在翻Christine Manfield的Desserts一書時看到這個食譜馬上就想到用它做為fraisier的餡心。傑諾瓦士海綿蛋糕的食譜也是來自這書﹐不過我加了杏仁粉﹐蛋糕體也變的較濕潤。食譜雖然簡單﹐但是甜點整體味道豐富有層次。蜜糖的濃郁甜味配酸酸的草莓合適的不得了﹐吃了滿嘴的草莓奶香~
草莓花蜜慕斯蛋糕 ~ 法式經典草莓蛋糕變奏版
2個 - 直徑6x2in 心形蛋糕
杏仁傑諾瓦士(海綿)蛋糕 ~直徑24cm/10寸圓形模具1個
將原份量的一半麵粉用杏仁粉代替﹐所以有別於傳統海綿蛋糕﹐口感品嚐起來較濕潤及清爽。
5 個 大的蛋黃
5 個 大的蛋白
150g 砂糖
80g 杏仁粉
70g 麵粉, 篩過
1tsp 香草精
50g 放涼的澄清無鹽奶油
事前準備:
- 將一烤架移到烤箱中格﹐烤箱預熱至320°F/160°C。
- 模具抹上厚厚的奶油﹐再鋪上烘烤紙﹐備用。
將杏仁粉和麵粉混合篩過﹐備用。用電動攪拌器以中速攪打蛋黃和砂糖﹐攪打至富含空氣且顏色變淡為止。加進篩過的杏仁麵粉﹑香草精﹑及放涼的澄清無鹽奶油﹐每加進一樣就要確實拌勻。
在另一大碗裡加進蛋白﹐用電動打蛋器以低速將蛋白打發至起泡出現軟角的程度時﹐將速度加至中速打發至立體為止。小量地將蛋霜拌入麵糊裡﹐用橡皮刀源邊往下刮翻切拌勻﹐會如緞帶般重疊時即可。
輕輕地將麵糊倒進烤模中﹐輕輕敲一下烤模釋放氣泡後﹐放進預熱過的烤模裡﹐烘烤約20分鐘。等烤到焦色恰到好處時﹐週圍會因烤熟而稍稍縮小﹐烤模和蛋糕體間就會出現空隙﹐輕按蛋糕中間時感覺到彈性即烤好。也可以用竹籤插入中央﹐慢慢拔出時不會沾黏﹐就烤好了。從烤箱取出﹐翻轉倒扣脫模﹐擺在網架上整個放涼。將海綿蛋糕橫切成10mm厚片﹐然後用直徑6x2in的心形慕斯模吸切出4片蛋糕片﹐備用。
如果不立刻使用﹐可將蛋糕包好放冰箱存放﹐可以保存3天。使用前靜置回溫即可。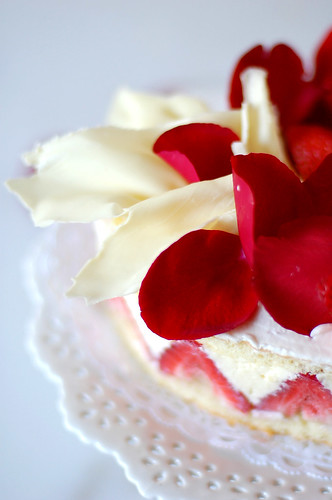
洋槐花蜜慕斯
取自洋槐又名相思樹花之蜜,清澈純淨的色澤,細緻高雅的風味中帶有洋槐花香。
320ml 全脂奶
60g 洋槐(相思)花蜜
4 蛋黃
100g 砂糖
7g 魚膠片
250ml 鮮奶油
事前準備:
- 明膠片用冰水泡軟之後擠掉水分﹐備用。如果用明膠粉﹐將其倒入水裡泡脹後備用。
製作蜜糖蛋黃醬:
先燒開一小鍋的水﹐轉小火。將牛奶跟蜜糖混合裝進小鍋裡,以中火煮至剛沸騰即離火﹐備用﹔要不時地攪拌以免燒焦。
用電動攪拌器以中速攪打蛋黃和砂糖至顏色變淡。將蜜糖奶漿慢慢地注入蛋糊中﹐這時要用打蛋器不斷攪打。放小鍋上隔熱水加熱﹐用打蛋器持續不斷的攪拌至變稠﹐並可以在木匙背劃出清晰的線條時(約10分鐘)﹐蜜糖蛋黃醬就完成了﹐離火。加入泡軟的明膠片,確實拌勻後將蜜糖蛋黃醬過濾﹐再放進冰水浴中﹐並不時的攪拌至完全放涼。
製作花蜜慕斯:
將鮮奶油打發至出現尖角的起泡程度﹐用切拌法(用橡皮刀源邊往下刮翻)將3份1份量的發泡鮮奶油拌入蜜糖蛋黃醬中﹐攪拌乳化後﹐拌入剩餘的鮮奶油﹐確實攪拌勻備用。
櫻桃酒糖漿(塗抹蛋糕用)
4湯匙 清水
2湯匙 砂糖
2茶匙 櫻桃利口酒
清水﹑砂糖裝進小碗裡﹐再放微波爐微波30秒煮沸至砂糖融化為止。放涼後拌入櫻桃利口酒備用。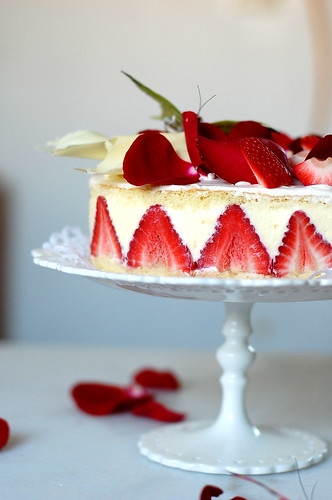
玫瑰風味香堤麗鮮奶油 – 約1 ½ 杯份量
200ml 鮮奶油
2湯匙 細砂糖
1茶匙 玫瑰精
將鮮奶油﹑玫瑰精﹑和細砂糖放入mixing bowl裡﹐用電動打蛋器先以低速打發鮮奶油至起泡﹐再轉中速攪打至出現尖角的程度。將鮮奶油放冰箱冷藏10分鐘即完成。
組合及裝飾蛋糕:
將一片蛋糕片鋪進慕斯圈中﹐在表面用刷子塗上櫻桃酒糖漿﹐然後將切掉蒂頭﹑對半縱切的草莓原著模型邊緣排列。將慕斯倒進擠袋裡﹐剪去一角﹐先擠些慕斯填滿草莓間的空隙﹐然後由外往中心整體填滿慕斯至半滿。將去蒂的草莓排列填滿整個模型﹐然後再擠進慕斯填滿。在另一片蛋糕片的表面塗上櫻桃酒糖漿﹐塗面朝下疊蓋在慕斯上﹐輕壓使其確實貼黏著﹐放入冰箱冷卻凝固60分鐘。
取出蛋糕﹐將蛋糕脫模﹐以溫毛巾圍著模型溫熱10秒後﹐用手指將慕斯往上推出脫模。用抹刀將玫瑰香堤麗鮮奶油平均的塗抹在蛋糕的正上方。在蛋糕上方的一角擺放白巧克力裝飾﹐再擺放滿滿的玫瑰花瓣及草莓即可。
Subscribe to:
Posts (Atom)


