



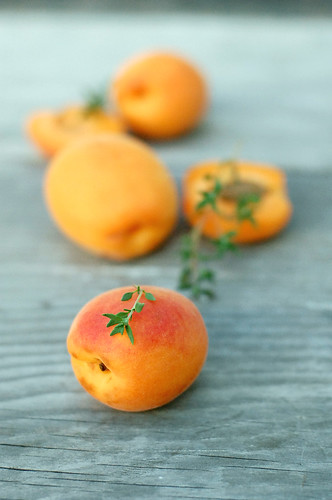
I have been enjoying quite a few stone fruit recipes recently due to endless supply of yummy peaches, nectarines, and apricots from my dear friends at the Kashiwase Farm. I am grateful to their generosity and I tried to repay them with the desserts made from these fruits. They seem to enjoy them as much as I do and I hope you will too^^
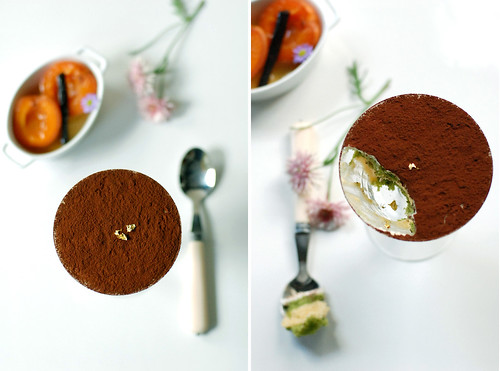
I have bookmarked the page for the roasted apricots with chamomile from Claudia Fleming’s The Last Course as soon as I saw the recipe. I just love the idea of cooking with flowers =) It sounds so appealing yet seems easy to make and I know it is going to taste great since I had a taste of another dessert using a recipe from this same book! Yes, the taste was as promising as the ingredients gave away - tender, luscious, and gently perfumed. They were lovely just as is but CF suggested serving it as a topping to plain cake and ice cream, which I’m yet to try.
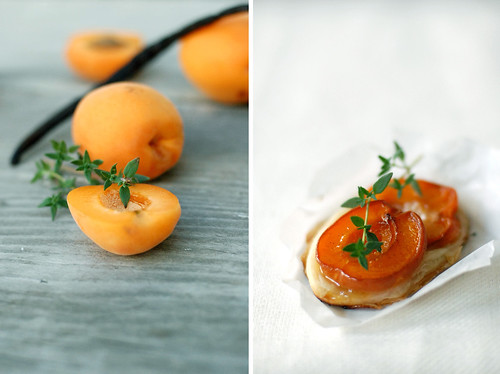
Not long ago, I spent a day making feullitage or puff pastry dough and I still have some left over so I thought some fruit tarts would go well with the roasted apricots. It was very simple, all I did was poached some apricot and yellow peaches in vanilla and star anise infused syrup and baked with the pastry. While still warm, I brushed some syrup on the tarts then serve. Easy but nothing short of deliciousness! Oh, these pair well with ice cream too.
Next up is a Wa-fu or Japanese style tiramisu. When I saw this gorgeous post by one of my all time favorite bloggers, I just couldn’t wait to get started!! The flavor combination – apricot and matcha – sounds so intrigue and exciting! The apricots were cooked until tender in vanilla syrup then made into purée to fold into whipped cream to make the mousse. Although the matcha sponge was yummy but I had to use a different recipe because I thought it tasted too subtle and I like a more intense flavor. The tangy sweet mousse paired with fragrant matcha sponge, feather-light mascarpone cream and a generous dust of unsweetened cocoa powder simultaneously underscore and complement each other. Rich was not the word to describe this cake, it is more of a taste of summery freshness! Oh, I piped some left over mousse into small molds and made bite size cakes too^^
I also made a cheesecake with yellow peach at the request of my mom for her to share with her co-workers. I prepared the peach purée the same way that I did with the apricots then added some pâte de peche (peach paste) to enhance the flavor. Once the cheese mixture was set, I arranged thin slices of peach on top then added a thin layer of peach jelly, made with the syrup and agar powder.
I know I have been posting lots of fruit desserts lately but I just can’t help it! Summer has so much lovely fruits to offer and I like to cook with what’s in season =)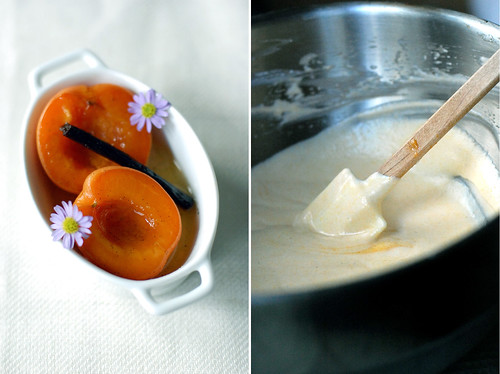
Roasted apricots with chamomile
serves 4
1 ½ cups sugar
¼ cup fresh chamomile flowers or 1 chamomile tea bag
1 vanilla bean, split lengthwise, seeds scraped out
8 apricots, unpeeled, halved and pitted
1 cup water
Preheat the oven to 375°F/185°C. Combine the sugar and water in a saucepan and bring to a boil over high heat. Add the vanilla pod and seeds, chamomile flowers (or tea bag), then simmer for about 5 minutes over medium heat. Remove from heat and strain through a fine sieve into a baking dish or roasting tray.
Arrange the apricots in the syrup, cut side down, roast for about 10 minutes. Turn them over, baste with the syrup and roast for another 5 minutes until tender. Serve warm.
The apricots will keep for 3 days, refrigerated.
Vanilla spice poached apricot & yellow peach tarts
1/3 recipe of homemade feullitage or 2 sheets of store-brought puff pastry
1 large yellow peach, peeled, finely sliced and pitted
4 apricots, unpeeled, halved and pitted
2 tbsp unsalted butter, diced
1 vanilla bean, split lengthwise, seeds scraped out
1 star anise
1 ¼ cups sugar
50ml white wine
200ml water
For the egg wash:
1 large egg yolk
1tsp water
Some flour, for work surface
Remove the feullitage out the freezer 10 minutes before. On a slightly floured work surface; roll out the feullitage to a 5mm/¼in thick square. Stamp out 3in/5in ~ 7.5cm/12.5cm rounds using cookie cutters, prick all over with a fork then return the dough to the freezer to firm up. Preheat the oven to 350°F/175°C.
Combine the sugar, water, white wine, star anise and vanilla pod + seeds in a saucepan and bring to a boil over high heat, then turn heat down to medium and simmer for about 2 minutes. Add the apricots to the hot syrup and let poach for 3 minutes; removed. Add the peach slices to the hot syrup and let poach for 2 minutes, removed. Simmer the syrup down to two thirds of its original volume then strain, discard the solid and reserve the syrup.
Beat the egg yolk with the water to make the egg wash. Set aside. Take the feullitage out the freezer and transfer them to a baking sheet lined with parchment paper. Using a knife, score but not cut all the way through a ¼ inch boarder all around, then brush with egg wash but avoid the boarders.
Arrange 2 apricot halves on each 3in rounds and peach slices on the 5in rounds (within the boarders), then dot with diced butter. Place in oven and bake for 25 - 30 minutes or until golden. Transfer to a cooling rack and let cool for 5 minutes. Brush the tarts with the reserved syrup. Serve warm.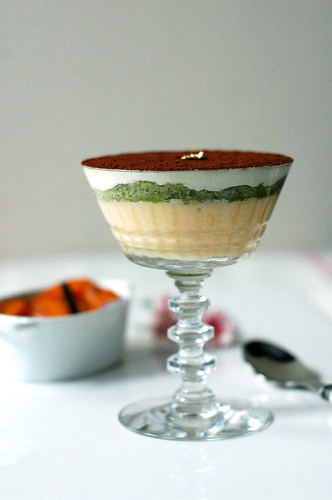
Apricot and Matcha Tiramisu
makes 4 3in x 3in squares
Matcha génoise
100g granulated sugar
70g all purpose flour
15g matcha
20g unsalted butter, melted and cooled
3 large eggs
Apricot mousse
350g apricots (after pitting)
250ml water
100g sugar
1 vanilla bean (cut lengthwise, seeds scraped out)
4g gelatine sheet
150ml heavy cream
2 egg whites
75g caster sugar
Mascarpone cream
100ml heavy cream
15g caster sugar (you may not need it if you’re using tinned apricots)
30g mascarpone cheese
For the matcha génoise:
Brings a small pot of water to boil, set aside. Melt the butter in a microwave, set aside to cool.
Lightly butter a 12 x 9in/28 x 24cm roll cake pan and line it with parchment paper. Sift together flour and matcha, set aside. Preheat oven to 360°F/180°C.
Using a handheld mixer, beat the eggs together in a heatproof bowl then add sugar and beat until blended. Place the bowl over the pot of boil water and continue to beat over medium speed until it is foamy and warm to the touch. Remove from heat, continue to beat in a circular motion until it doubles in volume and soft peaks form. Gradually add in the sifted matcha flour mix using a rubber spatula and fold gently until incorporated. Add in the melted butter, quickly fold until completely incorporated.
Pour the batter into the prepared pan, spread and smooth out the batter using the spatula. Tap the pan slightly on the counter to release any air bubbles, place into the preheated oven and bake for 15 minutes. Turn out onto a wire rack to cool completely.
To make the apricot mousse:
Soak the gelatine in cold water. Place the water, 100g sugar and vanilla seeds (as well as the pod) in a saucepan over medium heat. When the sugar has dissolved, add the apricots and simmer for about 5 minutes until just tender. When cool, strain the apricots through a fine sieve (you’ll get about 250g purée) and add 50ml syrup from the pan. Reserve some syrup and discard the solids.
(If you’re using tinned apricots, puree 250g fruit and strain through a fine sieve then add 50ml syrup from the tin. Reserve some syrup for soaking the sponge.)
Squeeze out the gelatine, melt in a bain marie and stir into the puree. Whip the double cream into soft peaks (it’s important that the purée and cream have a similar consistency). Make the meringue with the egg whites and 75g sugar – whip the egg white until foamy, add the sugar a little at a time, whipping as you go along. When the purée is slightly set, gently fold the cream and meringue into it.
To make the mascarpone cream:
Place the double cream and sugar in a bowl and whip into soft peaks then mix the cheese in.
To assemble the cake:
Cut 4 pieces of sponge to the size of your mold. Place the sponge in the mold as a base and brush with the left over syrup, pour the mousse, then place the other sponge on top.
Freeze the cake until firm enough to slice (you don’t need to but it helps to cut neatly), layer the mascarpone cream on top and dust with cocoa powder just before serving.
Peach Flavor Chilled Cheesecake
makes one 18cm/6in round cake
Peach purée
2 large yellow peach, skinned, pitted, sliced
1tsp vanilla extract
1cup sugar
50ml white wine
200ml water
Crust
100g honey graham crackers
50g unsalted butter
Peach cheesecake mixture
200g cream cheese
50g mascarpone cheese
200ml whipping cream
100g condensed milk
50g peach purée
1tbsp pâte de peche
5g gelatine sheet
Peach Jelly
200ml peach syrup (add water if you don’t have enough)
8g agar powder (Kanten/寒天- かんてん)
1tbsp lemon juice
1tbs Amaretto liquor
Prep:
- Wrap the cream cheese in plastic food wrap and place in microwave on low for 1 minute to soften it.
- Soak the leaf gelatine in a bowl of ice water for a few minutes to soften it. Squeeze off excess water, set aside.
For the peach purée:
Combine the sugar, water, and the white wine in a saucepan and bring to a boil over high heat, then turn heat down to medium and simmer for about 2 minutes. Add the yellow peaches to the hot syrup and let poach for 3-5 minutes then remove from heat. When cool, strain the peaches through a fine sieve. Add the vanilla extract and 35ml syrup from the pan to the purée. Strain, discard the solid and reserve the syrup.
For the crust:
Preheat oven to 360°F/180°C. Break the crackers into small pieces, then place into a zip lock bag or any heavy weight plastic bag (remove air bubbles), and crush + roll using a rolling pin until crackers become fine crumb. Place butter in microwave and heat for 30sec – 1min over medium heat. Pour melted butter into the bag, remove air bubble and close the bag, then shake it to mix the two. Pour this mix into the cake pan; using the back of a large spoon, press crumb firmly to pan until packed. Bake for 20 minutes then cool on wire rack.
For the peach cheesecake:
Place the cream cheese in a mixing bowl. Using a whisk, whisk cream cheese until blended; add the mascarpone cheese and whish until blended then add in other ingredients in the following order: --> condensed milk --> peach purée --> cream --> pâte de peche, make sure that each item is well blended before adding another; set aside.
Place the pre-soaked gelatine and 1 tablespoon of cream in a heatproof bowl then place in microwave and cook for 30 seconds on low heat to melt the gelatine. Cool it in a cold water bath then gradually pour the melted gelatine into the cream cheese mixture while stirring non-stop. Mix well until combined then strain the cheese mixture, pour into the cake pan and then place in fridge and leave to set for 2-3 hours.
Skin, core, and slice a yellow peach then arrange the slices on top of one another in a circle on the set cheesecake; place back into the fridge.
For the peach jelly:
Pour the strained syrup into a saucepan then sift in the agar powder and cook over low heat. Once it reaches 150°F/75°C, remove from heat and place saucepan in a cold water bath. When it cools to room temperature, add the lemon juice and amaretto. Slowly pour it into the cake pan from the side and let set for an hour.
To unmold the cakes:
Wrap a hot towel around the cake mold for 10 second then push it out.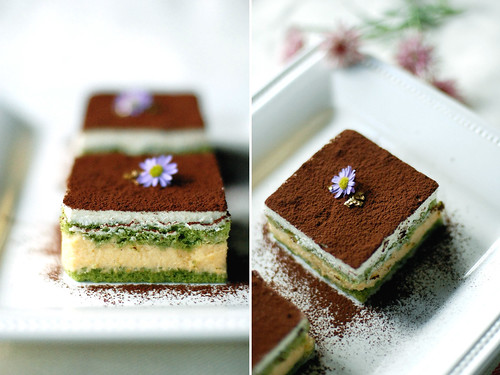
夏季是核果橫行的季節﹐這樣說應該沒人會不認同吧﹗最近常享用這些水嫩多汁的核果﹐也很常用它們製作甜點及點心。說來還得謝謝在Kashiwase Farm工作的朋友們不停的提供這些有機培植的時果。吃了那麼多﹐我也很不好意思﹐只有以甜點回報她們了。可是給她們送去的甜點越多﹐送來的水果的盒數就越多﹐我想這應該是她們喜歡吃﹐莫非是要我做多一點送她們的意思^^
這道洋甘菊烤杏桃是我翻Claudia Fleming的The Last Course甜點書時其中一個黏了標籤要製作的甜點﹐只因喜歡以花卉來製作甜點的方子。看起來是頗簡單的甜點﹐不過由於做過這位女甜點主廚的其它甜點的方子﹐對她充滿驚喜及創意的材料配搭很有信心﹐所以還是很期待。不用多說味道很美味﹔杏桃經慢烤後釋放更甜美的果香﹐且還帶有淡淡的清雅花香。除了單吃﹐CF還建議將烤杏桃作為較單調乳酪蛋糕或冰淇淋的配料﹐為平平無奇的它們添加色彩。
我不喜歡吃市售的果塔﹐總覺得添加了很多有的沒的﹐味道並不討喜﹐所以總是喜歡自己動手做。剛好不久前耗了一天半的時間反覆摺疊製作出有著無比酥脆口感的千層派皮﹐想說配核果做成餡塔應該和烤杏桃很搭。做法很簡單 – 將用香草﹑八角茴香﹑糖跟白酒泡煮好的杏桃跟黃桃鋪在派皮上烘烤成金黃色﹐再刷一層香草茴香糖漿即成。雖然簡單﹐可味道讓人一口接著一口的吃過不停﹐配冰淇淋更是無敵 =)
再來是充滿和風的提拉米蘇。杏桃配抹茶這個組合怎麼樣? 很特別吧?﹗是一個阿Vi很喜歡的博客跟據某本日語甜點書的食譜演變出來的美的讓人心醉的一道甜點。將煮過的香草杏桃製作成杏桃果泥跟發泡鮮奶油做成酸甜適中的杏桃慕斯夾在兩片有著襲人淡雅茶香的抹茶海綿蛋糕間﹐跟著是一層綿密富乳香的馬斯卡朋奶油乳酪﹐最後是超濃厚的可可亞。跟著方子做出來的抹茶海綿蛋糕很美味﹐但抹茶味偏淡﹐由於喜歡重一點的﹐我改用另一個抹茶方子。除了做成小蛋糕﹐還做成一口小點呢~
我還應媽咪的要求製作了一個黃桃風味的冷藏式乳酪蛋糕讓她跟同事分享。以製作杏桃果泥雷同的方法做出黃桃果泥後﹐再混合奶油乳酪﹑馬斯卡朋乳酪做成乳酪糊。為了讓桃子的味道更鮮明﹐我加了少量的桃子濃縮糊。要是這樣稍嫌單調了點﹐所以加了一層透明果凍﹐讓賣相更引人。
呵呵。。。這次先post這些。Bon Appétit =)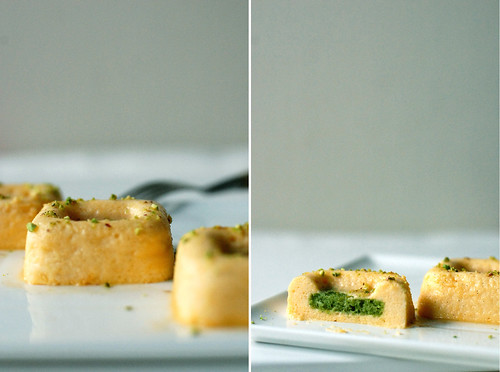
洋甘菊烤杏桃
1 ½ 杯 砂糖
¼ 杯 新鮮洋甘菊或1個洋甘菊茶包
1條 香草豆﹐縱的開半﹐刮籽
8個 杏桃﹐開半﹐去核﹐留皮
1杯 水
預熱烤箱至375°F/185°C。將砂糖跟水倒進小鍋中﹐以高溫加熱至沸騰。加進香草豆跟籽﹑洋甘菊或茶包﹐然後轉中火熬煮5分鐘﹐離火。用濾網過濾糖漿﹐然後倒進耐熱烤盤中﹐跟著將杏桃切面朝下排列在烤盤中﹐先烤10分鐘﹐然後翻面沾上糖漿再烤5分鐘即可。最佳食用的溫度是微暖。佐香草冰淇淋﹑烤餡餅﹑味道是一級棒。
香草茴香核果餡塔
自製千層派皮3分1 的份量或2片市售的千層派皮
1個 大的黃桃﹐開半﹐去核﹐去皮﹐切薄片
4 個 杏桃﹐開半﹐去核﹐留皮
2湯匙 無鹽奶油 ﹐切丁
1條 香草豆﹐縱的開半﹐刮籽
1粒 八角茴香
1 ¼ 杯 砂糖
50ml 白酒
200ml 水
桿麵皮用的麵粉適量
蛋汁
1個 (L尺寸) 蛋黃
1茶匙 水
將千層派皮從冰箱取出解凍備用﹐約十分鐘。
將派皮麵糰放在撒上麵粉的工作台上﹐用桿麵棒將派皮桿成約厚5mm或1/4寸的薄片﹐用分別直徑3寸跟5寸(7.5cm/12.5cm)圓形餅乾模具吸出薄片﹐再用叉子戳刺氣孔﹐放進冰箱冷藏備用。預熱烤箱到350°F/175°C。
將砂糖﹑水﹑白酒﹑八角茴香﹑香草豆跟籽一起放入小鍋裡﹐再以高溫加熱煮至沸騰後轉中火繼續煮2分鐘。將杏桃加入熱糖漿中泡煮3分鐘﹐取出。跟著將黃桃片加入熱糖漿中泡煮2分鐘﹐取出。繼續熬煮糖漿至濃縮變稠﹐約至原體積的3分2量﹐用濾網過濾糖漿﹐備用。
把蛋黃和水一起拌勻成蛋汁﹐備用。將派皮從冰箱取出,放到鋪了烤紙的烤盤上。用刀子輕輕的在麵皮邊緣劃界線﹐約寬1/4寸(5mm)﹐小心不要切斷麵皮。用蛋汁塗抹界線裡的麵皮,界處不塗抹蛋汁。將兩塊杏桃排列在直徑3寸(7.5cm)派皮上﹐然後將黃桃片排列在直徑5寸(12.5cm)的派皮上﹐隨意將切小丁的無鹽奶油撒在派皮上,放進烤箱烘烤約25 - 30分鐘至金黃色。取出﹐放涼5分鐘﹐然後用刷子將香草茴香糖漿塗在餡塔表面即可。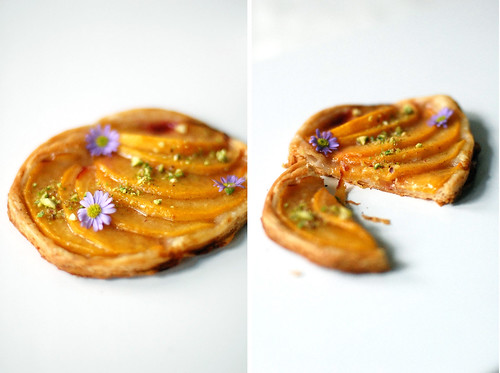
杏桃抹茶和風提拉米蘇
4個3in x 3in 小蛋糕
抹茶傑諾瓦士
100g 砂糖
70g 麵粉, 篩過
15g 抹茶
20g 無鹽奶油
3個 大尺寸全蛋
杏桃慕斯
350g 杏桃(去核後的重量)
250ml 水
100g 砂糖
1條 香草豆﹐縱的開半﹐刮籽
4g 明膠片
150ml 鮮奶油
2個 大的蛋白
75g 細砂糖
馬斯卡朋奶油
100ml 鮮奶油
15g 細砂糖 (可免若用罐裝糖煮杏桃)
30g 馬斯卡朋乳酪
製作抹茶蛋糕:
先燒開一小鍋的水﹐備用。將奶油切丁﹐倒進一個耐熱的容器裡﹐然後放微波爐加熱融化﹐靜置放涼備用。
將1個直徑12 x 9in/28 x 24cm長方形模具抹上厚厚的奶油﹐再鋪上烘烤紙﹐備用。將抹茶和麵粉混合篩過﹐備用。將一烤架移到烤箱中格﹐烤箱預熱至360°F/180°C。
將蛋倒進耐熱拌碗中﹐用電動攪拌器以中速打散﹐加進砂糖﹐攪打至顏色變淡。將拌碗放小鍋上隔熱水加熱打發﹐不停攪拌至微溫發泡。停止加熱﹐繼續以劃圓圈的動作打發至富含空氣會如緞帶般重疊時即可。分數次加進篩過的抹茶麵粉﹐用橡皮刀源邊往下刮翻切拌勻﹐然後拌入放涼的融化無鹽奶油﹐同樣的以橡皮刀源邊往下刮翻切拌勻。
一鼓作氣地將麵糊倒進烤模中﹐推勻﹐輕輕敲一下烤模釋放氣泡後﹐放進預熱過的烤箱裡﹐烘烤約15分鐘。當週圍會因烤熟而稍稍縮小﹐烤模和蛋糕體間就會出現空隙﹐輕按蛋糕中間時感覺到彈性即烤好。也可以用竹籤插入中央﹐慢慢拔出時不會沾黏﹐就烤好了。從烤箱取出﹐翻轉倒扣脫模﹐擺在網架上整個放涼。將蛋糕切成所需的片狀。
如果不立刻使用﹐可將蛋糕包好放冰箱存放﹐可以保存3天。使用前靜置回溫即可。
製作杏桃慕斯:
將水﹑100g砂糖﹑香草豆跟籽一起放入小鍋裡﹐開中火加熱煮至砂糖完全融化後加進杏桃熬煮5分鐘至軟﹐離火。靜置放至室溫後﹐將杏桃用濾網撈起﹐用力碾壓擠成杏桃果泥﹐約有250g成品。用濾網過濾糖漿﹐將杏桃果泥跟50ml的糖漿混合﹐剩下的糖漿包好備用。若是用罐裝糖煮杏桃﹐將250g的糖煮杏桃用同樣的手法壓成泥﹐再從罐裡取50ml的糖漿跟泥混合。
明膠片用冰水泡軟之後擠掉水分。將泡軟的明膠片隔熱水融解後拌進杏桃果泥中﹐確實拌勻﹐備用。將鮮奶油打發至出現尖角的起泡程度﹐備用。將蛋白打散﹐然後將細砂糖分數次加進蛋白中打發至出現尖角的起泡程度。用切拌法(用橡皮刀源邊往下刮翻)將2分1的發泡鮮奶油拌入杏桃果泥中﹐攪拌乳化後﹐拌入剩餘的鮮奶油﹐確實攪拌乳化後再拌進蛋白霜﹐攪拌乳化後倒進擠袋裡備用。
製作馬斯卡朋奶油乳酪:
將馬斯卡朋乳酪室溫放軟。將鮮奶油和砂糖混合打發至出現尖角的起泡程度﹐用切拌法(用橡皮刀源邊往下刮翻)將放軟的馬斯卡朋乳酪拌入發泡鮮奶油中﹐攪拌乳化即可。
組合及裝飾蛋糕:
將4個無底方形慕斯模擺放好﹐然後在每個模中鋪放一片抹茶蛋糕。用刷子將糖漿塗在蛋糕表面, 將杏桃慕斯擠進模中﹐鋪進另一片抹茶蛋糕﹐輕輕按下去(去氣泡)﹐跟著用抹刀抹一層馬斯卡朋奶油乳酪﹐抹平後放進冰箱冷藏凝固﹐至少3小時或一個晚上。
將蛋糕脫模﹔以溫毛巾圍著模型溫熱10秒後﹐然後用手指將蛋糕往上推出脫模。享用前撒上一層無糖可可亞粉﹐再以食用金箔點綴即可。
黃桃風味冷藏式乳酪蛋糕
1個6in/18cm 的蛋糕
黃桃果泥
2個 大的黃桃﹐開半﹐去核﹐去皮
1茶匙 香草精
1杯 砂糖
50ml 白酒
200ml 水
全麥餅底
100g 蜜糖全麥餅乾
50g 無鹽奶油
黃桃乳酪糊
200g 奶油乳酪
50g 馬斯卡朋乳酪
200ml 鮮奶油
100g 煉乳
50g 黃桃泥
1湯匙 桃子濃縮糊(膏)
5g 明膠片
1個 大的黃桃﹐去核﹐去皮﹐切薄片
桃子透明果凍
200ml 糖漿
8g 寒天粉
1茶匙 檸檬汁
2湯匙 義大利杏仁酒
事前準備:
- 將奶油乳酪用保鮮膜包起來﹐放進微波爐﹐以弱溫加熱1分鐘﹐使其軟化。
- 將明膠片用冰水泡軟﹐擠掉水分備用。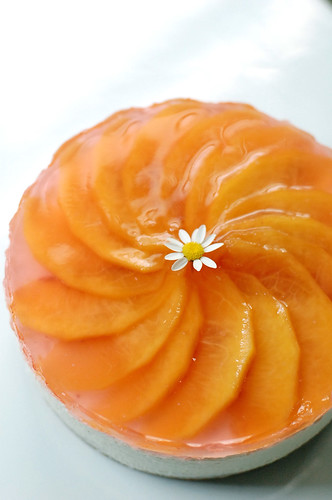
製作黃桃果泥:
將砂糖﹑水﹑白酒一起放入小鍋裡﹐以高溫加熱煮至沸騰後轉中火繼續熬煮2分鐘。加入黃桃塊繼續煮3 – 5分鐘。靜置放至室溫後﹐將黃桃用濾網撈起﹐用力碾壓擠成桃泥。用濾網過濾糖漿﹐將桃泥跟35ml的糖漿跟香草精混合﹐剩下的糖漿包好備用。
餅底﹕
烤箱預熱至360°F/180°C。將蜜糖全麥餅乾裝入拉鍊袋﹐用桿麵棍打碎。滾動桿麵棍﹐將餅乾壓成細末。奶油放進微波爐加熱至融解﹐加入袋內並封緊袋口﹐用手搓揉混合。倒入1個6in/18cm底板可以拆除的模模具中﹐用湯匙背使勁壓平後﹐放進烤箱烘烤20分鐘。取出﹐擺在網架上整個放涼。
黃桃乳酪糊:
將軟化的奶油乳酪放入拌盤中﹐用打蛋器攪拌至順滑加入馬斯卡朋乳酪﹐攪拌均勻順滑後依序加入煉乳à 黃桃果泥à鮮奶油à桃子濃縮糊﹐每加入一樣都必須確實攪拌均勻, 備用。
將1湯匙的鮮奶油和泡軟擠掉水分的明膠片倒進一個耐熱的容器中﹐再放進微波爐以低溫加熱至明膠完全溶解。放冰水浴中冷卻﹐然後拌入乳酪糊中﹐用打蛋器攪拌至順滑後用濾網過濾﹐倒入模具中﹐放進冰箱冷藏2 - 3個小時。將桃片以放射狀排列於凝固的乳酪蛋糕上﹐放進冰箱備用。
桃子透明果凍:
將濾過的糖漿倒進小鍋裡﹐然後將寒天粉過篩到糖漿上﹐以低火煮至150°F/75°C﹐離火﹐放冰水浴中冷卻後﹐加入檸檬汁跟杏仁酒。在模的邊緣緩緩的倒進模中至滿﹐再放進冰箱冷藏凝固1 - 2個小時或一個晚上。
以溫毛巾圍著模型溫熱10秒後﹐用手指將蛋糕往上推出脫模即可。
Thursday, August 20, 2009
Stone Fruit Bonanza ~ 盛夏の核果響宴


Wednesday, March 11, 2009
Kuri Matcha Choco Verrines ~ 栗子抹茶可可和風物語
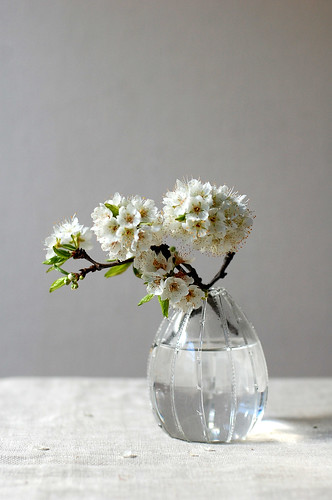
It is so wonderful that the sun is out after weeks of stormy weather! I had caught the blue bug from all that rain and didn’t want to do anything but lay in the bed! Now that it is sunny and warm, I am motivated to be back in the kitchen ^^
This Japanesey sweet is my take on a dessert featured in the Japanese version of ELLE à Table (Jan/09). I like the layering effect showed in the magazine and was convinced by the intrigue combination of chestnut and matcha. The two is a fairly common pairing in making wagashi (traditional Japanese sweets), but this nothing short of deliciousness combination seem somewhat unpopular or common in western pastry. If you have a recipe made of the two, would you mind sharing? I’m just mad about them!
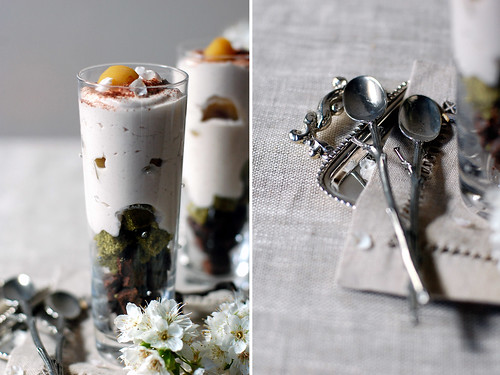
The sweet is composed of spongy fragrant matcha génoise, rich & dense flourless chocolate cake, candied chestnuts, light & melt-in-your-mouth chestnut Chantilly then a dusting of cocoa powder and a piece of candied chestnut complete this lovely, Springy dessert - giving it not just a lovely presentation but a contrasting texture of light and dense. All the components were simple to make and you can make them a day in advance (except the chestnut Chantilly). Though I was very happy with the result but I couldn’t stop thinking that this may taste even better with Jasmine mousse, maybe you can try this combo and let me know how it turns out =)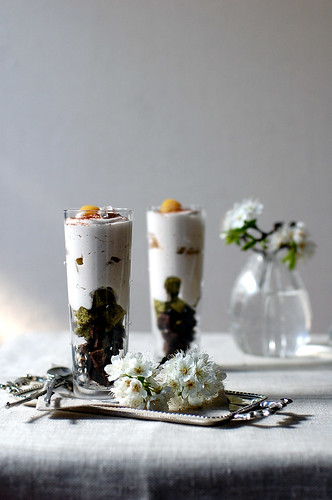
Kuri Matcha Choco Verrines – makes six 8oz glasses
¼ recipe Matcha Génoise, diced
¼ recipe Chocolate Valentino, diced
1 recipe Kuri (chestnut) Chantilly Cream
8 whole chestnuts in syrup (available at Japanese markets)
Some cocoa powder
Matcha Génoise
100g granulated sugar
70g all purpose flour
15g matcha
20g unsalted butter, melted and cooled
3 large eggs
Prep:
- Sift together flour and matcha, set aside.
- Preheat oven to 360°F/180°C.
- Lightly butter a 12 x 9in/28 x 24cm roll cake pan and line it with parchment paper.
Brings a small pot of water to boil, set aside. Melt the butter in a microwave, set aside to cool.
Using a handheld mixer, beat the eggs together in a heatproof bowl then add sugar and beat until blended. Place the bowl over the pot of boil water and continue to beat over medium speed until it is foamy and warm to the touch. Remove from heat, continue to beat in a circular motion until it doubles in volume and soft peaks form. Gradually add in the sifted matcha flour mix using a rubber spatula and fold gently until incorporated. Add in the melted butter, quickly fold until completely incorporated.
Pour the batter into the prepared pan, spread and smooth out the batter using the spatula. Tap the pan slightly on the counter to release any air bubbles, place into the preheated oven and bake for 15 minutes. Turn out onto a wire rack to cool completely. Slice it into small cubes.
Kuri (chestnut) Chantilly Cream
200ml heavy cream
3tbsp chestnut cream or crème de marrons
1tbsp caster sugar
¼ vanilla bean, split open and seeds scraped out
Bring 50ml heavy cream, vanilla pod & seeds, and the chestnut cream to just simmer over medium heat; stirring occasionally to prevent from burning. Remove from heat and continue to stir until the two are fully incorporated. Remove vanilla pod and place the saucepan in an ice water bath to cool.
Place the remaining cream, sugar in a bowl and whip until stiff peaks form. Fold in the cooled chestnut cream mixture and mix until fully incorporated. Pour the whipped cream into a piping bag w/o a tip, let chill in refrigerator.
Assemble:
Spoon some Chocolate Valentino cubes into the glasses (I use champagne flutes) to ¼ height of the glasses then spoon in matcha génoise cubes next to 2/4 full. Snip off a little corner of the piping bag, and pipe the cream to ¾ full, place some candied chestnuts on top then pipe more cream until almost to the top. Sprinkle some cocoa powder and top off with a piece of candied chestnut. Voilà!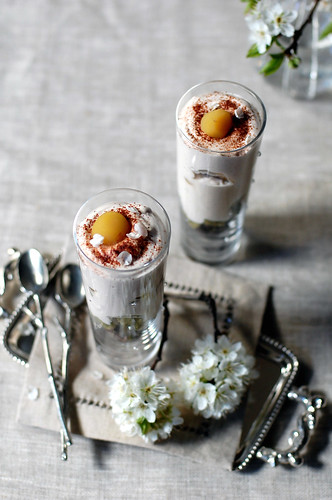
這個和風甜點的靈感來自一款在日版ELLE à Table(01/09)看過的點心。我承認是因為照片拍的很漂亮﹐所以我才給吸引住的。再看它的材料配搭居然是我最愛的抹茶跟栗子的組合﹐我可沒理由拒絕了。其實抹茶跟栗子的組合是和菓子常見的風味﹐但在製作西式點心方面這個搭配並不是很普遍。好可惜喔~
很喜歡這個甜點的味道鋪陳 – 由有著襲人的淡雅茶香的抹茶海綿蛋糕﹑濃郁濕潤的純巧克力蛋糕﹑質地輕盈細緻口感清爽不膩帶有淡淡奶香的栗子風味香堤麗鮮奶油﹑還有藏在香堤麗鮮奶油中的鬆軟綿密帶著微甜的栗子甘露煮交揉出絕妙的層次及鮮明的口感﹐讓人為那份美味著迷感動。這個甜點適合用透明度高的容器來呈現﹐這樣才能看到它賞心悅目的漂亮層次。而因為它本身很精緻﹐裝飾上方簡單的用濾網過篩可可粉﹐再擺放一顆栗子甘露煮就可以了。
我覺得將栗子風味香堤麗鮮奶油變成茉莉風味慕斯﹐味道應該更迷人典雅。如果你剛巧不愛栗子﹐不妨嘗試這個組合吧 ^O^
栗子抹茶可可和風物語– 約6杯
¼ 份量的 抹茶傑諾瓦士﹐切丁
¼ 份量的 巧克力華輪天奴蛋糕﹐切丁
1 ½ 杯 栗子風味香堤麗鮮奶油
8顆 市售栗子甘露煮(購自日本超市)
少許 可可粉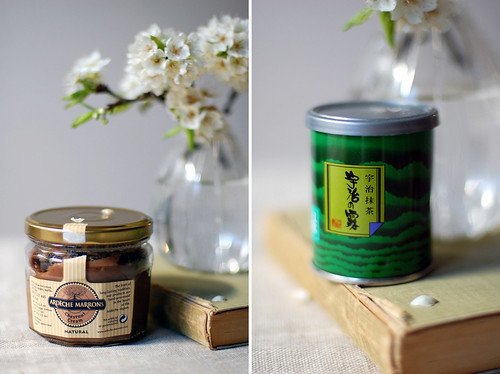
抹茶傑諾瓦士 ~ 直徑12 x 9in/28 x 24cm長方形模具1個
100g 砂糖
70g 麵粉, 篩過
15g 抹茶
20g 無鹽奶油
3個 L尺寸全蛋
事前準備:
- 將抹茶和麵粉混合篩過備用。
- 將一烤架移到烤箱中格﹐烤箱預熱至360°F/180°C。
- 模具抹上厚厚的奶油﹐再鋪上烘烤紙﹐備用。
先燒開一小鍋的水﹐備用。將奶油切丁﹐倒進一個耐熱的容器裡﹐然後放微波爐加熱融化﹐靜置放涼備用。
將蛋倒進耐熱拌碗中﹐用電動攪拌器以中速打散﹐加進砂糖﹐攪打至顏色變淡。將拌碗放小鍋上隔熱水加熱打發﹐不停攪拌至微溫發泡。停止加熱﹐繼續以劃圓圈的動作打發至富含空氣會如緞帶般重疊時即可。分數次加進篩過的抹茶麵粉﹐用橡皮刀源邊往下刮翻切拌勻﹐然後拌入放涼的融化無鹽奶油﹐同樣的以橡皮刀源邊往下刮翻切拌勻。
一鼓作氣地將麵糊倒進烤模中﹐推勻﹐輕輕敲一下烤模釋放氣泡後﹐放進預熱過的烤箱裡﹐烘烤約15分鐘。當週圍會因烤熟而稍稍縮小﹐烤模和蛋糕體間就會出現空隙﹐輕按蛋糕中間時感覺到彈性即烤好。也可以用竹籤插入中央﹐慢慢拔出時不會沾黏﹐就烤好了。從烤箱取出﹐翻轉倒扣脫模﹐擺在網架上整個放涼。將海綿蛋糕橫切成小丁備用。
如果不立刻使用﹐可將蛋糕包好放冰箱存放﹐可以保存3天。使用前靜置回溫即可。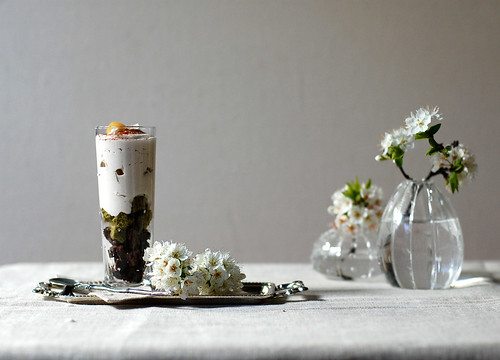
栗子風味香堤麗鮮奶油 – 約1 ½ 杯份量
200ml 鮮奶油
3湯匙 市售栗子醬
1湯匙 細砂糖
¼條 香草豆﹐開半刮籽
將50ml的鮮奶油﹑香草豆及籽﹑栗子醬混合倒進小鍋中﹐以中火煮至剛沸騰﹐期間要不時的攪拌以免煮焦。離火﹐確實攪拌勻栗子奶漿後﹐丟掉香草豆﹐放冰水浴中放涼。
將鮮奶油和細砂糖放入拌碗中﹐用電動打蛋器先以低速打發鮮奶油至起泡﹐再轉中速攪打至出現尖角的程度。拌入放涼的栗子奶漿﹐用橡皮刀源邊往下刮翻切拌勻即可。將栗子香堤麗倒進擠袋裡﹐剪去一角﹐放冰箱冷藏備用。
組合及裝飾:
將切成小丁的巧克力華輪天奴蛋糕舀進杯中至4分1滿﹐然後舀進丁狀的抹茶傑諾瓦士至4分2滿。將栗子香堤麗擠進杯中至4分3滿﹐填入切碎的栗子甘露煮﹐然後再擠栗子香堤麗至滿頂。撒一些可可粉﹐再擺放栗子甘露煮點綴裝飾即可。
Saturday, January 24, 2009
Non-stop celebrations - Lunar New Year! ~ 過不完的節日^^
Did I tell you this time of the year is my favorite time of the year?! You see, it is non-stop celebrations – Thanksgiving, Christmas, New Year, Lunar New Year (LNY) and Valentine’s Day (plus my Chinese birthday and birthday are only weeks away too)!!! Yup, it is fantastic =)
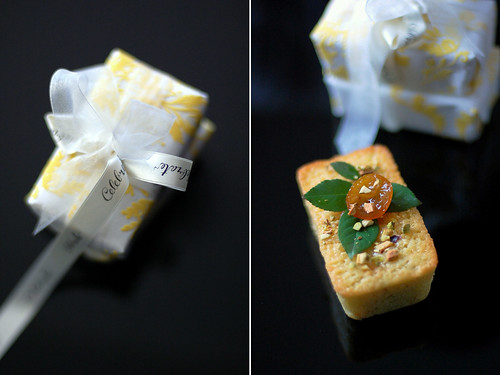
I was cleaning the house and the garden over the weekend for LNY, and found that all the citrus trees in my garden were bearing fruits – loads of. I have been thinking of baking some sweets to give to my relatives as gifts for the LNY holiday and was flipping thru books to look for recipe that is suitable. We bring sweets (candies, Chinese pastries, chocolate and etc) to family and friends’ home when paying them visits over LNY, symbolizing prosperity in the new year - a traditional of LNY. When I saw all those mandarins, a light bulb lighted up; I knew of just the perfect sweet I can bake up – mini citrus cakes!
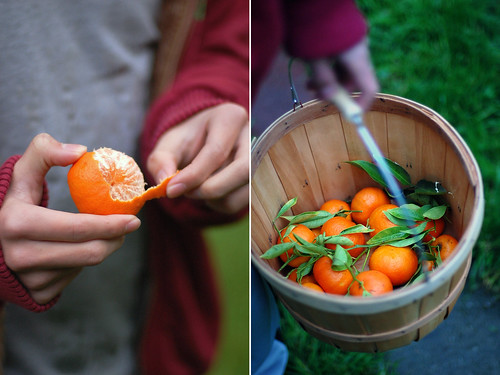
To get in the spirit of the Lunar New Year, I decided to use what Chinese see as the symbol of prosperity – Kumquat (pronounced gam gwat) and mandarins fruits. Kumquat is widely popular during LNY and sold as a plant and used to decorate the house – think Poinsettias for Christmas and mandarins fruits are eaten as snacks – at least in my family~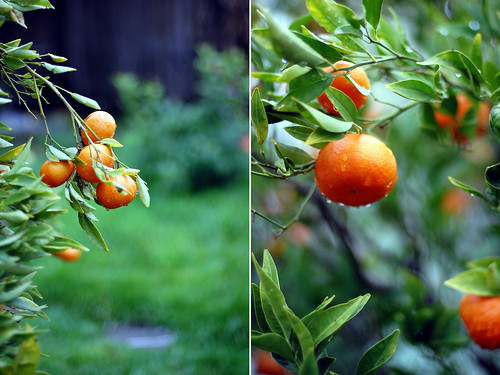
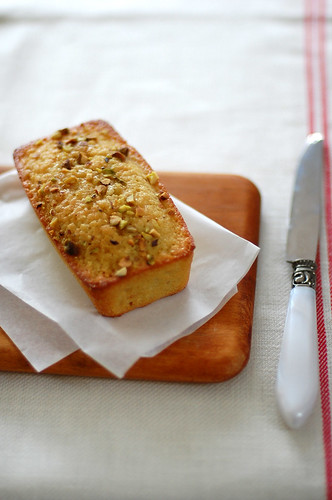
I adopted the recipe from Hidemi Sugino’s The Dessert Book; the original recipe was for fava bean pound cakes, which sounds really interesting and soon to be tested. I would say these mini pound cakes are a variation to the financier cakes I made last year. Since I used 2 types of citrus in this recipe, I was worried that it would be overly tangy but the end result was some super moist cakes with ultra citrus fragrant that will delight anyone who eats them. BTW, they are best enjoyed with a cup of good black tea ;)
Citrus Mini Pound Cakes – 4in x 2in x 5¾in mini loaf pan
For the batter:
200g unsalted butter, thinly sliced
280g confectioners’ sugar
7 whole eggs, L size
200g almond flour
140g all-purpose flour
80g candied mandarins peel, process until purée-like in a food-processor
3g baking powder
Some candied kumquat halves
Some pistachio dice
Some Cointreau for brushing on cake
Prep:
- Butter the loaf pans generously with unsalted butter.
- Preheat the oven to 340°F/170°C.
Sift together, flour, almond flour and baking powder; set aside.
Using a stand mixer, combine butter, sugar and mix over medium speed for a few seconds or until incorporated; gradually add the eggs, flour mixture, mix for a few second after each addition.
Transfer mixture to a mixing bowl and fold in the mandarins purée until incorporated. Pour batter into a piping bag. Snip off a corner of the bag and pipe batter into the prepared pans, lightly tap each pan to release the air bubbles, arrange 3 to 4 pieces of kumquat and sprinkle pistachio dice generously on top. Place in the oven and bake for 25 minutes or until golden; remove from oven. Remove the cakes from pans, brush a layer of Cointreau on top of cake while it is still warm then leave on wire rack to cool.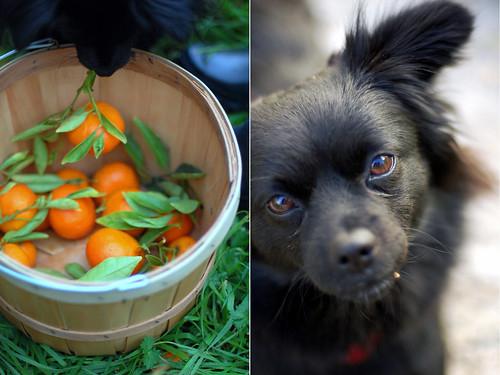
Candied Mandarins Peel
100g mandarins peel
½ tsp salt
Syrup:
100g granulated sugar
100g water
Make the syrup: bring sugar and water to a boil over medium heat; remove from heat and set aside.
Wash the peel well using a veggie brush then slice into thin threads. Put peel, salt, add water to just cover in a saucepan and bring to a boil. Remove from heat and drain; repeat this step 1 more time.
Return the drained peel to a small saucepan, add the syrup to just cover and boil over medium heat until translucent. Let cool and cover (with syrup) overnight.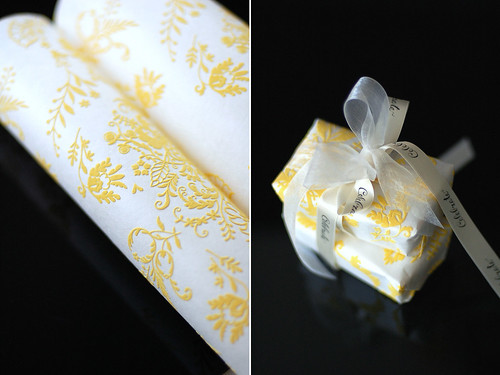
一年中就屬十一﹑十二﹑一月這些時候最得我心了。無他﹐因像有過不完的節日是的(笑)。想說剛剛才過完西方的聖誕﹑新年﹑可過幾天又是農曆新年了﹐可樂了我~
自踏入冬天﹐我就很少打理后花園那些花花草草﹐不過因為新年的關係﹐在過去的這個週末就想清理一下好去舊迎新。走進花園映入眼前的是顏色鮮艷的各色柑橘類的果樹﹐原來它們都結滿了果實﹐有檸檬﹐柚子跟橘子等。媽媽說現在是柑橘的季節﹐所以都結果了。果實看起來實在是太飽滿了﹐打掃中途忍不住摘了個橘子來吃﹐味道還不賴不過偏酸﹐覺得比較適合用來製作果醬。剛好我在為該做什麼樣的拜年糕點拌手禮而頭痛﹐突然想到我該用這些橘子跟朋友由佛羅里達州帶回來的金桔作為食材。記得Hidemi Sugino’s The Dessert Book 中有多個柑橘甜點的做法﹐決定做什麼後馬上翻食譜去。
想想大可做我去年烤過的桔香小蛋糕﹐不過那實在需要烤多次才能達到我要的數量﹐決定做比較有份量的磅蛋糕。原食譜是用蠶豆茸(改天一定要試做)﹐我改以加入用糖漿煮過的橘子皮及金桔及刷一點橘味白蘭地酒好讓味道更突出﹐不過麵糊base做法還是源用Sugino大師的。味道做出來是我的那杯茶﹐是一種樸素而簡單的蛋糕﹐但是味道很紮實﹐可以享受到柑橘獨特的香味。最適合午後配杯紅茶享用喔~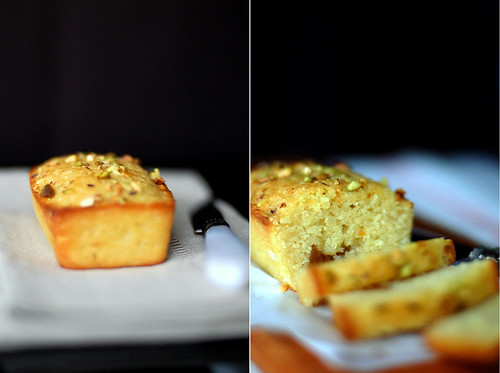
柑橘風味磅蛋糕
磅蛋糕模具4in x 2in x 5¾in 6個
200g 無鹽奶油﹐室溫放軟﹑切片
280g 糖粉
7個 全蛋﹐L尺寸
200g 杏仁粉
140g 麵粉
80g 糖漬橘子皮粗泥
3g 發酵粉/ 泡打粉
適量 糖漬金桔
適量 開心果仁碎
適量 刷塗用橘味白蘭地酒
事前準備:
- 先把奶油從冰箱取出﹐使恢復為室溫。用手指戳一下奶油﹐變軟即可。
- 模具抹上厚厚的奶油﹐備用。
- 將一烤架移到烤箱中間﹐烤箱預熱至340F/170C。
要注意什麼呢?
- 麵糊攪拌至飽含空氣後立刻烘烤。
- 烤箱應不同制造商﹐溫度有異哦﹗記住烘烤時間只是參考而以﹗
混合篩過杏仁粉﹑麵粉﹑發酵粉﹐備用。用食物處理器將糖漬橘子皮磨打約一分鐘至粗泥狀後﹐移至碗中備用。
用電動攪拌器以中速把糖和奶油打至融合﹐分數次加入雞蛋﹐每加一次攪打數秒至融合。跟著小量地加入混合篩過後的粉類﹐每加一次都必須攪打均勻﹐至呈順滑麵糊狀。將麵糊倒進裝有橘子皮粗泥的碗中﹐用橡皮刀源邊往下刮翻拌勻。將麵糊倒入沒有擠嘴的擠花袋裡﹐剪去一角﹐將麵糊擠進烤模中至約8分滿﹐輕輕叩幾下釋放氣泡﹐放3 - 4塊糖漬金桔在上﹐最後撒些開心果仁碎。
放進預熱過的烤箱裡﹐烘烤約25分鐘至金黃色。用竹籤插入中央﹐慢慢拔出時不會沾黏﹐就烤好了。從烤箱取出﹐擺在網架上稍微放涼﹐翻轉倒扣﹐然後在蛋糕表面刷一點橘味白蘭地酒後整個放涼。
糖漬橘子皮
100g 橘子皮
½茶匙 鹽巴
糖漿:
100g 砂糖
100g 清水
製作糖漿: 將水和砂糖倒進小鍋裡﹐開中火煮沸後離火備用。
將橘子皮洗乾淨﹐抹乾﹐切成絲﹐備用。
將橘子皮﹑ ¼ 茶匙的鹽巴﹑適量的水(蓋過橘子皮即可)以中火煮沸﹐撈起橘子皮﹐倒掉熱水﹐擠掉水份﹐再重複一次這個去水份的做法。將橘子皮和糖漿混合倒進小鍋以中火煮沸後繼續煮至變透晶瑩為止。在常溫中放涼置一晚。將橘子皮跟小量的糖漿倒進密閉容器中冷藏存放。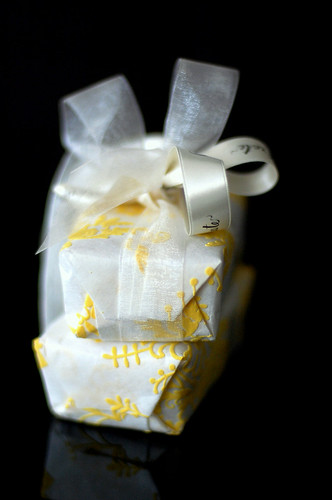
Friday, January 9, 2009
Sablés au thé vert ~ 富傳奇色彩的抹茶餅乾
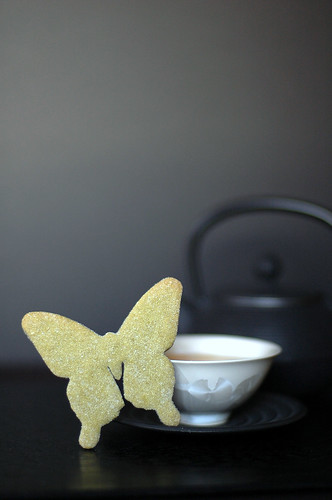
The shortbread cookie you see here is legendary and has a cult followings. It is so good that it won itself a Golden Scoop Award, not to mention that it is insanely popular among many food bloggers (you can find the list here) . It is not difficult to understand why after eating a few (Okay, I lied. It was more like a few dozens!). These cookies are the creation of Kelli, the owner of Amai Tea & Bake House in New York City. She has posted the recipe to her blog – Lovescool – some time back and I bet it was due to popular requests by fans^^
I didn’t learn of her shop and the cookies until I seen it here years after she posted the recipe. I immediately fell in love with the elegant packaging hoping that I can have a taste of them. You can imagine how happy I was when I found out that she has posted the recipe to her blog!
To my surprise (and everyone else), the recipe called for ingredients that I already have and the instruction was easy to follow. However, it does take time (patience too) to do the chill – cut – chill dough process though your work will be rewarded! Also, the quality of matcha plays a major role here as it is the main flavoring. I strongly advise that you use the best quality of matcha that you can find or afford. I used matcha from Uji, the area known to produce the finest matcha in Japan and the world. You certainly can taste the differences between so so and premium matcha. The color definitely shown too – better quality matcha equals more brilliant color.
These cookies are just as good as everyone promised and more! They are exceptionally delicate, crumbly and have a distinctive matcha aroma and the most brilliant shade of jade! The recipients of these cookies can’t agree more - I baked these cookies as holiday treats to friends along with the icebox cookies that everyone raved about^^
Btw, I must have baked hundred dozens because I was forever “tasting” the cookies so it seem like I don’t ever have enough to pack the boxes ;)
Sablés au thé vert – makes 2 dozens
I thought you should know:
- Make sure to press the cookie cutter hard into the dough to get a clean cut. Take care to keep the shape by shaking the cutter slightly before pushing out the dough.
- Matcha tends to fade when exposed to sunlight so store the cookies in container that blocks out sunlight to preserve the color.
Recipe
Happy baking!

你現在看到的抹茶餅乾可是大有來頭極富盛名的哦﹗美味到贏取獎項及擁有為數龐大的粉絲團﹐更是很多網友及food bloggers(點這裡)的最愛。我想那也是應該的因為它是位於紐約市的Amai Tea & Bake House 的鎮店之寶。當初在這裡看到這家店的產品介紹時就被它清雅的包裝所吸引﹐很想每一樣都咬上一口。而當我品嘗後就明白它的魅力所在了。不像我吃過的只有綠色卻無抹茶味的成品﹐Amai的抹茶餅乾極具抹茶的清香獨特風味﹐讓人吃到停不了口。可是它的價錢也不便宜﹐3個小餅乾盛惠$3.50﹐所以不能天天買。當我由他人口中知道Kelli﹐Amai的老闆娘將食譜上載到她的部落格時我可開心的咧。。呵呵呵呵。。。
跟著食譜不僅做出了那個讓我難忘的味道﹐還比我吃過的更酥脆﹗食譜也沒有想像中的困難讓我頗驚訝的。想說一定是加了什麼特別的材料才能做出那麼讓人難忘的味道﹐可是沒有﹗我想食材都是用頂級的﹐就算是簡單的材料也能做出那麼美味讓人魂牽夢寐的成品。因為這餅乾的特色是它的香氣﹐所以抹茶的品質是舉足輕重的。購買抹茶時不要吝惜錢﹐品質越高的抹茶越發凸顯香氣﹐顏色越是翠綠﹐成品就越出色。
美味的東西當然要和家人﹑朋友分享所以特地烤了上百的餅乾在過去的這個聖誕送人。我烤了很多次才籌夠數﹐因為每次餅乾一烤好都給我吃了一半﹗就是忍不住口﹐希望你會比我有自制力 ^__~
抹茶小知識:
抹茶具有極高的蛋白質、氨基酸、維生素、礦物質和葉綠素的含量很高。具有清熱解毒、生津止渴、抗疲勞、醒酒消醉、降血壓、防衰老、明目清肝的保健功能。雖然具有這麼多保健功能﹐據中醫師說抹茶屬寒涼物﹐體質屬涼性的人應少喝為妙。多喝會造成血氣不流暢﹐臉色蒼白。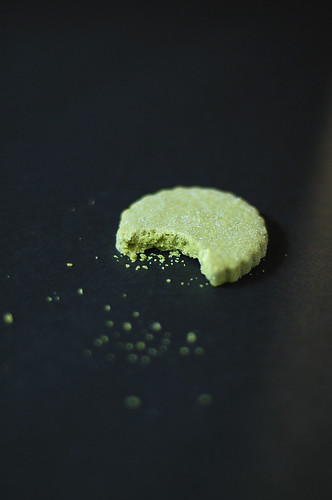
抹茶餅乾 - 餅乾的數量就要看餅乾模了
食譜來自Lovescool
¾ 杯 糖粉或細砂糖
150g 無盬奶油 (室溫放軟, 切丁)
1 ¾ 杯 麵粉
3個 L尺寸蛋黃
1.5湯匙 抹茶 (我用的是宇治抹茶)
1杯 砂糖 (包裹麵團用)
要注意什麼呢?
- 用餅乾模具吸出麵糰時一定要大力的按下出﹐左右要幾下﹐這樣麵團才會輕易的脫出。
- 抹茶遇熱後顏色會變淡﹐所以記得將放涼後的餅乾存放在不透光的容器裡。
將抹茶和糖粉混合拌勻。將抹茶糖粉跟室溫放軟的奶油用電動攪拌器先以低速拌勻﹐改用中速打至蓬鬆且顏色變淡及一致。加入麵粉﹐攪打勻後加入蛋黃﹐拌成糰塊。
將麵糰放在撒上麵粉的工作台上﹐揉至軟滑成球狀。輕壓成扁圓片﹐蓋上保鮮膜﹐放進冰箱靜置30分鐘醒麵。
烤箱預熱至350°F/180°C。在餅乾烤盤上鋪上烤盤紙﹐備用。取出麵糰﹐放在撒上麵粉的工作台上﹐將麵糰桿成約厚3/8in的薄片後用餅乾模具吸出麵糰﹐然後放到盛著砂糖的碗中讓麵團完全包裹著砂糖。有間距地排放在鋪了烤盤紙的烤盤上﹐放入烤箱烤15分鐘或是烤到餅乾週邊變金黃色就可以了。烤好後記住要在鋼架放涼﹐否則口感沒那麼酥脆。
Wednesday, November 12, 2008
November Birthday & My 1st SHF: Matcha and Amaretto Chilled Cheesecake Served with Crème Chantilly ~ 抹茶與杏仁風味冷藏式乳酪蛋糕

Gosh, where did time go?! I didn’t even realize it is November until I was tapped for dinner for friends’ birthday! Of course, I am late for the monthly birthday post as well (what is new!). With my hectic agenda, all I could think of was how to whip up something suitably special to bring to dinner but not have to spend a full day making it. I adapted a recipe for chilled cheesecake from this wonderful book about cheesecakes by Kaori Ishibashi. I’ve found success many times with this book - this would be my 3rd entry that I’m posting here. If you’re interested how other recipes turned out then click here and click here.
I chose to do a chilled cheesecake to save time as the baked kind can take a long time and also because it can be prepared ahead of time. All exquisite in appearance, it is surprisingly easy to make. No, really, it was easy! Probably took me an hour (minus the chilling time). The hardest part was deciding what flavor of cheesecake to make. Knowing that we are having Japanese cuisine for dinner, I decided to go with something Japanesey. Therefore, matcha! I had matcha cheesecake before but I couldn’t really taste the matcha so I have been anxious to make my own. The original recipe has a subtle matcha flavor so I had to adjust to my liking. I suspect that it will taste quite different depending on what type or quality of matcha is used, so make sure you add a little bit at a time and adjust the quantity to your taste. It was paired with Amaretto cheesecake, which has a subtle almond flavor and goes well with matcha. I also recommend pairing with vanilla cheesecake.
Aside that this cake was made for people born in November; I had SHF in mind when I added the glaze and the edible gold. Susan of The Well-Seasoned Cook came up with the November theme as “all that glitters” for Sugar High Fridays (SHF). I was thrilled because for once I am not late to submit my entry^^ For those of you who have no idea what is this SHF event: it is this international sweet tooth blogging extravaganza, created by Jennifer at The Domestic Goddess. It has been going strong since October 2004, giving food lovers around the world an excuse to make something sweet each month. I am so excited to be part of this!
With this light and mousse-like, yet rich and creamy texture, you’ll return for a second serving and maybe third =) I really like this cake and I hope E & D loved it too!
Matcha and Amaretto Chilled Cheesecake – make one 6cm x 6cm x 23cm oblong cake
Matcha Cheesecake
250ml whole milk
3g agar powder* (Kanten/寒天- かんてん)
150g cream cheese
50ml whipping cream
50g granulated sugar
3tsp matcha powder
1tsp lemon juice
Amaretto Cheesecake
250ml whole milk
3g agar powder
150g cream cheese
50ml whipping cream
40g granulated sugar
2drops vanilla extract
2tbs Amaretto liquor
*What is Agar powder/Kanten? Click here!
Prep:
- Wrap the cream cheese in plastic food wrap and place in microwave on low for 1 minute to soften it.
- Sift the matcha once; set aside.
For the matcha cheesecake:
Place the cream cheese in a mixing bowl. Using a whisk, whisk cream cheese until blended then add in other ingredients in the following order: --> sugar --> lemon juice --> matcha --> whipping cream, make sure that each item is well blended before adding another; set aside.
Place milk and kanten powder in a saucepan and bring to boil over medium heat, stirring constantly to avoid mixture sticking to the saucepan. Once boil, turn heat down to low and continue to boil for another minute, stirring constantly to avoid mixture sticking to the saucepan. Remove from heat, then gradually pour the hot milk mixture into the cream cheese mixture while stirring non-stop. Mix well until combined then strain the cheese mixture; pour into the cake mold and let cool. Once cool, place into the fridge and leave to set for 2-3 hours.
For the Amaretto cheesecake:
Place the cream cheese in a mixing bowl. Using a whisk, whisk cream cheese until blended then add in other ingredients in the following order: --> sugar --> vanilla extract --> whipping cream, make sure that each item is well blended before adding another; set aside.
Place milk and kanten powder in a saucepan and bring to boil over medium heat, stirring constantly to avoid mixture sticking to the saucepan. Once boil, turn heat down to low and continue to boil for another minute, stirring constantly to avoid mixture sticking to the saucepan. Remove from heat, then gradually pour the hot milk mixture into the cream cheese mixture while stirring non-stop. Mix well until combined then strain the cheese mixture then add in the Amaretto, stir well. Pour cheese mixture into the cake mold on top of the matcha cheesecake, let cool then place into the fridge and leave to set over night or at least for 3 hours.
Crème Chantilly - makes 1 ½ cups
150ml heavy whipping cream, chilled
2tbs caster sugar
Combine chilled cream and caster sugar in a mixing bowl; using a handheld mixer, beat cream from low speed and gradually turn to higher speed until peaks form. Chill while you prepare the glaze.
Nappage au thé matcha (Matcha glaze)
Nappage is a neutral glaze use to add shine to pastry. I got it from this place.
1tsp matcha
1tbs hot water
1tsp caster sugar
2tbs neutral cold glaze
Stir together matcha, caster sugar and hot water in a small bowl. Once matcha completely melted, heat the neutral glaze on medium heat for 20 second using the microwave then add it to the matcha mixture; stir until completed combined. Let cool to touch before use.
Decorating the cake:
To unmold the cakes: wrap a hot towel around the cake mold for 10 second then flip the mold over so the cake can slide out. Brush the matcha glaze on top of cake using a pastry brush, then place in the fridge to chill for 10 minutes. Remove cake from fridge, with an icing knife in hand, spread and coat the edges on top and long sides of the cake. Move the knife with long stroke so the cream will appear smooth and mirror-like. Pull the cream atop toward the center so it will resemble melting glacier. Place it back into the fridge another 15 minutes to set. Sprinkle some edible gold before serving.
Cake Slicing 101
You can get your cake sliced just like the one they sell in the patisseries by following these simple steps: first soak a knife in a cup of hot water, wipe off with a towel, then cut the cake while knife is still warm. Try to cut it through with only one cut and do not “saw”. Whip off any cake crump/residue and slice again. Just repeat these steps and you will have neat and pretty slices of cake that rival what they sell in the patisseries!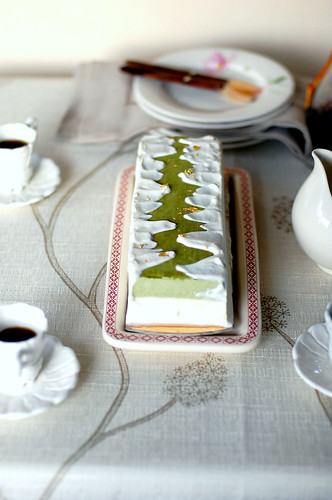
抹茶與杏仁風味冷藏式乳酪蛋糕 - 6cm x 6cm x 23cm磅蛋糕模具一個份
抹茶乳酪糊
250ml 全脂奶
3g 寒天粉*
150g 奶油乳酪
50ml 鮮奶油
50g 細砂糖
3茶匙 抹茶
1茶匙 檸檬汁
Amaretto乳酪糊
250ml 全脂奶
3g 寒天粉
150g 奶油乳酪
50ml 鮮奶油
40g 細砂糖
2drops 香草精
2湯匙 義大利杏仁酒
*究竟寒天- かんてん是什麼東西呢? 點這裡~
事前準備:
- 將奶油乳酪用保鮮膜包起來﹐放進微波爐﹐以弱溫加熱1分鐘﹐使其軟化。
- 抹茶過篩1次﹐備用。
抹茶乳酪糊:
將奶油乳酪放入mixing bowl裡用打蛋器攪拌至順滑﹔再依序加入細砂糖 à 檸檬汁 à 抹茶 à 鮮奶油﹐每加入一樣都必須確實攪拌均勻, 備用。
將牛奶和寒天粉放入小鍋裡﹐開中火加熱﹔不停的輕輕攪拌奶漿﹐讓它不會燒焦或黏鍋。煮至沸騰後轉小火繼續煮1分鐘至寒天粉完全溶解﹐熄火。將奶漿緩緩的逐次加入乳酪糊中﹐用打蛋器攪拌至順滑後用濾網過濾﹐倒入模具中。待靜置放涼後﹐放進冰箱冷藏2 - 3個小時。
杏仁乳酪糊:
將奶油乳酪放入mixing bowl裡用打蛋器攪拌至順滑﹔再依序加入細砂糖 à 香草精 à 鮮奶油﹐每加入一樣都必須確實攪拌均勻, 備用。
將牛奶和寒天粉放入小鍋裡﹐開中火加熱﹔不停的輕輕攪拌奶漿﹐讓它不會燒焦或黏鍋。煮至沸騰後轉小火繼續煮1分鐘至寒天粉完全溶解﹐熄火。將奶漿緩緩的逐次加入乳酪糊中﹐用打蛋器攪拌至順滑後用濾網過濾﹐加入義大利杏仁酒﹐拌勻。待燒微放涼後﹐倒在抹茶乳酪糊上﹐再放進冰箱冷藏凝固至少3個小時或一個晚上。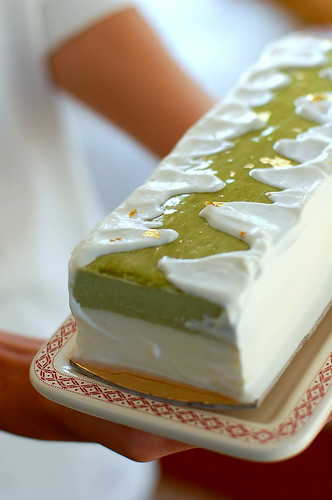
香堤麗鮮奶油 – 約1 ½ 杯份量
150ml 鮮奶油
2湯匙 細砂糖
將鮮奶油和細砂糖放入mixing bowl裡﹐用電動打蛋器先以低速打發鮮奶油至起泡﹐再轉中速攪打至出現尖角的程度。將鮮奶油放冰箱冷藏10分鐘即完成。
抹茶鏡面
鏡面果膠讓蛋糕晶瑩發亮~ 在這裡買的好東西^^
1茶匙 抹茶
1湯匙 熱開水
1茶匙 細砂糖
2湯匙 無味純果膠
將抹茶﹑細砂糖﹑熱開水混合拌勻至抹茶完全溶解。加進加熱過的無味純果膠﹐快速攪拌均勻。稍微放涼後﹐備用。
組合及裝飾蛋糕:
先將蛋糕脫模﹕以溫毛巾圍著模型溫熱10秒後﹐翻轉倒扣脫模。將微溫的抹茶鏡面用毛刷刷在蛋糕正上方﹐然後放進冰箱冷藏10分鐘。取出蛋糕﹐用抹刀將香堤麗鮮奶油平均的抹在蛋糕的正上方邊緣及長邊。再用抹刀將上面邊緣的鮮奶油拖向中間﹐形成溶雪的樣子。再放冰箱凝固15分鐘。享用前撒些食用金箔點綴即可。
究竟如何切出像patisseries賣相的蛋糕呢?
一點也不難喔﹗只要用溫熱過的刀子來切﹐就可以切得像店家賣的一樣整齊。首先﹐將刀子浸在熱水裡﹐擦乾就可以切了。每切完一刀﹐就把沾在刀子面上的蛋糕屑擦乾淨﹐並再度放進熱水裡溫熱﹔重複這些步驟就成了。
Shout out to Elaine: Happy Birthday!!! Another great year ahead =)
Thursday, September 20, 2007
Panna cotta, arrosée de sirop de cassonade et saupoudrée de sésame noir ~ 芝麻の魅力

Panna cotta literally means "cooked cream", it generally refers to a creamy, set dessert from Italy. It is a dessert made by simmering together cream, milk and sugar, mixing this with gelatine, and letting it cool until set. This is the only non-bake, eggless custard dessert from its family. Anyone who have ever tasted this rich, creamy, silky smooth, melt-in-your-mouth dessert became a devoted fans.
Panna Cotta is believe to be originated from the shepherd’s kitchen of Northern Italy. First, they cooked the cream they processed, let cool then wait for it to get set naturally. Earlier recipes used boiled fish bones in place of gelatine. Years later, this treat evolved into what is now a gelatine-thickened semi-custard semi-mousse dessert, flavored with vanilla. Vanilla is a key ingredient. It contains tiny, flavourless seeds, which are recognizable as black specks. Other than it adds a delectable aroma to the dessert, it contains about 17 types of beneficial amino acid and 250 plus types compounds. It has the property to ease heartburn, release toxic, and etc. An all-natural beauty enhancer and helps with our well-being.

Not long ago, I made panna cotta with strawberry sauce. The tartness balanced the sweetness of panna cotta perfectly. This time, I made a fusion variation. I must admit it is a very different taste when it is paired with sesame sauce. Very aromatic! Sesame is also another food that is beneficial to us. It is packed with amino acid, vitamin B, iron and etc. Sesame plays an important role in keeping my hair healthy and silky ;P
You can adjust the texture of this dessert. The key is the gelatine! You can add 100ml cream mixture to 1.5g gelatine and see if you prefer it to be softer or harder. You’ll be the judge! 
Serves 4 (4oz mold)
Panna Cotta
150ml milk
180ml whipping cream
2tbs condensed milk
30g granulated sugar
½ vanilla bean (split and seeds scraped)
7g leaf gelatine (or 7g of powdered gelatine)
1tbs Amaretto (Italian almond liqueur)
Sesame Sauce
4tbs black honey (made from brown sugar and is available in Japanese supermarket.)
2tbs black sesame powder
Some black sesame for presentation
Butter for buttering molds
Prep:
- Oil all the molds with melted butter.
- Heat a frying pan over medium heat and roast the sesame until it release aroma. 3 minutes.
- Soak leaf gelatine in cold water for 5 minutes (squeeze out excess water before adding to mixture). Add 2 tablespoons of water to powdered gelatine if this is what you use in replacement.
Note:
Make sure to remove any bubbles from surface after pouring cream mixture into molds.
Bring milk, whipping cream, condensed milk, sugar and vanilla bean (split and seeds scraped) to boil over medium heat. Stir occasionally.
Remove from heat. Add pre-soaked leaf gelatine or powder gelatine. Stir until gelatine completely melted.
Strain. Discard vanilla bean. Let cool to room temperature. Pour in the Amaretto. Stir to combine. Pour mixture into molds and place in the refrigerator for 3 hours or overnight.
Make sesame sauce only before serving. Mix the honey and sesame powder in a small bowl until combined. Divide sauce into servers. Invert the molds and place in a hot water bath for 10 second and the panna cotta will slide right out.
Pour sauce over each panna cotta and sprinkle with sesame and serve.
Recipe came from Naomi Hakamata's 3行レシピでつくる とっておきスイーツ 
意式奶凍
Panna Cotta的意思就是煮過的鮮奶油。是一道不含蛋,不用熱烤的意式布丁甜點。濃郁的乳香,細緻柔滑的口感,入口的瞬間隨即融化,使吃過的人不能不愛上它喔^O^
它的出源地是意大利。話說很久以前某山上的牧羊人將自家生產的牛、羊奶製成鮮奶油後,經過熬煮、冷卻、放置自然凝固製作而成的一道家常甜點。流傳至今,則演變為直接加入明膠冷卻凝固。Panna Cotta 另一種主要材料就是香草豆﹐即雲呢拿。不要小看這黑黑的籽籽﹐豆莢中含有250種以上芳香成份及17種人體必需的氨基酸,具有極強的補腎、開胃、除脹、健脾等醫學效果,是一種天然滋補養顏良藥。
之前我將 panna cotta 搭配酸酸甜甜的果漿,現在搭配香醇的芝麻漿又是另一種風味。芝麻含有豐沛的維他命B群、氨基酸等。多吃有養顏的功效喔﹗
Q度是可以調整的。只要調整明膠的用量就可以。因為每個人喜歡的軟硬程度不同。大家可以先試試每100ml的奶漿加1.5g左右的明膠,若是喜歡軟一點的就減少;硬一點的就加多一點。
4oz凍模 4個
意式奶凍
150ml 牛奶
180ml 淡忌廉/ 鮮奶油
2湯匙 煉乳/煉奶
30g 砂糖
7g 明膠片/魚膠片(或魚膠粉7g)
½ 條 雲呢拿條/香草豆 (開半刮籽)
1湯匙 Amaretto酒 (杏仁酒)
黑芝麻漿
4湯匙 黑蜂蜜
2湯匙 黑芝麻粉
裝飾用黑芝麻 隨意
塗凍模用無塩牛油 隨意
事前準備:
- 明膠片用冰水泡軟之後擠掉水分,備用。如果用明膠粉: 將其倒入水裡泡脹後備用。
- 為了方便脫模,模子要上一層融牛油。
- 黑芝麻要先炒過。
要注意什麼呢?
- 奶漿倒進容器裡,要去掉表面的泡沫,要不然美觀感會打折。
製作奶漿。把牛奶、鮮奶油、砂糖、煉乳、雲呢拿條和籽混合裝進小鍋裡,開中火煮滾後熄火。加入泡軟(擠掉水分)的明膠片,攪拌至融化混合。
將奶漿篩過後,稍微放涼。接著加入 Amaretto 酒,攪拌均勻。然後倒進凍模裡。放進冰箱冷凍3小時以上或一個晚上。
黑芝麻漿是panna cotta 要上桌時才製作的。將黑蜂蜜、黑芝麻粉攪拌混合後,分別倒進容器裡,備用。
將panna cotta脫模。將模子倒轉,隔著熱水回暖(或用熱毛巾將周圍熱敷)十秒,倒轉放于盤子上脫模。食用時淋上黑芝麻漿,再撒上黑芝麻就可以上桌啦 ^U^
食譜來自袴田尚弥的 3行レシピでつくる とっておきスイーツ
Monday, September 10, 2007
Tofu Cheesecake ~ 和風の豆腐乳酪蛋糕

My love for desserts bloom from the beautiful pictures from all the Japanese dessert books at the Kinokuniya bookstore located in J-town. I envy and worship those who can turn eggs, sugar and flour into all kinds of tasty treats. I wanted to become one of them! Needless to say, I ended up collecting these books and my library is growing rapidly as I fall deeper into the world of sweets :D The satisfaction I get from baking is equivalent to completing a garment; turning nothing into something! Nothing in the world beats this feeling and that’s why I can’t turn back!
Tofu Cheesecake seems to make appearances in many of the books I owned. This is one of those cakes that became a Japanese Classic or what we call Wakashi (和風)(Japanese Style Sweets). We know that cheesecake is rich and high in sugar content. In order to let health conscious people enjoy cheesecake, extra silken tofu is used to substitute half of the cream cheese used in the recipe. The texture becomes lighter but it is still creamy and full of flavor. The best part is that it cuts the calories in half! For this reason, I went for my second (I usually can’t finish a slice of cheesecake by myself.)! I know this tofu part may sound strange to some of you but give it a try and love may strike ^u^
Tofu Cheesecake
150g cream cheese
150g extra silken tofu
180ml milk
60g granulated sugar
7.5g powdered gelatine
3tbs white wine (or sub w/water)
2tsp lemon juice
Prep:
- Wrap the cream cheese in plastic food wrap and place in microwave on low for 2 minutes to soften it.
- Pre-soak gelatine. Place the wine in a bowl and sprinkle it over the gelatine. Set aside for a few minutes.
Place the cream cheese in a mixing bowl and whisk until smooth. In the following order, whisk each until well combined; sugar - lemon juice. Using a fork, mince the tofu until smooth then add to the cheese mixture. Whisk until combined and smooth.
Pour milk into a heatproof bowl and place in microwave over medium heat for 1 minutes (before it gets to the boiling point). Add in the pre-soaked gelatine. Stir until gelatine completely melted. Let cool to the touch then add into cheese mixture. Mix well till combined. Strain.
Pour into mold and refrigerate till set, about 3 hours. Decorate before serving. 
其實我對desserts的喜愛是由日語甜點書中的照片慢慢發芽的。而我總覺得會做菜和會做dessert的人都很厲害。我超崇拜他們﹗
豆腐乳酪蛋糕是一道和風創意甜點。這個豆腐乳酪蛋糕常常出現在我的日語甜點書中﹐使我對它印像深刻。一直以為製作方法很複雜﹐其實做法很容易。只要所有的材料確實攪拌勻﹐就很容易成功。摻入豆腐的冷藏式乳酪蛋糕﹐既健康又冰涼。口感很清爽﹐多吃都不會膩﹗吃的時候一定要泡杯花草茶慢慢品嚐﹐這樣還可以一次吃好幾塊的喔 ^O^
150g 奶油乳酪 (cream cheese)
150g 嫩豆腐
180ml 牛奶
60g 砂糖
2小匙 檸檬汁
7.5g 明膠粉 (魚膠粉)
3大匙 白葡萄酒(也可用水代替,不過味道多少有影響。)
事前準備
- 將奶油乳酪用保鮮膜包起來,放進微波爐,以弱溫加熱2分鐘,使其軟化。
- 將明膠粉倒入葡萄酒裡泡脹備用。
將奶油乳酪放入碗裡用打蛋器打至順滑﹔再依序加入砂糖、檸檬汁,每加入一樣都必須確實攪拌勻﹔然後一邊把豆腐弄碎一邊加入碗裡,再攪拌均勻。
將牛奶倒入耐熱碗中,放進微波爐加熱至即將沸騰,再加入泡脹的明膠,使其溶解在牛奶中﹔然後倒入cheese餡料裡,拌勻後用濾網過濾。
倒入模具放進冰箱冷藏,約3個小時,使其凝固即可。


