



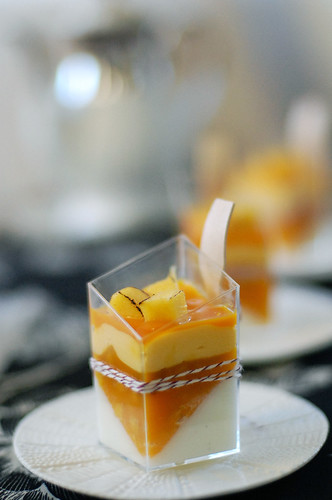
I know it is already fall but I just couldn’t resist making this summery dessert, plus I have to use up the remainder of the mango purée from making this out-of-this-world-yummy buttercream!
This mango verrine is nothing too complicated thus it does look and taste sophisticated. It is suggested that it be served in see through container so that the beautiful layers can be visible. If you can’t find readily available mango purée, you can make your own using a food processor. In this case, it is very important to use ripe mangoes in order for the flavor to pop. I have made this dessert before with a traditional panna cotta layer, but since devouring this version made with crème fraîche, I have been eager to pair this rich, velvety, tangy, and nutty cream cheese to sweet mango! The result?! It is a truly delicious combo! Try it yourself (^u^)
Btw, for those who observed Thanksgiving – Have a wonderful Turkey Day!! I’ll be cooking my 1st big girl Thanksgiving dinner!! Hopefully, I can take some pictures to show and tell later ;) 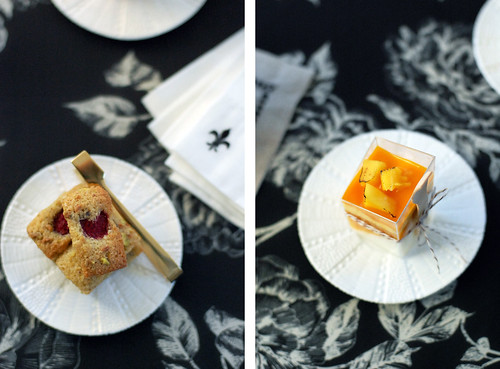
Crème Fraîche + Mango Verrines Compositions
- Crème Fraîche Panna Cotta
- Mango Gelée with Mango Cubes
- Mango Mousse
- Mango Coulis
- Mango Cubes, slightly torched
Crème Fraîche Panna Cotta
~ adopted from Cannelle et Vanille
200 grams heavy cream
45 grams sugar
1 vanilla bean, split and scraped
3 grams sheet gelatine
100 grams crème fraîche
In a small saucepan, cook the heavy cream, sugar and vanilla bean until it comes to a boil. In the meantime, soak the gelatine in ice water. When the cream has come to a boil, remove the pan from the heat and add the softened gelatin. Whisk to dissolve it. Sift into a clean bowl, discard solids, and let it cool to about body temperature. Add the crème fraîche and whisk well.
Pour the panna cotta into glasses or cups (I used verrine cups I found in a local Party Warehouse.) to about 1/3 of the height and let it set in the refrigerator, about 2 hours.
Mango Gelée with Mango Cubes
~ adopted from Tony Wong’s dessert series
150 grams fresh mango, diced
100 grams mango purée
25 grams granulated sugar
2 grams sheet gelatine
Warm half of the mango purée with the sugar in a medium saucepan over low heat. In the meantime, soak the sheet gelatine in ice water. Remove saucepan from heat once sugar completely dissolved. Squeeze off excess water and add the softened gelatine to the warm mango purée. Add the rest of the purée and diced mangoes and mix well. Let it cool to room temperature then spoon the mixture on top of the chilled crème fraîch panna cotta to about 2/3 of the height of the glasses/cups. Let it set in the refrigerator, about 30 minutes to 1 hour.
Mango Mousse
~ adopted from Tony Wong’s dessert series
150 grams mango purée
15 grams granulated sugar
3½ grams sheet gelatine
120 grams heavy cream, whipped to soft peaks
Warm half of the mango purée with the sugar in a medium saucepan over low heat. In the meantime, soak the sheet gelatine in ice water. Remove saucepan from heat once sugar completely dissolved. Squeeze off excess water and add the softened gelatine to the warm purée and stir until completely dissolved. Add the rest of the purée; stir to combine then let it cool to room temperature.
In a mixing bowl, whisk the heavy cream until soft peaks then using a rubber spatula; fold the whipped cream into the purée base until fully incorporated (no more white streak). Pour this mousse on top of the mango gelée, smooth it out using the back of a spoon and let it set in the refrigerator, about 1 hour.
For garnish:
Mango Coulis
100 grams mango purée
20 grams granulated sugar
Warm half of the mango purée with the sugar in a medium saucepan over low heat. Remove saucepan from heat once sugar completely dissolved. Add the rest of the purée; stir to combine then let it cool to room temperature. Pour it on top of the mango mousse layers, swirl the cup until it covers the mousse completely. Chill in the refrigerator while you prepare to torch some mango cubes – take care not to burn them! If you like, you can also add some edible flakes to dress them up. 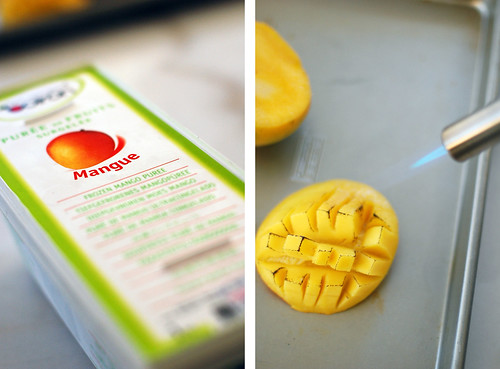
雖說天氣已轉涼﹐該是吃一些熱騰騰的麵包又或是較富濃郁風味的甜點的﹐可我就是無法抗拒吃冰品甜點﹐特別是水果慕斯類的﹐就是喜歡它那酸酸的綿如蜜的口感。除了貪吃﹐正好也可消化掉上次做那個芒果口味奶油餡剩下的芒果泥。
光是看這道芒果奶酪慕斯杯層次分明的賣相就讓人以為是道費時費工的甜點。沒錯﹐是需要點時間來凝固﹐但製作過程很簡單。材料鮮就是好吃的秘訣。若是買不到優質芒果果泥就找品質、色澤﹑香氣具佳的新鮮芒果取肉﹐用食物調理機打成泥狀再過濾。要是兩種也購買不到﹐不妨選用其它當季的水果。我不是第一次製作這道點心﹐可是頭一次用crème fraîche(酸味軟乳酪)做成的奶酪配芒果只因為嚐過濃郁中帶清爽的crème fraîche後就愛上這味道﹗該如何形容這個組合呢? 就濃郁誘人﹐甘香軟滑﹐齒頰留香~
明天就是感恩節囉﹐你有什麼樣的節目呢﹖阿Vi我明天將會專職做廚娘做飯給party of 15﹗我會想辦法用鏡頭記錄我人生的第一頓感恩節晚餐跟你分享的﹗Happy Thanksgiving~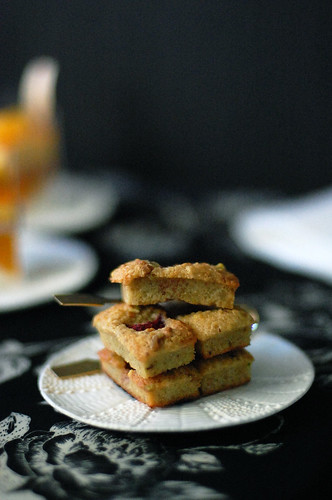
芒果奶酪慕斯杯 - 12杯
- Crème Fraîche 奶酪
- 芒果凍
- 芒果慕斯
- 芒果果醬
- 微焦化的芒果粒
要注意什麼呢?
- 確實每層都完全凝固才可再倒入另一層﹐這樣才有承托力。
- 因為是奶製品﹐最好在兩天內吃完噢~
Crème Fraîche 奶酪
~自Cannelle et Vanille
200g 鮮奶油
45g 砂糖
1條 香草豆﹐縱的開半﹐刮籽
3g 明膠片
100g crème fraîche (法國酸奶油)
明膠片用冰水泡軟之後擠掉水分備用。將鮮奶油﹑砂糖﹑香草豆跟籽一起放入小鍋裡﹐開中火加熱煮至沸騰後熄火。加入泡軟的明膠片,攪拌至融化混合﹐過濾奶漿。待放置至微溫後拌入crème fraîche﹐攪拌均勻﹐盛入杯子中至1/3滿,然後放入冰箱冷凍凝固﹐約2小時或一個晚上。
芒果凍
~ 自Tony Wong的五星級蛋糕甜點
150g 新鮮芒果肉﹐切粒
100g 芒果果泥
25g 砂糖
2g 明膠片
明膠片用冰水泡軟之後擠掉水分備用。將一半分量的芒果果泥和砂糖混合倒進小鍋裡﹐用小火煮至砂糖完全融化後離火。加入泡軟的明膠片,拌勻後再拌入剩下的一半果泥跟芒果肉﹐攪拌至均勻混合。為免底層受熱溶解﹐需待放置至微溫時才用湯匙將芒果茸舀進杯子中至2/3滿。放進冰箱冷藏凝固﹐約30分鐘~1小時。
芒果慕斯
~ 自Tony Wong的五星級蛋糕甜點
150g 芒果果泥
15g 砂糖
3½g 明膠片
120g 打發好的鮮奶油
明膠片用冰水泡軟之後擠掉水分備用。將一半分量的芒果果泥和砂糖混合倒進小鍋裡﹐用小火煮至砂糖完全融化後離火。加入泡軟的明膠片,拌勻後再拌入剩下的一半果泥﹐攪拌至均勻混合﹐將鍋子放冰水浴中散熱放涼。
將鮮奶油打發至出現軟尖角的起泡程度。將發泡鮮奶油倒入冷卻後的芒果泥中﹐用橡皮刀源邊往下刮翻攪拌至乳化均勻。將芒果慕斯用湯匙舀進杯子中至填滿﹐用湯匙背將表面均勻漂亮地抹平﹐放進冰箱冷藏凝固﹐約1小時。
芒果果醬
100g 芒果果泥
20g 砂糖
適量 芒果粒
將一半分量的芒果果泥和砂糖混合放進小鍋裡﹐用小火煮至砂糖完全融化後離火。為免底層受熱溶解﹐需待放置至微溫時才用湯匙將芒果醬舀在芒果慕斯上﹐放進冰箱冷藏凝固。上桌前用烹飪用噴槍將適量的芒果粒焦化作點綴即可。
Wednesday, November 25, 2009
Crème Fraîche + Mango Verrines ~ 芒果奶酪慕斯杯


Thursday, October 1, 2009
Crème Fraîche Panna Cotta with Strawberry Mousse, Strawberry Gelée & Baked Meringue Sticks ~ 法式酸奶草莓奶酪佐烤蛋白霜
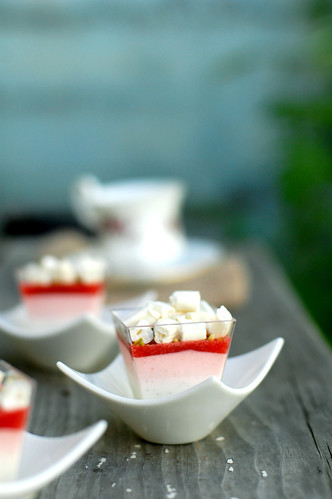
Apologies for the lack of postings lately, time really does fly!! Since the wedding, I have been in the kitchen testing out recipes for an upcoming dessert order for an October wedding. Yes, I am officially going into business! I have been dreaming of opening my own shop but unfortunately the piggy bank is still not full so I am setting up shop on the web. There are lots of things that I still need to sort out like launching the actual event and catering website, putting together a pricing menu and etc. I am keeping my fingers crossed that everything will go as planned! Of course, I will post the updates here as things unfold ^^
I have been enjoying lots of fresh picked fruits from the farmers markets this summer especially berries and stone fruits. Unlike the varieties in the supermarket, seasonal local fruits are so much sweeter and juicier. Like the other day, I bought a flat of strawberries and ate 1/3 of it at one go because it was so yummy and plump, a huge contrast to the sour and hard variety from the supermarket. I thought it would be excellent for dessert so I pureed the rest and set out to find a great recipe.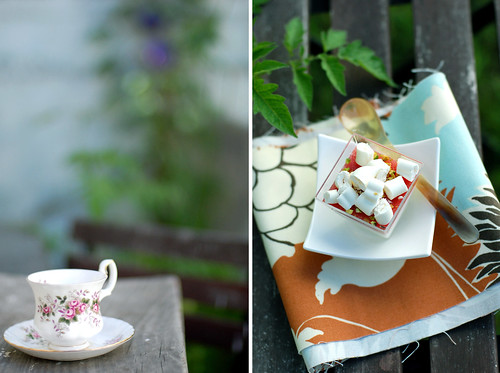
Instead of flipping through books or doing my usual repertoire, I went off a recipe off this talented pastry chef/photographer/stylist/blogger’s site - one my favorite places to go for inspirations and also to give my eyes a feast.
The components were easy to make but the end result was just scrumptious! I especially love the meringue sticks, it added texture and a touch of sophistication! Mmmmm…….I hope you’ll enjoy this dessert as much as I did =)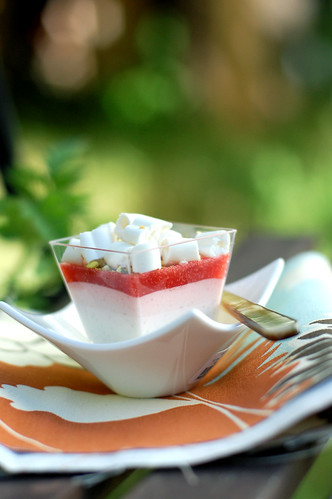
Crème Fraîche Panna Cotta with Strawberry Mousse, Strawberry Gelée & Baked Meringue Sticks
Recipes from Cannelle et Vanille
Crème Fraîche Panna Cotta
200 grams heavy cream
45 grams sugar
1 vanilla bean, split and scraped
3 grams sheet gelatin
100 grams crème fraîche
In a small saucepan, cook the heavy cream, sugar and vanilla bean until it comes to a boil. In the meantime, soak the gelatin in ice water. When the cream has come to a boil, remove the pan from the heat and add the softened gelatin. Whisk to dissolve it. Pour this into a clean bowl and let it cool to about body temperature. Add the crème fraîche and whisk well.
Pour the panna cotta into your molds or jars and let it set in the refrigerator.
Strawberry Mousse
100 grams strawberry puree
10 grams sugar
2 grams sheet gelatin
75 grams heavy cream, soft peaks
Warm half of the strawberry puree with the sugar. In the meantime, soak the sheet gelatin in ice water. Add the softened gelatin to the warm strawberry puree. Add the rest of the puree and let it cool.
Fold in the whipped cream into the puree base. Pour this mousse on top of the panna cotta and let it set in the refrigerator.
Strawberry Gelée
150 grams strawberry puree
30 grams sugar
2 gram sheet gelatin
Warm half of the strawberry puree with the sugar. In the meantime, soak the sheet gelatin in ice water. Add the softened gelatin to the warm strawberry puree. Add the rest of the puree and let it cool.
Pour this gelée on top of the strawberry mousse and let it set in the refrigerator.
Baked Meringue Sticks
100 grams egg whites (3.5 ounces or a little under half a cup)
100 grams sugar (1/2 cup)
100 grams powdered sugar, sifted (1 cup)
Whip the egg whites until a light meringue forms (soft peaks). Slowly add in the sugar while mixing. Continue to mix to stiff peaks. Fold in the powdered sugar until incorporated.
Place the meringue in a pastry bag fitted with a plain (round) tip. Pipe straight lines of meringue on a sheet pan lined with parchment paper.
Bake the meringues in a very low oven, about 200°F/100°C until crispy, about an hour. Keep them in an airtight container to stop them from becoming soggy.
中文食譜晚點再補上哦~
More from the gardens^^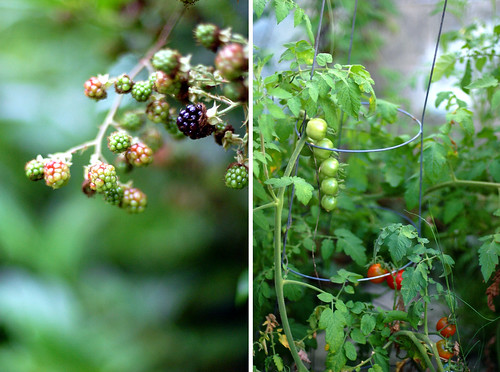
Tuesday, March 24, 2009
Birthday present to myself! ~ 送給自己的生日蛋糕^^
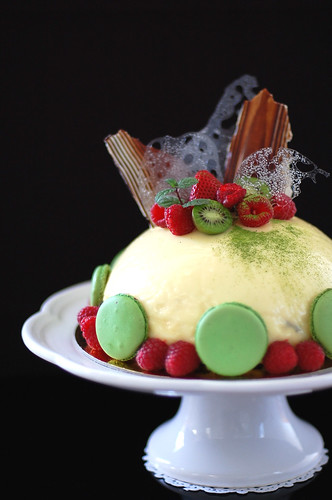
Having been asked to make cake for many friends’ birthday, I realized that I have not made my own birthday cake before! Some said that I should have others bake me a cake and someone did (thanks Mei & family!). Nevertheless, I still want to make one and not just for me but also for my brother and Linda, my evil twin. Our birthdays are within days from each other, one stone three birds =)
This dome shaped cake is a 1st for me and composed of 8 components!! It has a beautiful name - Cité Jardin - city garden, giving hints of all the beautiful red, green, brown hues. It is the work of Yoshiya Inoue of Puissance located in Japan. His original composition was of pistachio dacquoise/pistachio crème brûlée/confiture de fruits rouges/white chocolate mousse/white chocolate glaze but since the pistachio paste I ordered was on back order, I opted for a different composition.
When one look at the components, it may look busy with all the different ingredients but they were actually quite subtle. The exotic taste of saffron-infused crème brûlée, the subtle bitterness of matcha génoise, chewy macarons gives it a very contrasting texture and all these flavors work wonderfully together. Though the mousse and baravois was surprising light to me but it may taste rich and creamy to some so serve more raspberries on the side to cut the creaminess.
Decoration-wise, to bring out the garden theme, I stick to Inoue’s use of wood grain chocolate decoration, colorful fresh fruits, sprig of mints and added a personal touch of Isomalt sugar decoration, and a dust of matcha. Overall I was happy with the result except that next time I won’t do a macaron insert. It got lumpy from the moisture and didn’t give me the crumbly texture I hoped for. There is always room for improvement ^u^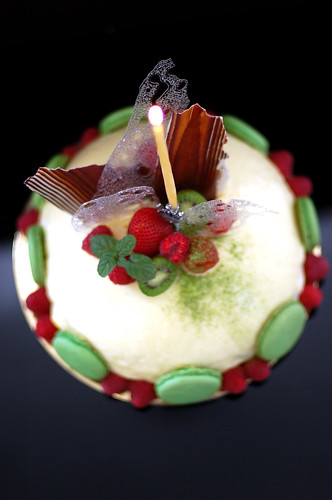
Cité Jardin – makes one 19cm/7 ½ dome
Composition is as follow:
1) matcha génoise
2) mascarpone mousse
3) saffron-infused crème brûlée insert
4) matcha macaron crumbs insert
5) white chocolate bavarois filling
6) white chocolate glaze
#1 ~ Matcha Génoise (recipe here)
The cake can be baked a day in advance. Once cooled, cut out a 13mm/½in thick and 16 ½cm/6 ½in diameter round. Wrap with food wrap and store at room temperature.
#2 ~ Saffron-infused Crème Brulée Insert -1 8in/18cm round pan
220g heavy cream
60g whole milk
20g boiled water
12 saffron threads
40g egg yolks
40g granulated sugar
Place the saffron threads in a small bowl, add the boiled water and let steep for 5 minutes. Pour the saffron-infused water and saffron into a small saucepan, add in the milk and heavy cream, heat over medium heat to just boiling. Remove from the heat, put the lid on and let infuse for 10 – 15 minutes then strain the mixture.
Preheat the oven to 240°F/120°C. Whisk together the sugar and egg yolks till pale in color, then pour the saffron-infused milk over the sugar/yolk mixture, whisking constantly as you pour, and mix until combined. Place a napkin over the mixture to soak up the bubbles that formed from whisking. Pour into the pan, place it into a large roasting pan then pour hot water into the roasting pan all the way up half way of the pan and bake for about 40 minutes or until firm on the edges and slightly wobbly in the center.
Let cool then chill in the fridge for at least 1 hour or overnight until firm up.
#3 ~ White Chocolate Bavarois Filling
260g heavy cream
110g whole milk
56g quality white chocolate, finely chopped
45g egg yolks
20g granulated sugar
6g gelatine leaf
18g egg white
9 g caster sugar
Prep:
- Line a 19cm/7 ½in half sphere mold with food wrap, press firmly onto the mold to push out air bubbles, leave a 2in/6cm tail outside the mold.
Place the gelatine in icy water, soak until soften, squeeze out the water, set aside. Place the chopped chocolate in a heatproof bowl then place it over a pot of simmering water, stirring constantly until completely melted. Place in a warm water bath to keep warm.
Bring the milk to just boiling then remove from heat. Using a hand mixer, whisk the egg yolks and sugar together in a large mixing bowl, slowly pour in the hot milk mixture, whisking constantly until combined.
Return the mixture to the saucepan and cook over low heat until thicken and the temperature reaches 170°F /85°C, about 2 minutes. Add the pre-soaked gelatine, mix well then using a rubber spatula, fold 1/3 of it to the melted chocolate mixture and mix well. Fold in the remaining egg mixture until incorporated. Set the bowl in an icy water bath to cool.
Whip the cream until soft peaks form. Fold 1/3 of it into the chocolate mixture, mix well then fold in the remainder of the whipped cream until incorporated. Using a hand mixer, whisk the egg white until foamy then gradually add in the caster sugar, whisk until stiff peaks form. Fold 1/3 of it to the chocolate mixture, mix well then fold in the remainder of the meringue until incorporated. Pour into the prepared mold and slightly tap it on the counter to release air bubbles. Chill in the fridge for at least 2 hours or overnight.
#4 ~ Mascarpone Mousse (recipe here)
Pour the mousse into a piping bag without a tip, set aside.
#5 ~ White Chocolate Glaze
The glaze jellifies quickly, you should make it at the last minute.
240g quality white chocolate, finely chopped
200g whole milk
80g corn syrup
7g gelatine leaf
Prep:
- Pre-soak the gelatine, set aside.
Place the chopped chocolate in a heatproof bowl then place it over a pot of simmering water, stirring constantly until completely melt.
Bring the milk and corn syrup to a boil over medium heat, stirring constantly to avoid burning the mixture. Pour the hot mixture into the melted chocolate, using the rubber spatula, stir until completely incorporated, add in the pre-soaked gelatine and mix well. Let cool while checking the texture regularly. As soon as the mixture is smooth and coats a spoon well, use immediately.
#6 ~ Matcha Macarons – 30 sandwiches
Italian meringue method
55g egg white
150g caster sugar
40 g water
Tant pour tant
150g almond flour
150g powdered sugar
15g matcha
55g egg white
1 drop green food coloring
Chocolate ganache filling
Raspberry Buttercream
Prep:
- On the back side of 2 parchment papers, trace 3cm/1 ¼in circles about 3cm/1 ¼in apart. Flip them over and line the baking sheets.
- Prepare 2 sheets of foil the size of the baking sheets.
I thought you should know:
- Must let the piped cookies sit out until dry to touch before baking to prevent them from cracking during baking.
- Press the piping tip on the baking sheet when piping for uniformly shaped macarons. Do not suspend the tip in the air!
Sift together almond flour, matcha, and powdered sugar twice then place the mixture in a large mixing bowl. Add 55g egg white to the flour mixture and stir until it forms into a sticky ball, set aside.
Heat water and caster sugar over medium heat until it thickens and reaches 230°F/116°C. While the syrup is heating, begin whisking the egg white at high speed in the bowl of a mixer using the whisk attachment; whisk until pale and foamy. Reduce the mixer speed to low speed and begin slowly (very slowly) pouring the syrup down the side of the bowl being very careful not to splatter the syrup into the path of the whisk attachment. Some of the syrup will spin onto the sides of the bowl but don’t worry about this and don’t try to stir it into the mixture as it will harden! Raise the speed to medium-high and continue beating until it becomes thick and satiny and the mixture is cool to the touch, about 5 minutes. Add in a drop of green food coloring, fold until incorporated.
With a rubber spatula, fold 1/3 of the meringue into the almond/sugar/matcha flour mix, fold until incorporated then fold in the remaining meringue and fold until completely incorporated. With the rubber spatula, scoop and spread the batter, in a full circle, on the inside wall of the mixing bowl. Repeat this scoop & spread process also known as macaronnage, for a total of 15 times. Lift some batter with the spatula, it should falls into the bowl in a ribbon fashion, and has a glossy look.
Pour the batter into a piping bag with a round tip and pipe the batter from the center of the drawn circle onto the baking sheets. Pipe about 60 circles. Let dry at room temperature for 30 minutes before baking to allow skins to form. Meanwhile, preheat oven to 400°F/220°C, with racks in upper and lower thirds.
When the batter is dry to the touch, place into the preheated oven and bake for 2 minutes, then quickly turn it down to 300°F/150°C, bake for 5 minutes, then rotate the baking sheets (upper and lower racks), cover the sheets with foil, and continue to bake for 5 minutes. Remove from oven and transfer to cool on the cooling rack. Once cooled, slide a knife (fragile, must be careful) underneath the macarons to remove from the parchment paper.
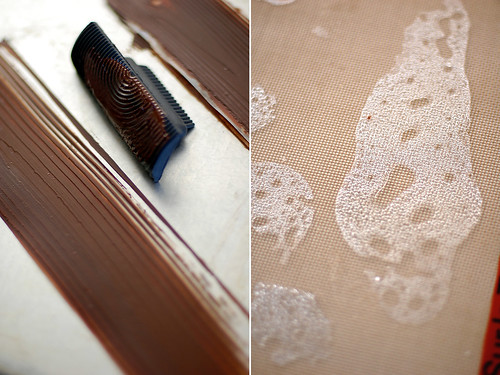
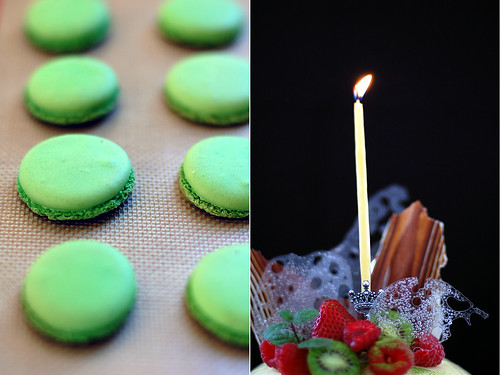
Wood Grain Pattern Chocolate Decoration
80g bittersweet chocolate, finely chopped
120g white chocolate, finely chopped
Chop the bittersweet chocolate into tiny pieces and place into a dry heatproof mixing bowl. Temper the chocolate by melting it in the microwave. Need to do it on medium for 4~5 times and at 30 second interval. Stir the chocolate each time the microwave stops until becomes completely melted and smooth. Cool for 2 minute.
Spread out a few 2.5x14in/6x40cm acrylic strips on the back of a jelly roll pan. Dip the pattern side of the wood grain comb into the chocolate, and draw the pattern on the acrylic strips. Chill in the fridge to set.
Melt and temper the white chocolate using the same method as above. Let cool to touch then spread the melted chocolate evenly with a spread knife on top of the chilled chocolate pattern. Place in refrigerator to chill and set. Carefully peel off the chocolate and break/cut into desired size.
Sugar Decoration
Some Isomalt sugar
Preheat oven to 360°F/180°C。Sprinkle the Isomalt sugar evenly on a jelly roll pan lined with silpat silicone sheet, place another silpat sheet on top, and press it down lightly. Bake for 5 minutes, remove from oven, press it lightly using a rolling pin then return it to the oven and bake for 5 minutes until sugar completely melted. Let cool completely then break/cut into desired size.
Assemble your dome:
Prep:
- Line your mold with food wrap, press firmly onto the mold to push out air bubbles, leave a 2in/6cm tail outside the mold.
- Cut the saffron crème brûlée into 16 ½cm/6 ½in round.
- Cut the matcha génoise into 16 ½cm/6 ½in round.
THIS IS FOR UNMOLDING FROM UPSIDE DOWN TO RIGHT SIDE UP. You will want to tap your mold gently on the countertop after each time you pipe mousse in to get rid of any air bubbles.
Snip off a little corner of the piping bag with the mascarpone mousse, pipe to about 1/3 height of the mold, spread evenly. Push the bavarois filling into the mousse; it will fill to 2/3 full. Pipe another layer of the mascarpone mousse, place macaron halves on top, then the saffron crème brûlée insert, another layer of mascarpone mousse and then top with the matcha génoise (syrup side down) round, press lightly. Chill in the fridge to set for at least 3 hours or overnight.
Unmold the cake by grabbing the food wrap and carefully pull upward. Once loosen, turn it out on a wire rack. Make the glaze now. Place the cake along with the rack over a large baking pan, pour the glaze on top and let flow down to cover the entire cake. The glaze jellifies quickly so work fast; let set for 30 minutes in the fridge.
Cover the entire side of the cake base with a pattern of 1 macaron half & 2 raspberries. Place the chocolate and sugar decorations at the top of the dome then arrange some fresh fruits like strawberries, raspberries, kiwi berries and mints on top then a dust of matcha powder.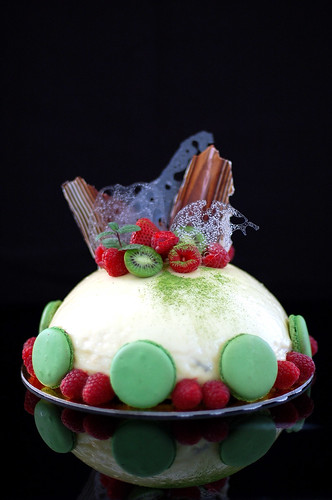
給不少的朋友做過生日蛋糕﹐但卻從沒給自己做過一個。有人說讓他人做一個給我就好了﹐為什麼需要自己動手呢? 因為這個蛋糕是要和另外兩個人- 我弟跟好姐妹Linda分享的。我們的生日很近﹐想說一石三鳥嘛﹗還有﹐今年第一次收到一個朋友做給我的生日蛋糕﹐好感動哦~~~~~~謝謝Mei跟她的姐姐們還有她可愛的侄女 ~~
這款用半圓形模具做的蛋糕是首次嘗試﹐更別說是用上8種不同風味口感的甜點素材組合而成。這個充滿田園氣息的蛋糕有個很美很符合它的名字 : Cité Jardin就法文的[田園都市]的意思﹐是日本Puissance 甜點店的井上佳哉師傅的作品。蛋糕本來是由開心果風味的杏仁蛋白蛋糕﹑開心果烤布蕾﹑白巧克力慕斯﹑果醬﹑和白巧克力奶油淋醬組合而成﹐可因我沒能買到開心果膏等材料﹐我將蛋糕的組合改了。
咋看到材料的組合可能會讓人感到構成的材料很多很忙﹐甚至繁複鋪陳的程度,足以令人咋舌﹐但味道﹑口感、氣味出乎意料的融合﹐口感鋪陳和我想像一樣的極端精緻、豐富、多樣化﹐使甘美的香氣合而為一。質地細緻綿密柔軟的馬斯卡朋慕斯包裹著帶有濃郁乳香口感綿密的白巧克力芭芭羅瓦餡心﹑富茶香的抹茶馬卡龍﹑充滿異國香氣的番紅花風味烤布蕾﹑再以襲人的淡雅茶香的抹茶海綿蛋糕托底﹑最後以富濃郁奶香的白巧克力鏡面包過著。為配合田園的主題﹐跟著井上師傅用鮮艷覆盆子﹑迷你奇異果﹑薄荷香草﹑木紋巧克力裝飾跟糖片裝飾蛋糕的頂端﹐然後在蛋糕週圍用1塊抹茶馬卡龍2顆覆盆子的花樣整個包圍﹐最後撒些抹茶點綴組合成這個鮮艷亮眼的蛋糕。
蛋糕最後只跟弟及家人分享﹐因為Linda旅行去了。如往常﹐甜點一上桌就給一掃而空。品嚐過程裡,從視覺到味蕾到整個心靈的滿足,久久難以忘懷。
田園都市
1) 抹茶海綿蛋糕
2) 馬斯卡朋慕斯
3) 番紅花風味烤布蕾
4) 抹茶風味馬卡龍
5) 白巧克力芭芭羅瓦餡心
6) 白巧克力鏡面
#1 ~ 抹茶海綿蛋糕 (點這裡)
蛋糕可以前一天烤好﹐包好室溫存放。
#2 ~ 番紅花風味烤布蕾 - 直徑8in或18cm圓形烤模1個
220g 鮮奶油
60g 全脂奶
20g 熱水
12根 番紅花
40g(3個M尺寸) 蛋黃
40g 砂糖
用小碗盛著番紅花﹐加熱水泡5分鐘後﹐倒進小鍋中。跟著將奶﹑鮮奶油也倒進小鍋﹐用中火慢慢加熱﹐ 煮至沸騰時立刻熄火﹐蓋上鍋蓋泡10 – 15分鐘。
預熱烤箱至240°F/120°C。將蛋黃和砂糖混合充份攪拌勻至淡白﹐慢慢注入過濾後的番紅花熱奶漿﹐邊倒邊攪拌﹐攪拌均勻後在奶漿上方鋪上一片餐巾紙﹐輕輕地吸取掉泡沫後倒進模具中。將模具放進有深度的烤盤裡﹐然後注入熱開水達模具一半的高度﹐再放進預熱過的烤箱裡烘烤40分鐘。當搖晃模具時布蕾中央會抖動但週邊不動即烤好了。取出﹐待室溫放涼﹐蓋上保鮮膜﹐放冰箱冷卻一個小時或一個晚上。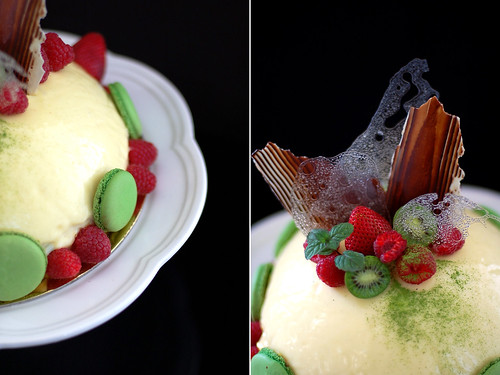
#3 ~ 白巧克力芭芭羅瓦餡心
260g 鮮奶油
110g 全脂奶
56g 白巧克力﹐切碎
45g 蛋黃
20g 砂糖
6g 魚膠片
18g 蛋白
9 g 細砂糖
事前準備:
- 在一個19cm/7 ½ in的半圓形模具裡鋪上一層保鮮膜(四邊留約2in/6cm的尾巴)﹐按壓出氣泡讓保鮮膜貼服﹐備用。
明膠片用冰水泡軟之後擠掉水分﹐備用。將切碎的白巧克力倒進一個耐熱容器中﹐隔熱水加熱融化後﹐放溫水浴中保溫。
將牛奶倒進鍋子裡用中火加熱﹐煮沸後離火。將蛋黃和糖混合倒進一個大的拌碗中﹐用電動攪拌器以中速打發至顏色變淡白﹐然後邊打發邊細絲般的慢慢地注入滾燙的牛奶﹐拌勻後﹐倒回小鍋中以小火加熱﹐用打蛋器持續不斷的攪拌至變稠至溫度為170°F /85°C後離火﹐約2分鐘。加進泡軟的魚膠片攪拌融化後﹐邊攪拌邊慢慢地拌進融化的的白巧克力中﹐用橡皮刀攪拌至順滑﹐使其乳化。過濾後﹐放冰水浴中降溫。
用電動打蛋器打發鮮奶油至變富含空氣出現軟角的程度﹐然後將3分1拌進微溫的巧克力漿中﹐用橡皮刀輕輕的源邊往下刮翻切拌勻。拌入剩下打發好的鮮奶油﹐輕輕的拌勻。
用電動攪拌器以低速打發蛋白至起泡﹐然後分數次的加入細砂糖打發﹐打至富含空氣出現結實尖角的程度為止。將3分1拌進巧克力乳漿中﹐用橡皮刀輕輕的源邊往下刮翻切拌勻﹐再拌入剩下的蛋白霜拌勻。倒進鋪了保鮮膜的模具中﹐輕輕敲一下釋放氣泡後﹐放進冰箱冷藏凝固最少2個小時或一個晚上。
#4 ~ 馬斯卡朋慕斯(點這裡)
將慕斯倒進擠袋裡備用。
#5 ~ 白巧克力鏡面
鏡面很容易凝固﹐所以最好在裝飾前製作。
240g 白巧克力﹐切碎
200g 全脂奶
80g 玉米糖漿
7g 魚膠片
事前準備:
- 明膠片用冰水泡軟之後擠掉水分,備用。
先將切碎的白巧克力隔熱水加熱融化備用。將牛奶和玉米糖漿混合倒入小鍋裡﹐用中火加熱﹐不時攪拌讓液體不會煮焦﹐煮沸後離火。將奶漿倒入白巧克力中﹐用橡皮刀攪拌均勻至順滑﹐加入泡軟的明膠片﹐拌勻至融合﹐放涼備用。
#6 ~ 抹茶風味馬卡龍 - 30個
義式蛋白霜
55g 蛋白
150g 細砂糖
40 g 水
Tant pour tant
150g杏仁粉
150g 糖粉
15g 抹茶
55g蛋白
1滴綠色食用色素
苦甜巧克力甘那許夾心餡
覆盆子風味奶油餡心
事前準備:
- 準備兩張烤纸﹐然後在每一張的反面畫上直徑3cm間隔3cm的小圓圈。鋪在烤盤上。
- 準備兩張相等於烤盤大小的包裝鋁箔紙﹐備用。
要注意什麼呢?
- 擠出麵糊後要放置到表面乾燥為止才可進烤箱。
- 擠麵糊時先固定一個點再擠出是要訣。
混合抹茶、杏仁粉、糖粉﹐過篩2次後倒進一個大的拌碗中。將55g的蛋白倒進粉中﹐用橡皮刀確實攪拌勻成膏狀後靜置備用。
把水和細砂糖混合倒進小鍋中﹐以中火熬煮至出現黏稠狀﹐用手指沾黏(非常燙喔﹗)會牽出糖絲的程度(約230°F/116°C) 即可。在煮糖漿的同時﹐將55的蛋白用電動打蛋器以高速打發至起泡但還沒出現尖角的程度。轉低速繼續仔細打發﹐然後邊打發邊細絲般的慢慢地注入滾燙的糖漿(千萬不要攪拌糖漿不然會結晶),完全注入糖漿後轉中速繼續打發﹐直到冷卻出現結實尖角的程度至光滑立體狀態為止﹐約5分鐘。最後倒入1滴綠色食用色素﹐拌勻。
將3分1的蛋白霜拌入的抹茶杏仁粉糰中﹐用橡皮刀從底部往上翻起的方式拌勻。分兩次加入剩餘的蛋白霜 ﹐拌勻後進行macaronnage*程序。將麵糊從底部往上翻起再往拌碗的內壁壓推勻15次至表面紋理細緻且有光澤的麵糊為止。
將麵糊裝入擠花袋中﹐在先前畫了圓圈的烤盤紙上擠出圓形的麵糊。先固定一個點﹐再從上方擠出比直徑2cm稍小的圓形。總共擠出60個﹐放置30分鐘讓表面乾燥﹐用手摸不沾黏即可。放置的同時預熱烤箱至400°F/200°C。
待表面形成薄膜後用400°F/200°C烘烤2分鐘﹐然後迅速降溫到300°F/150°C繼續烘烤5分鐘。迅速取出烤盤各自覆上包裝鋁箔紙﹐放回烤箱時將烤盤調換 (上下烤架) 好 讓馬卡龍烤的均勻﹐再烘烤5分鐘﹐取出﹐放網架上靜置放涼後用抹刀取下﹐備用。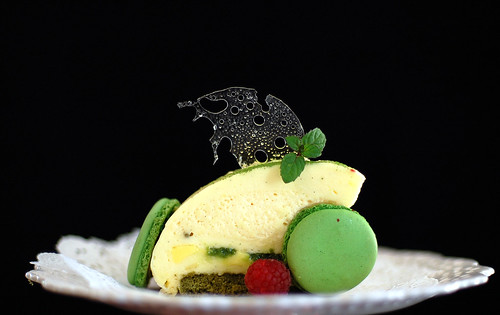
木紋圖案巧克力裝飾
80g 苦甜巧克力﹐切碎
120 g 白巧克力﹐切碎
苦甜巧克力切碎後﹐放進一個耐熱的碗裡。碗一定要確實擦乾﹐不可有任何水份。放進微波爐裡加熱。分4~5次﹐每一次間隔為30秒的加熱及調溫巧克力。每一次都要確實攪拌勻至完全融化的狀態﹐放涼約2分鐘。
將蛋糕卷專用模具或方形模具倒轉﹐鋪上矽膠條(2.5x14in/6x40cm)。用木紋梳子沾取少量的調溫後的巧克力﹐塗抹在矽膠片上劃出圖案﹐放進冰箱凝固定形。
將白巧克力調溫融化後﹐用抹刀的前端沾取少量薄薄地填平在凝固定形後的苦甜巧克力上﹐在常溫下凝固後﹐再放進冰箱定形。
烤糖片裝飾
適量 Isomalt糖
預熱烤箱至360°F/180°C。將Isomalt糖均勻的灑在烘烤膠蓆上﹐蓋上另一片烘烤膠蓆﹐輕壓﹐然後放進烤箱烤5分鐘。取出﹐用桿麵棍輕壓一下﹐再烘烤5分鐘至完全融化後取出。放涼後將糖片切成你需要的大小。
組合及裝飾蛋糕:
事前準備:
- 在一個19cm/7 ½ in的半圓形模具裡鋪上一層保鮮膜(四邊留約2in/6cm的尾巴)﹐按壓出氣泡讓保鮮膜貼服﹐備用。
- 將烤布蕾切割成16 ½ cm/6 ½ in的圓形片﹐備用。
- 將蛋糕體切割出16 ½ cm/6 ½ in 的圓形片﹐備用。
將裝著馬斯卡朋慕斯的擠袋剪去一角﹐先擠些慕斯填滿模具至3分滿﹐推勻並薄薄地鋪平至模具邊緣﹐輕輕敲一下模具釋放氣泡。將白巧克力芭芭羅瓦餡心填入馬斯卡朋慕斯中﹐然後再擠入一層馬斯卡朋慕斯至模具7分滿。鋪上馬卡龍片﹐將烤布蕾填入慕斯中﹐再一層薄薄的馬斯卡朋慕斯﹐推平﹐最後鋪上塗了糖水的蛋糕片﹐往下輕按﹐將蛋糕放入冰箱冷卻定形3小時或一個晚上。
取出蛋糕﹐兩手拉著保鮮膜往上提﹐待蛋糕體可以拉離模具時翻轉倒扣脫模。製作巧克力鏡面。
將蛋糕連網架擺放在深的烤盤上。將微溫的鏡面淋在蛋糕上﹐任鏡面溢滿源周邊流下包覆整個蛋糕(連烤盤一起提起輕敲一下會幫助甘那許源邊流下)。記住這時動作要迅速,因為溫度容易下降﹐鏡面很快就會凝固。將蛋糕放冰箱凝固定形30分鐘才可以裝飾蛋糕。
以1個馬卡龍片2個覆盆子的比例貼在蛋糕的側面。將烤糖片﹑木紋圖案巧克力裝飾隨意的插在蛋糕的頂﹐然後擺放一些新鮮的覆盆子﹑草莓﹑迷你奇異果﹐及薄荷等等。最後在表面撒一些抹茶粉即可。
Isn't it gorgeous? This gorgeous arrangement is the topper on a cake that Mei made for my birthday. Mei is the owner of this lovely flower shop.
~~~~~~~~~~~~~~~~~~~~~~~~~~~~~~~~~~~~~~~~~~~~~~~~~~
我不是說過Mei送我一個手工蛋糕嗎? 這些花是她用作裝飾蛋糕用的。是不是很漂亮?﹗當然啦﹐她可是花店老闆娘耶﹗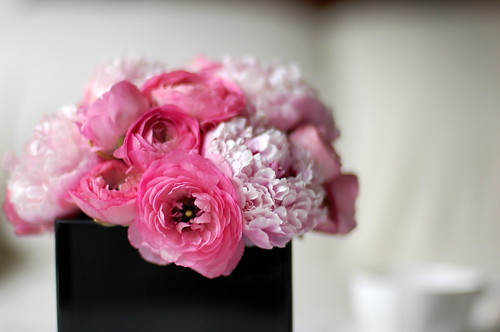
Sunday, February 22, 2009
Eggs, 2 ways ~ 以蛋為主角的甜點 =)
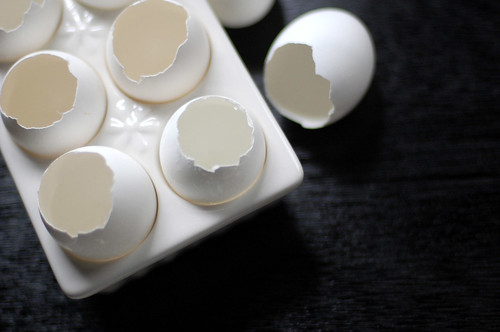
The egg is the simplest, highly nutritious and versatile food. Not only can be prepared into savory dishes like omelets and egg benedicts but also a favorite of pâtissiers and dessert chefs. It is important to use fresh eggs whenever possible but it is quite difficult for those who live in the city - local farmers’ markets are your best bet. When mom came home from Friday’s farmer market with 2 dozens of farm fresh eggs, I was quick on my feet to use them for desserts.
First is a simple vanilla custard, quintessentially English but it is known as crème Anglaise to most; made of a mixture of cream and eggs thickened by gentle heating. It is favored for serving warm alongside grilled stoned fruits, cakes; chilled and layered with jelly, mousse in frozen desserts, or churn it using an ice-cream machine to make your own ice cream. Though I made the traditional vanilla flavor, its flavoring options are virtually unlimited, whether infused with spices, scented with flower essences, spiked with booze, or enriched with chocolate. The vanilla bean I used is the Madagascar Bourbon variety. It blends beautifully with all the ingredients and didn’t just stand out by itself.
Traditionally, egg soufflé refers to a savory dish that is served over Sunday brunch. This dessert should be called faux soufflé because it requires no baking! When I saw it made into a dessert and served in egg shell, I thought it was just too cute to pass off ;)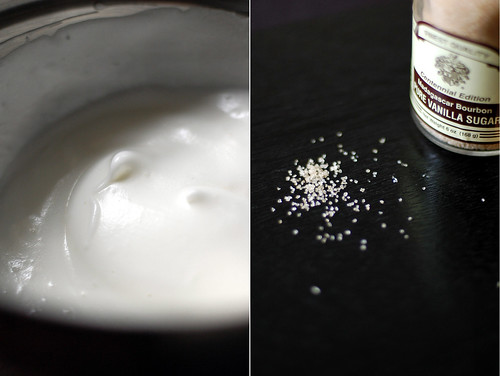

How to prepare eggshells as serving vessels:
Using a paring knife, score the top of the eggshells, and carefully crack. Separate egg whites and yolks. Bring a small pan of water to a boil. Add eggshells, and boil 3 minutes. Using a slotted spoon, remove shells, drain then scrape out membrane, and discard. Set eggshells aside in an egg carton.
Egg Soufflé – makes 8 (eggshells)
Adopted from Michel Richard in Off Duty
Lemon Curd
recipe here
Meringue
2 large egg whites
100g caster sugar
Whisk the egg whites, adding sugar little by little, until they form soft peaks. Pour the meringue into a piping bag, snip a little corner, and pip into the prepared eggshells to 1/3 full. Spoon a teaspoon of the lemon curd on top of the meringue then pip meringue until full.
Before serving, place it into the microwave and heat for 5 second (this will cook and sterilize the egg whites). Burn the top with a blowtorch or put under a hot grill for a few seconds.
Vanilla Custard Served in Eggshells
Makes 6 eggshells - adopted from Martha Stewart
2 large eggs
1 cup whole milk
½ cup whipping cream
¼ vanilla bean, seeds scraped
¼ cup vanilla sugar
3g leaf gelatine
¼ teaspoon salt
Separate egg whites and yolks. Transfer the egg yolks to a bowl; reserve egg whites for another use.
Put milk, cream, vanilla bean and seeds, and sugar into a medium saucepan. Cook over low heat, once sugar dissolved, add in the pre-soaked gelatine, stirring until completely dissolved, removes from heat.
Whisk salt with egg yolks. Slowly whisk in hot milk mixture until combined, and then pour back into saucepan. Cook over low heat, stirring occasionally, until custard is thick enough to coat the back of a spoon, about 5 minutes. Remove vanilla bean then pour custard through a sieve. Divide custard among the eggshells, refrigerate until set, about 2 hours.
雞蛋有良好且均衡的營養成分﹐可做成簡單卻又華麗的蛋料理像蛋捲﹑班尼迪客蛋﹐更是烘烤﹑製作甜點不可缺的材料。挑選雞蛋的重點是它的鮮度。越是新鮮的雞蛋其蛋黃和蛋白的張力越強﹐在打發起泡時越是結實鬆軟。而放在冰箱冰過的雞蛋張力也很強﹐打發時也容易起泡。對於我們這些城市人來說﹐想吃新鮮的雞蛋好像也只有往農夫市場碰運氣了。媽媽的運氣還不賴﹐前幾天從市場帶回從雞蛋農場買到的新鮮雞蛋﹐我迫不及待的拿了一些做甜點。
簡單的製作了卡士達奶黃布丁及蛋舒芙蕾。說到這個卡士達奶黃醬﹐我想大家應該不陌生。它的另一個名字是英式奶黃醬﹐有著甜而不膩且滑潤的口感﹐在甜點裡面算是運用最廣、最多的醬料。它不僅是佐簡單烤核果的最佳醬料﹐也可與打發的鮮奶油、果膠拌勻而變身為美味的慕斯甜品,還可以做成冰淇淋﹐用途廣泛。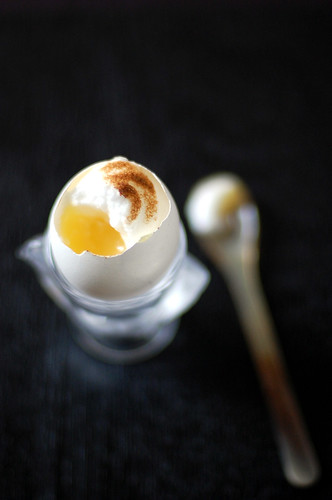
我用產自瑪達加斯加的波旁香草Bourbon vanilla來調味﹐氣味溫和但同時擁有芬芳無比的香氣。倘若與其他材料結合的話,它的變化更是豐富﹑多樣化的。大家不妨採用香味藥草﹑乾燥辛香料﹑甜酒﹑巧克力來加強香氣及調味﹐會有意想不到的效果喔~
而小小的蛋舒芙蕾是我在Off Duty書裡看到並迷上的甜點。食譜由Citronelle的主廚﹐ 人稱French-Californian料理之父Michel Richard 提供。是不是很可愛?﹗ 這個甜點除了有可愛的造型﹐享用的人吃到蛋黃即檸檬乳醬時驚喜無比呢^^
如何將蛋殼處理作容器:
先用小刀在蛋殼上劃痕﹐將蛋一一小心翼翼劃破﹐然後將蛋黃和蛋白分別盛進碗裡﹐蛋殼備用。燒開一小鍋水﹐將蛋殼放滾水中燙3分鐘後﹐撈起瀝乾﹐去掉蛋殼內壁的透明膜﹐裡外抹乾備用。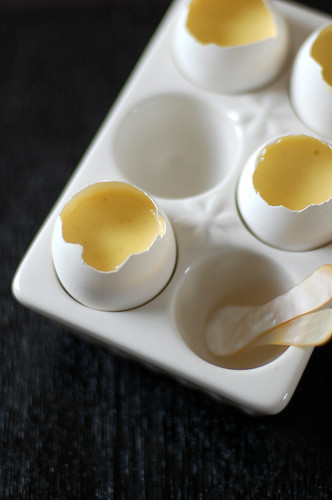
蛋舒芙蕾 – 蛋殼8個
檸檬乳醬
食譜在這裡
蛋白霜
2 個大的蛋白
100g 細砂糖
要注意什麼呢?
- 製作蛋白霜時﹐儘量選擇新鮮或冰過的雞蛋為要。
用電動攪拌機將蛋白打發至柔滑、顏色變白。將細砂糖小量地分數次加入蛋白中﹐仔細發泡﹐打至出現軟角成光滑立體蛋白霜的程度為止。
將蛋白霜倒入擠袋裡,剪去一角﹐將蛋白霜擠進蛋殼裡至3分滿﹐取1茶匙檸檬乳醬舀入蛋殼中﹐然後整體擠滿蛋白霜。
享用前將它們放進微波爐以高溫加熱5秒達殺菌的功效。上桌前用烹飪用噴槍將正面﹑側面焦化上色即可。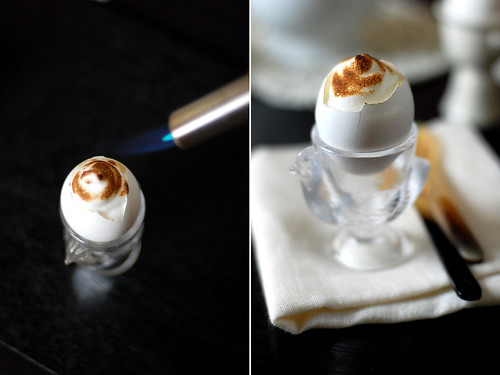

香草卡士達奶黃布丁- 蛋殼6個
改自Martha Stewart
2大的雞蛋
1杯全脂奶
½杯鮮奶油
¼香草荳﹐開半刮籽
¼杯香草風味砂糖
3g魚膠片
¼茶匙鹽巴
事前準備:
- 明膠片用冰水泡軟之後擠掉水分,備用。如果用明膠粉: 將明膠粉倒入水裡 (2大匙) 泡脹後備用。
- 將蛋黃跟蛋白分開﹐再分別盛進碗中。
將牛奶﹑鮮奶油﹑香草荳和籽﹑及香草砂糖混合裝進小鍋裡,以低火煮至砂糖融化即離火﹐加入泡軟的明膠片,確實拌勻備用。
用打蛋器攪打蛋黃和鹽巴至顏色變淡。將熱奶漿慢慢地注入蛋糊中﹐這時要用打蛋器不斷攪打﹐拌勻後﹐倒回小鍋中加熱。用打蛋器持續不斷的攪拌至變稠﹐並可以在木匙背劃出清晰的線條時(約5分鐘)﹐蛋黃醬就完成了﹐離火。將蛋黃醬過濾﹐倒進蛋殼中至滿﹐ 放進冰箱冷藏凝固約2小時。
Friday, February 13, 2009
St. Valentine’s Day: Coup de coeur ~ 草莓花蜜慕斯蛋糕
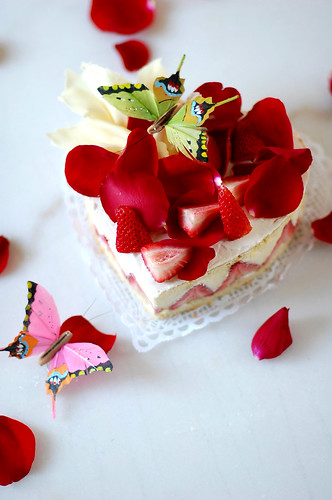
Happy St. Valentine’s Day, everyone! This is my Valentine’s gram to you =)
This is a remix version of the classic French fraisier or strawberry shortcake! Instead of filling it with crème patisserie, I filled it with honey mousse, something I have been tempted to do since I got myself a copy of Christine Manfield’s Desserts. There isn’t a fraisier recipe in her book but when I saw the recipe for the honey mousse I immediately thought of it as a substitute for the cream filling. It is so much lighter! However, I can’t guarantee that it is skimmer^^ I also used her génoise sponge recipe but made some adjustment to it. The recipes were easy to follow but the end result is marvelous!
Coup de coeur
yields 2 - 6x2in cakes
Almond Génoise Sponge Cake
5 large eggs, separated
150g granulated sugar
80g almond flour
70g all purpose flour, sifted
1tsp vanilla essence
50g unsalted butter, melted and cooled
Preheat oven to 320°F/160°C. Grease a 24cm round cake pan with generously with butter and line it with parchment paper.
Sift together almond flour and flour. Whisk the egg yolks with the sugar until pale and creamy. Add in the sifted flour mix, vanilla essence, the melted butter; stir until combined after each addition. In another bowl, whip the egg whites until stiff peaks form then gently fold it into the cake batter with a spatula, fold until incorporated.
Pour the batter into the prepared pan, tap the pan slightly on the counter to release any air bubbles, bake for 20 minutes or until golden. Turn out onto a wire rack to cool completely. Slice it into 10mm thick rounds then stamp it with the heart shaped mousse ring.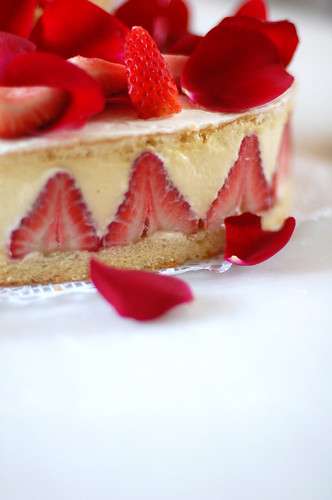
Acacia Honey Mousse
320ml whole milk
60g *Miele di Acacia (Acacia Honey)
4 egg yolks
100g granulated sugar
7g gelatine leaves
250ml heavy cream
*Elegant and rich, Acacia honey is called the "moonflower honey" in Italy. It has a clean, light vanilla flavor. It tastes delicious with coffee or tea, also great drizzled over toast, ricotta cheese or shaved hard cheeses.
First, bring a pot of water to boil then reduce to low heat once boiled. Bring the milk and honey to just boil over medium heat; stirring constantly to avoid burning the mixture. Remove the honey milk mixture once reached simmering point. Meanwhile, whisk the egg yolks with the sugar in a bowl then whisk in the honey milk slowly. Place the bowl over the pot of simmering water and stir gently until the mixture thicken into a custard or until it coats the back of a wooden spoon then remove from heat. Stir in the pre-soaked gelatine leaves, stir until completely dissolved. Pass the custard through a fine meshed sieve and place into a bath of icy water to cool. Whisking constantly to keep it aerated as it cools.
Whip the cream until stiff peaks form then fold 1/3 of this into the cooled custard, mix until combined. Fold in the rest of the whipped cream until combined. Spoon the mousse into a piping bag without a tip, set side.
Kirsch Syrup
2tbsp granulated sugar
4tbsp water
2tsp Kirsch (cherry liqueur)
Put sugar and water in a heatproof bowl then place it in the microwave to dissolve the sugar, about 30 seconds. Let cool until adding kirsch to the mixture, stir until combined.
Rose Flavor Chantilly Cream
200ml heavy cream
2tbsp caster sugar
1tsp rose essence
Place the cream, sugar and rose essence in a bowl and whip until semi-stiff peaks form.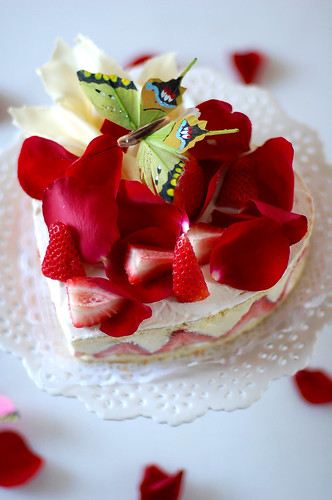
Assemble and decorating the cake:
Place the mousse molds on a tray then put a cake base inside each mold then brush a layer of kirsch syrup on top. Arrange the strawberry halves cut side to the side of the mold, pipe the honey mousse in between the strawberries and fill up to about 1/2 of the height of the moulds. Arrange strawberries on cake base until full, pipe more mousse until almost to the top, take another piece of cake, brush a layer of syrup then place it on top with syrup side facing down. Push it down slightly with your palm to take out any air bubbles then place in fridge to set for 1 hour.
Remove from fridge. To unmold the cakes, wrap a hot towel around the mold for 10 second then use your fingers to push the cake upward. With an icing knife in hand, spread the cream onto the cake center, move the knife over the top to get a smooth finish. Decorate with white chocolate ruffles, rose petals and fresh strawberries.
情人節快樂﹗這是阿Vi送你的情人節禮物喔~
這個蛋糕是法式經典草莓蛋糕fraisier的變奏版。由原本奶油餡心(crème patisserie)改成了花蜜慕斯﹐口感清爽許多。不知為啥在翻Christine Manfield的Desserts一書時看到這個食譜馬上就想到用它做為fraisier的餡心。傑諾瓦士海綿蛋糕的食譜也是來自這書﹐不過我加了杏仁粉﹐蛋糕體也變的較濕潤。食譜雖然簡單﹐但是甜點整體味道豐富有層次。蜜糖的濃郁甜味配酸酸的草莓合適的不得了﹐吃了滿嘴的草莓奶香~
草莓花蜜慕斯蛋糕 ~ 法式經典草莓蛋糕變奏版
2個 - 直徑6x2in 心形蛋糕
杏仁傑諾瓦士(海綿)蛋糕 ~直徑24cm/10寸圓形模具1個
將原份量的一半麵粉用杏仁粉代替﹐所以有別於傳統海綿蛋糕﹐口感品嚐起來較濕潤及清爽。
5 個 大的蛋黃
5 個 大的蛋白
150g 砂糖
80g 杏仁粉
70g 麵粉, 篩過
1tsp 香草精
50g 放涼的澄清無鹽奶油
事前準備:
- 將一烤架移到烤箱中格﹐烤箱預熱至320°F/160°C。
- 模具抹上厚厚的奶油﹐再鋪上烘烤紙﹐備用。
將杏仁粉和麵粉混合篩過﹐備用。用電動攪拌器以中速攪打蛋黃和砂糖﹐攪打至富含空氣且顏色變淡為止。加進篩過的杏仁麵粉﹑香草精﹑及放涼的澄清無鹽奶油﹐每加進一樣就要確實拌勻。
在另一大碗裡加進蛋白﹐用電動打蛋器以低速將蛋白打發至起泡出現軟角的程度時﹐將速度加至中速打發至立體為止。小量地將蛋霜拌入麵糊裡﹐用橡皮刀源邊往下刮翻切拌勻﹐會如緞帶般重疊時即可。
輕輕地將麵糊倒進烤模中﹐輕輕敲一下烤模釋放氣泡後﹐放進預熱過的烤模裡﹐烘烤約20分鐘。等烤到焦色恰到好處時﹐週圍會因烤熟而稍稍縮小﹐烤模和蛋糕體間就會出現空隙﹐輕按蛋糕中間時感覺到彈性即烤好。也可以用竹籤插入中央﹐慢慢拔出時不會沾黏﹐就烤好了。從烤箱取出﹐翻轉倒扣脫模﹐擺在網架上整個放涼。將海綿蛋糕橫切成10mm厚片﹐然後用直徑6x2in的心形慕斯模吸切出4片蛋糕片﹐備用。
如果不立刻使用﹐可將蛋糕包好放冰箱存放﹐可以保存3天。使用前靜置回溫即可。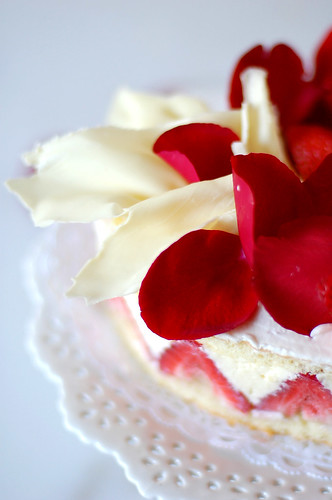
洋槐花蜜慕斯
取自洋槐又名相思樹花之蜜,清澈純淨的色澤,細緻高雅的風味中帶有洋槐花香。
320ml 全脂奶
60g 洋槐(相思)花蜜
4 蛋黃
100g 砂糖
7g 魚膠片
250ml 鮮奶油
事前準備:
- 明膠片用冰水泡軟之後擠掉水分﹐備用。如果用明膠粉﹐將其倒入水裡泡脹後備用。
製作蜜糖蛋黃醬:
先燒開一小鍋的水﹐轉小火。將牛奶跟蜜糖混合裝進小鍋裡,以中火煮至剛沸騰即離火﹐備用﹔要不時地攪拌以免燒焦。
用電動攪拌器以中速攪打蛋黃和砂糖至顏色變淡。將蜜糖奶漿慢慢地注入蛋糊中﹐這時要用打蛋器不斷攪打。放小鍋上隔熱水加熱﹐用打蛋器持續不斷的攪拌至變稠﹐並可以在木匙背劃出清晰的線條時(約10分鐘)﹐蜜糖蛋黃醬就完成了﹐離火。加入泡軟的明膠片,確實拌勻後將蜜糖蛋黃醬過濾﹐再放進冰水浴中﹐並不時的攪拌至完全放涼。
製作花蜜慕斯:
將鮮奶油打發至出現尖角的起泡程度﹐用切拌法(用橡皮刀源邊往下刮翻)將3份1份量的發泡鮮奶油拌入蜜糖蛋黃醬中﹐攪拌乳化後﹐拌入剩餘的鮮奶油﹐確實攪拌勻備用。
櫻桃酒糖漿(塗抹蛋糕用)
4湯匙 清水
2湯匙 砂糖
2茶匙 櫻桃利口酒
清水﹑砂糖裝進小碗裡﹐再放微波爐微波30秒煮沸至砂糖融化為止。放涼後拌入櫻桃利口酒備用。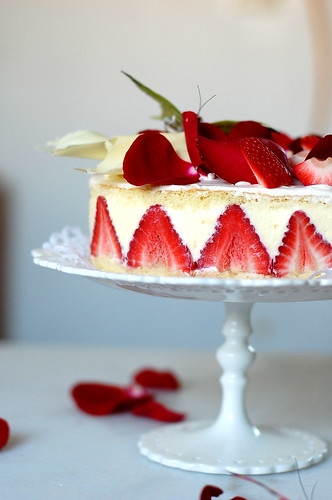
玫瑰風味香堤麗鮮奶油 – 約1 ½ 杯份量
200ml 鮮奶油
2湯匙 細砂糖
1茶匙 玫瑰精
將鮮奶油﹑玫瑰精﹑和細砂糖放入mixing bowl裡﹐用電動打蛋器先以低速打發鮮奶油至起泡﹐再轉中速攪打至出現尖角的程度。將鮮奶油放冰箱冷藏10分鐘即完成。
組合及裝飾蛋糕:
將一片蛋糕片鋪進慕斯圈中﹐在表面用刷子塗上櫻桃酒糖漿﹐然後將切掉蒂頭﹑對半縱切的草莓原著模型邊緣排列。將慕斯倒進擠袋裡﹐剪去一角﹐先擠些慕斯填滿草莓間的空隙﹐然後由外往中心整體填滿慕斯至半滿。將去蒂的草莓排列填滿整個模型﹐然後再擠進慕斯填滿。在另一片蛋糕片的表面塗上櫻桃酒糖漿﹐塗面朝下疊蓋在慕斯上﹐輕壓使其確實貼黏著﹐放入冰箱冷卻凝固60分鐘。
取出蛋糕﹐將蛋糕脫模﹐以溫毛巾圍著模型溫熱10秒後﹐用手指將慕斯往上推出脫模。用抹刀將玫瑰香堤麗鮮奶油平均的塗抹在蛋糕的正上方。在蛋糕上方的一角擺放白巧克力裝飾﹐再擺放滿滿的玫瑰花瓣及草莓即可。
Sunday, February 8, 2009
In season: Lemon Mousse with Citrus Curd ~ 檸檬慕斯乳醬杯
Since I developed an interest in pastry and baking, all these gorgeous food magazines seem to just appear out of no where! To name some of my favorite reads: Donna Hay, Delicious, Elle à Table, エル・ア・ターブル(Elle à Table in Japanese) Gourmet Traveller , Saveurs , Vogue Entertaining + Travel , and fresh off the press is jamie magazine - Jamie Oliver’s newest project - which was launched this past holiday! These are food magazines that seamlessly married beautiful photography with stunning styling! I strongly recommend that you look for a copy of any of the above on your next trip to a book store. I am positive that you won’t be disappointed^^
Oh back to this dessert – so we know that citrus are in season and like any other great chefs would do – cook with what is in season! Plus I got the prefect recipe for it too^^
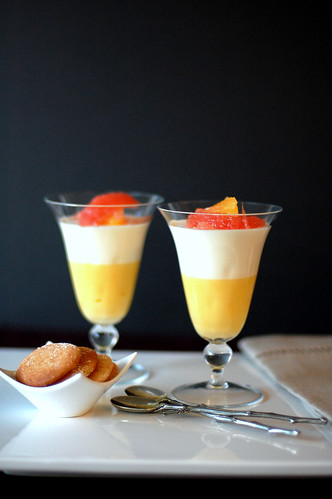
The recipe belongs to Andy Bunn of Café Sopra at Fratelli Fresh in Australia, who also is a contributor at VE+T. I have been eager to give this lemon mousse with citrus curd a try since I saw it on the cover of Vogue Entertaining + Travel (Vol.33 no.4) - it simply looked divine. Now that the citrus in my garden are at their best, I couldn’t wait any longer. I made these as the finale for a family dinner over the weekend and it was well received.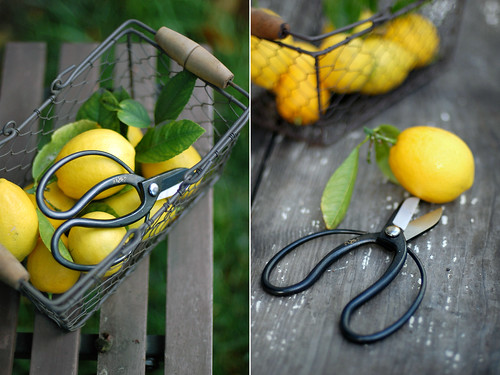
I stayed true to his recipe and didn’t make any adjustment except adjusting the quantities of some ingredients. It tasted lovely, airy and has an ultra silky texture. I served them with elderflower thins giving that it is quite tangy – a recipe I found in the Delicious December issue. I came to love anything make with elderflower after having eaten this dessert. Btw, this is great to be served at the Valentine’s Day dinner that you may be preparing. Talking about Valentine’s Day, I have just the perfect cake recipe in mind but let’s just hope that I am able to share with you before this date….
Lemon Mousse with Citrus Curd
Citrus Curd
175g caster sugar
3Lrg. eggs, lightly beaten
125g unsalted butter, chopped into cubes
Juice of 3 lemons
Lemon Mousse
200ml fresh lemon juice
160g caster sugar
10g leaf gelatine
300ml whipping cream
250ml water
Garnish:
1 pink grapefruit
1 orange
Some candied kumquat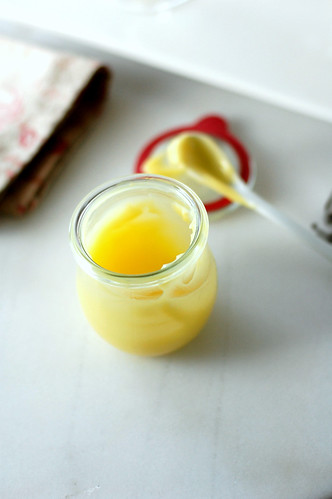
Make the citrus curd:
Place the lightly beaten eggs, lemon juice, caster sugar and butter in a heatproof bowl and place it over a saucepan of simmering water. Using a whisk, whisk the mixture continuously until it becomes thicken and glossy. Remove from heat, cool slightly then spoon into an airtight container and let chilled.
Make the lemon mousse:
Bring lemon juice, sugar and water to a boil over medium heat. Continue to boil until sugar completely dissolved then remove from heat. Add in the pre-soaked gelatine and still until completely dissolved. Place the mixture in an ice water bath and let cool completely, stirring occasionally. This cooling step is critical: otherwise, when the cream folded in, the two mixtures will separate into two layers. While the lemon mixture is being cool, whisk the cream until soft peak forms then fold it into the chilled lemon mixture until combined. It should look runny/loose at this point.
Spoon and divide the citrus curd among 6 glasses, tap glasses lightly to release the air bubbles, place 1 - 2 pieces candied kumquat on top then spoon in the lemon mousse next and chill for at least 2 hours or overnight to set. Garnish with orange and grapefruit slices, also some grapefruit pulps.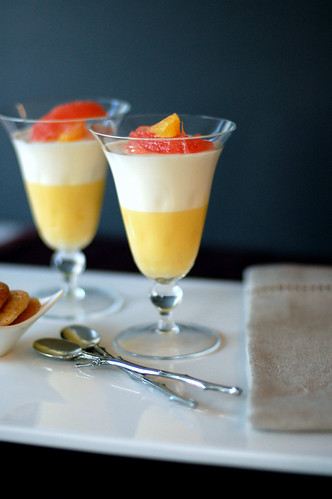
Elderflower thins – makes about 50 cookies
100g unsalted butter, softened
110g caster sugar
1 egg
1tbsp elderflower syrup
200g all purpose flour, sifted
1tsp baking powder
I thought you should know:
- Only bake the cookies the day you plan to serve them to keep its flaky texture.
Sift together flour and baking powder and set aside. Place the unsalted butter in a bowl, mash it with a spoon. Add in the sugar and stir with a spoon to combine. Add in the flour mixture gradually until combined then add the elderflower syrup, egg and mix to form a soft dough ball.
Turn the dough onto a lightly floured work surface and roll into a cylinder. Wrap it with parchment paper, place it in the freezer and chill for 2 hours.
Take the dough out and let rest for 15 minutes to soften; meanwhile, preheat the oven to 380°F/190°C. Cut the dough into 5mm slices and bake for 15 minutes or until golden. Remove from oven and let cool on wire rack.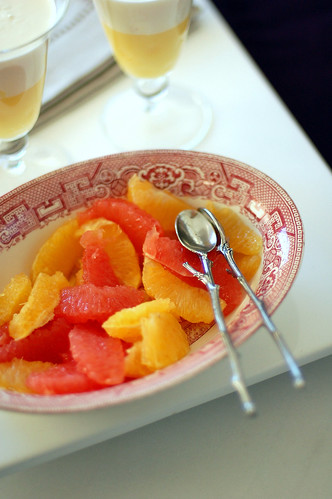
自從對甜點跟培烘產生濃厚的興趣﹐突然間像發現新大陸似的發現很多讓我眼睛為之一亮的烹飪雜誌。奇怪了﹐為什麼以前都好像沒看到呢?﹗其中又以Donna Hay, Delicious, Elle à Table, エル・ア・ターブル(Elle à Table 的日文版) Gourmet Traveller, Saveurs, Vogue Entertaining + Travel, 還有去年 十二月才創刊的jamie magazine是我每期必敗的。這些雜誌從擺盤到攝影風格都充滿美感﹐美的不像話﹗我隆重推薦給大家﹐希望你們下次進書店的時候找找看﹐我敢說你一定會得到一個視覺上的饗宴﹗
這個甜點就是來自雜誌的。大家也知道現在是柑橘當令的季節﹐大廚們常建議說多食用當季的蔬菜生果﹐所以找食譜的時候也是朝著這方向選材的。甜點食譜來自Vogue Entertaining + Travel。是由澳洲的Café Sopra的主廚Andy Bunn提供的。去年夏天VE+T的封面就是這個檸檬慕斯乳醬杯﹐咋看好不驚艷哦﹗食譜除了改了某些材料的量﹐基本是沒有更改﹐原汁原味。味道酸酸的﹐乳醬又或是慕斯的質地都非常細緻軟滑﹐入口即溶﹐ 口感輕盈的不得了﹐佐清雅的接骨木花脆餅享用會取得絕妙的均衡與和諧滋味喔~
還有過幾天就是情人節了﹐這個甜點操作不難﹐推薦大家做這個作為餐後甜點﹐酸酸甜甜像極了戀愛的感覺呢^^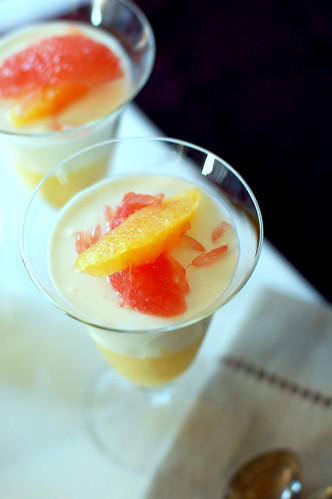
檸檬慕斯乳醬杯 - 約8杯
檸檬乳醬
175g 細砂糖
3個 L尺寸全蛋﹐稍微打發
125g 無鹽奶油﹐切丁
3個 Meyer檸檬(過濾檸檬汁)
檸檬慕斯
200ml 濾過的新鮮檸檬汁
160g 細砂糖
10g 明膠片
300ml 鮮奶油
250ml 清水
裝飾用:
1個 柳橙
1個 柚子
適量的糖漬金桔
要注意什麼呢?
- 檸檬糖漿一定要完全放涼才能拌入打發好的鮮奶油﹐要不然兩者是不能完全乳化﹐會分離的。
製作檸檬乳醬:
先燒開一小鍋的水﹐轉小火。將打散的蛋﹑濾過的檸檬汁﹑細砂糖及奶油混合裝進耐熱大碗裡,放小鍋上隔熱水攪打。用打蛋器持續不斷的攪拌至變稠﹐並可以在木匙背劃出清晰的線條時﹐約8-10分鐘﹐乳醬就完成了。稍微放涼後倒進密閉的容器裡﹐放冰箱存放。
製作檸檬慕斯:
明膠片用冰水泡軟之後擠掉水分﹐備用。如果用明膠粉﹐將其倒入水裡泡脹後備用。
把檸檬汁﹑細砂糖及水混合倒進小鍋裡﹐用中火煮至砂糖完全融化後﹐離火。加入泡軟的明膠片,確實拌勻後將小鍋放冰水浴放涼。
待檸檬糖漿放涼後﹐將鮮奶油隔著冰水打發至出現尖角的起泡程度﹐然後拌進冷卻後的檸檬糖漿中。用切拌法(用橡皮刀源邊往下刮翻)將3份1份量的發泡鮮奶油拌入檸檬糖漿裡﹐攪拌乳化後﹐拌入剩餘的鮮奶油﹐確實攪拌勻備用。
舀取3 – 4湯匙檸檬乳醬倒入杯中至3份2滿﹐抹平﹐輕輕叩幾下釋放氣泡﹐放1 - 2塊糖漬金桔在上, 然後舀進檸檬慕斯至滿﹐輕輕叩幾下釋放氣泡﹐放進冰箱冷藏凝固﹐至少2小時或一個晚上。
享用前放幾瓣柳橙﹑柚子在慕斯上﹐再撒一些柚子果肉。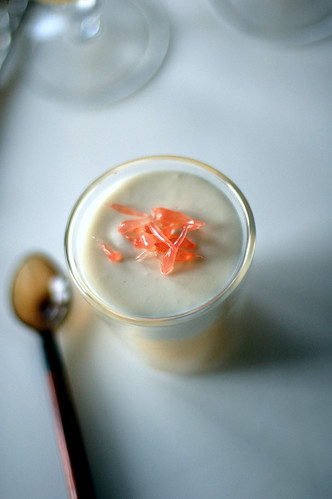
接骨木花脆餅– 約50個
100g 無鹽奶油﹐室溫放軟﹐切丁
110g 細砂糖
1 全蛋
1tbsp 接骨木花糖漿
200g 麵粉, 篩過
1tsp 發酵粉/泡打粉
要注意什麼呢?
- 這個餅乾的麵糰預先做好﹐享用的時候才烘烤方能保持酥脆的口感。
將麵粉和發酵粉混合篩過。將室溫放軟的奶油用湯匙壓散拌勻至蓬鬆。加入細砂糖攪打勻後加入小量的麵粉﹐拌勻後再加入剩下的麵粉﹐然後加入接骨木花糖漿﹐雞蛋﹐拌成糰塊。
將麵糰放在撒上麵粉的工作台上﹐揉至成圓柱狀﹐用烘烤紙包裹好再放進冰箱靜置2個小時醒麵。
取出麵糰﹐室溫回軟15分鐘。同時預熱烤箱至380°F/190°C。在餅乾烤盤上鋪上烘烤紙﹐備用。將麵糰切成約厚5mm的薄片﹐有間距地排放在鋪了烤盤紙的烤盤上﹐放入烤箱烤15分鐘或是烤到餅乾週邊變金黃色就可以了。烤好後記住要在鋼架放涼﹐否則口感沒那麼酥脆。
Wednesday, November 12, 2008
November Birthday & My 1st SHF: Matcha and Amaretto Chilled Cheesecake Served with Crème Chantilly ~ 抹茶與杏仁風味冷藏式乳酪蛋糕

Gosh, where did time go?! I didn’t even realize it is November until I was tapped for dinner for friends’ birthday! Of course, I am late for the monthly birthday post as well (what is new!). With my hectic agenda, all I could think of was how to whip up something suitably special to bring to dinner but not have to spend a full day making it. I adapted a recipe for chilled cheesecake from this wonderful book about cheesecakes by Kaori Ishibashi. I’ve found success many times with this book - this would be my 3rd entry that I’m posting here. If you’re interested how other recipes turned out then click here and click here.
I chose to do a chilled cheesecake to save time as the baked kind can take a long time and also because it can be prepared ahead of time. All exquisite in appearance, it is surprisingly easy to make. No, really, it was easy! Probably took me an hour (minus the chilling time). The hardest part was deciding what flavor of cheesecake to make. Knowing that we are having Japanese cuisine for dinner, I decided to go with something Japanesey. Therefore, matcha! I had matcha cheesecake before but I couldn’t really taste the matcha so I have been anxious to make my own. The original recipe has a subtle matcha flavor so I had to adjust to my liking. I suspect that it will taste quite different depending on what type or quality of matcha is used, so make sure you add a little bit at a time and adjust the quantity to your taste. It was paired with Amaretto cheesecake, which has a subtle almond flavor and goes well with matcha. I also recommend pairing with vanilla cheesecake.
Aside that this cake was made for people born in November; I had SHF in mind when I added the glaze and the edible gold. Susan of The Well-Seasoned Cook came up with the November theme as “all that glitters” for Sugar High Fridays (SHF). I was thrilled because for once I am not late to submit my entry^^ For those of you who have no idea what is this SHF event: it is this international sweet tooth blogging extravaganza, created by Jennifer at The Domestic Goddess. It has been going strong since October 2004, giving food lovers around the world an excuse to make something sweet each month. I am so excited to be part of this!
With this light and mousse-like, yet rich and creamy texture, you’ll return for a second serving and maybe third =) I really like this cake and I hope E & D loved it too!
Matcha and Amaretto Chilled Cheesecake – make one 6cm x 6cm x 23cm oblong cake
Matcha Cheesecake
250ml whole milk
3g agar powder* (Kanten/寒天- かんてん)
150g cream cheese
50ml whipping cream
50g granulated sugar
3tsp matcha powder
1tsp lemon juice
Amaretto Cheesecake
250ml whole milk
3g agar powder
150g cream cheese
50ml whipping cream
40g granulated sugar
2drops vanilla extract
2tbs Amaretto liquor
*What is Agar powder/Kanten? Click here!
Prep:
- Wrap the cream cheese in plastic food wrap and place in microwave on low for 1 minute to soften it.
- Sift the matcha once; set aside.
For the matcha cheesecake:
Place the cream cheese in a mixing bowl. Using a whisk, whisk cream cheese until blended then add in other ingredients in the following order: --> sugar --> lemon juice --> matcha --> whipping cream, make sure that each item is well blended before adding another; set aside.
Place milk and kanten powder in a saucepan and bring to boil over medium heat, stirring constantly to avoid mixture sticking to the saucepan. Once boil, turn heat down to low and continue to boil for another minute, stirring constantly to avoid mixture sticking to the saucepan. Remove from heat, then gradually pour the hot milk mixture into the cream cheese mixture while stirring non-stop. Mix well until combined then strain the cheese mixture; pour into the cake mold and let cool. Once cool, place into the fridge and leave to set for 2-3 hours.
For the Amaretto cheesecake:
Place the cream cheese in a mixing bowl. Using a whisk, whisk cream cheese until blended then add in other ingredients in the following order: --> sugar --> vanilla extract --> whipping cream, make sure that each item is well blended before adding another; set aside.
Place milk and kanten powder in a saucepan and bring to boil over medium heat, stirring constantly to avoid mixture sticking to the saucepan. Once boil, turn heat down to low and continue to boil for another minute, stirring constantly to avoid mixture sticking to the saucepan. Remove from heat, then gradually pour the hot milk mixture into the cream cheese mixture while stirring non-stop. Mix well until combined then strain the cheese mixture then add in the Amaretto, stir well. Pour cheese mixture into the cake mold on top of the matcha cheesecake, let cool then place into the fridge and leave to set over night or at least for 3 hours.
Crème Chantilly - makes 1 ½ cups
150ml heavy whipping cream, chilled
2tbs caster sugar
Combine chilled cream and caster sugar in a mixing bowl; using a handheld mixer, beat cream from low speed and gradually turn to higher speed until peaks form. Chill while you prepare the glaze.
Nappage au thé matcha (Matcha glaze)
Nappage is a neutral glaze use to add shine to pastry. I got it from this place.
1tsp matcha
1tbs hot water
1tsp caster sugar
2tbs neutral cold glaze
Stir together matcha, caster sugar and hot water in a small bowl. Once matcha completely melted, heat the neutral glaze on medium heat for 20 second using the microwave then add it to the matcha mixture; stir until completed combined. Let cool to touch before use.
Decorating the cake:
To unmold the cakes: wrap a hot towel around the cake mold for 10 second then flip the mold over so the cake can slide out. Brush the matcha glaze on top of cake using a pastry brush, then place in the fridge to chill for 10 minutes. Remove cake from fridge, with an icing knife in hand, spread and coat the edges on top and long sides of the cake. Move the knife with long stroke so the cream will appear smooth and mirror-like. Pull the cream atop toward the center so it will resemble melting glacier. Place it back into the fridge another 15 minutes to set. Sprinkle some edible gold before serving.
Cake Slicing 101
You can get your cake sliced just like the one they sell in the patisseries by following these simple steps: first soak a knife in a cup of hot water, wipe off with a towel, then cut the cake while knife is still warm. Try to cut it through with only one cut and do not “saw”. Whip off any cake crump/residue and slice again. Just repeat these steps and you will have neat and pretty slices of cake that rival what they sell in the patisseries!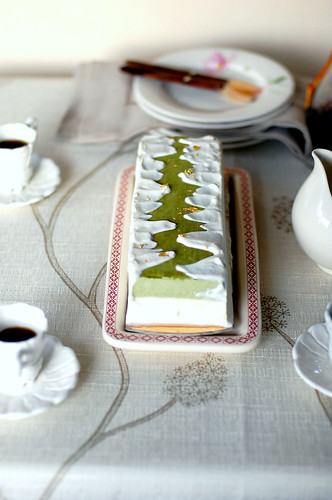
抹茶與杏仁風味冷藏式乳酪蛋糕 - 6cm x 6cm x 23cm磅蛋糕模具一個份
抹茶乳酪糊
250ml 全脂奶
3g 寒天粉*
150g 奶油乳酪
50ml 鮮奶油
50g 細砂糖
3茶匙 抹茶
1茶匙 檸檬汁
Amaretto乳酪糊
250ml 全脂奶
3g 寒天粉
150g 奶油乳酪
50ml 鮮奶油
40g 細砂糖
2drops 香草精
2湯匙 義大利杏仁酒
*究竟寒天- かんてん是什麼東西呢? 點這裡~
事前準備:
- 將奶油乳酪用保鮮膜包起來﹐放進微波爐﹐以弱溫加熱1分鐘﹐使其軟化。
- 抹茶過篩1次﹐備用。
抹茶乳酪糊:
將奶油乳酪放入mixing bowl裡用打蛋器攪拌至順滑﹔再依序加入細砂糖 à 檸檬汁 à 抹茶 à 鮮奶油﹐每加入一樣都必須確實攪拌均勻, 備用。
將牛奶和寒天粉放入小鍋裡﹐開中火加熱﹔不停的輕輕攪拌奶漿﹐讓它不會燒焦或黏鍋。煮至沸騰後轉小火繼續煮1分鐘至寒天粉完全溶解﹐熄火。將奶漿緩緩的逐次加入乳酪糊中﹐用打蛋器攪拌至順滑後用濾網過濾﹐倒入模具中。待靜置放涼後﹐放進冰箱冷藏2 - 3個小時。
杏仁乳酪糊:
將奶油乳酪放入mixing bowl裡用打蛋器攪拌至順滑﹔再依序加入細砂糖 à 香草精 à 鮮奶油﹐每加入一樣都必須確實攪拌均勻, 備用。
將牛奶和寒天粉放入小鍋裡﹐開中火加熱﹔不停的輕輕攪拌奶漿﹐讓它不會燒焦或黏鍋。煮至沸騰後轉小火繼續煮1分鐘至寒天粉完全溶解﹐熄火。將奶漿緩緩的逐次加入乳酪糊中﹐用打蛋器攪拌至順滑後用濾網過濾﹐加入義大利杏仁酒﹐拌勻。待燒微放涼後﹐倒在抹茶乳酪糊上﹐再放進冰箱冷藏凝固至少3個小時或一個晚上。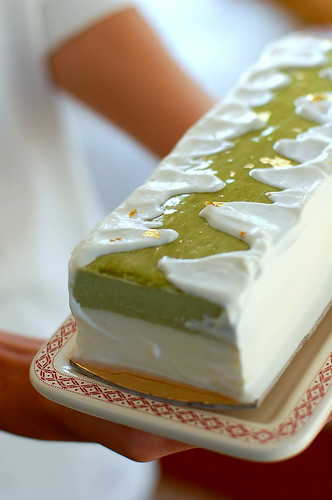
香堤麗鮮奶油 – 約1 ½ 杯份量
150ml 鮮奶油
2湯匙 細砂糖
將鮮奶油和細砂糖放入mixing bowl裡﹐用電動打蛋器先以低速打發鮮奶油至起泡﹐再轉中速攪打至出現尖角的程度。將鮮奶油放冰箱冷藏10分鐘即完成。
抹茶鏡面
鏡面果膠讓蛋糕晶瑩發亮~ 在這裡買的好東西^^
1茶匙 抹茶
1湯匙 熱開水
1茶匙 細砂糖
2湯匙 無味純果膠
將抹茶﹑細砂糖﹑熱開水混合拌勻至抹茶完全溶解。加進加熱過的無味純果膠﹐快速攪拌均勻。稍微放涼後﹐備用。
組合及裝飾蛋糕:
先將蛋糕脫模﹕以溫毛巾圍著模型溫熱10秒後﹐翻轉倒扣脫模。將微溫的抹茶鏡面用毛刷刷在蛋糕正上方﹐然後放進冰箱冷藏10分鐘。取出蛋糕﹐用抹刀將香堤麗鮮奶油平均的抹在蛋糕的正上方邊緣及長邊。再用抹刀將上面邊緣的鮮奶油拖向中間﹐形成溶雪的樣子。再放冰箱凝固15分鐘。享用前撒些食用金箔點綴即可。
究竟如何切出像patisseries賣相的蛋糕呢?
一點也不難喔﹗只要用溫熱過的刀子來切﹐就可以切得像店家賣的一樣整齊。首先﹐將刀子浸在熱水裡﹐擦乾就可以切了。每切完一刀﹐就把沾在刀子面上的蛋糕屑擦乾淨﹐並再度放進熱水裡溫熱﹔重複這些步驟就成了。
Shout out to Elaine: Happy Birthday!!! Another great year ahead =)
Monday, October 13, 2008
October Birthday: Petit pots de crème au chocolat accompagnée de crème Chantilly de thé au jasmin ~ 法式巧克力布丁佐茉莉香堤麗鮮奶油
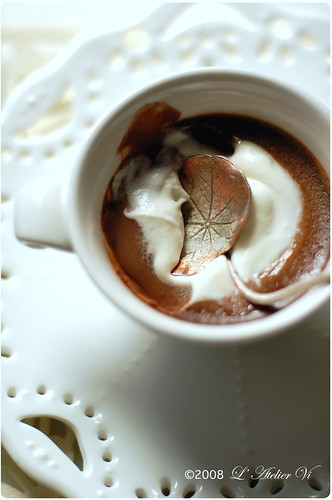
Foremost, I apologize to have kept you waiting for the October birthday treat. Both my personal and work life has had some drastic changes keeping me rather busy for the past couple weeks. Things are slowly taking its form so I have more time to spare. Lets get cooking!
Now that the weather has turned rather chilly, fresh fruit and refreshing icy treats will no longer do. My thoughts turn to what I call comfort food – chocolate! Guess what comes to mind? Luscious chocolate pot de crème (pronounced poh-duh-KREHM), which may known to some as chocolate pudding, is just what I would like to get a mouth full of on these chilly autumn nights. Pot de crème means pot of cream, literally. Basically is a baked custard; steamed long and slow in a water bath to give it that satiny texture. The original flavor is vanilla, I like it but I love the chocolate variation more and caramel is a close second =)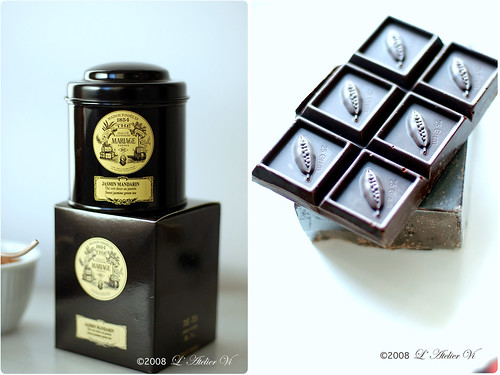
Since I picked up pastry/baking as a hobby, I happily stirred my way through pudding recipes from the most tried-and-true source, Martha Stewart, food network, and many celebrity chefs’ cookbooks. They were all yummy of course but not enough to have me going back for 2nd until I tried this recipe in Koji Tsuchiya’s Chocolats de Chocolatier book. This got to be the closest to how the French (it is originated from France hence the name) make them. This, my friends, is the ultimate, profoundly fudgy, satiny, and rich chocolate pot de crème that I ever tasted! Ultra luxurious, barely set, with a haunting bittersweet flavor and a texture like a silk camisole, one bite will transport you to haven! Besides that it is insanely yummy, the best part of the whole thing is that they’re super easy to whip up. Literally, you warm the cream/milk/vanilla seeds in a saucepan with the chocolate/cocoa powder; then, in a mixing bowl, whisk the muscovado sugar and yolks together. Then you combine the two, whisk the hot mixture into the bowl of egg yolks, pour it through a sieve to get rid of any lumps and bumps, mix in the Grand Marnier and pour it into ramekins/pots, bake them, cool them, and eat them with fresh whipped cream! Easy?! I know!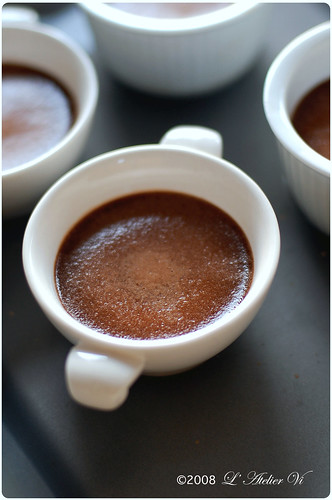
Although Tsuchiya’s recipe is almost close to perfection, I need it to be a bit fudgier so I played around with the recipe a bit and varying the ingredients too. I read somewhere that classic French recipe use only milk so you may want to try that if you prefer a lighter taste. I think either way, the outcome will be just as delicious.
I served the pot de crème with a dollop of fresh whipped cream delicately perfumed with jasmine tea. Though the floral note is sublimely subtle but it beautifully exploits the pure and intense flavor of the bittersweet chocolate.
This is going to be a regular dessert for me for sure and I hope it will find its way into your top desserts' list as well =)
Prep:
- Chop the chocolate into tiny pieces; sift the cocoa powder once.
- Bring a pot of water to boil and set aside.
I thought you should know:
- You must let the pots de crème set overnight before serving or it may turn out runny.
Pots de crème au chocolate - pots of chocolate cream
makes 4 (5oz)
175g whipping cream
175g milk
40g muscovado or brown sugar
2 egg yolks
40g bittersweet chocolate, 64 -66 % cocoa
½ vanilla bean, split open and seeds scraped out
1tbs unsweetened Dutch-process cocoa powder
1½tbs Grand Marnier liquor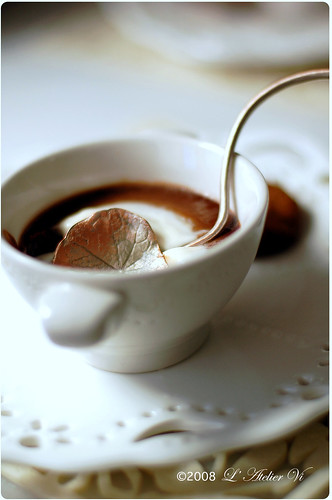
Bring the cream, milk, vanilla bean, and the seeds to a boil over medium heat. Turn the heat down to low then add the chopped chocolate pieces and cocoa powder. Using a hand whisk and whisk until chocolate completely melted and combined; bring mixture to a boil again then remove from heat. Remove the vanilla bean, set aside to cool slightly.
In the meantime, preheat your oven to 320°F/160°C. Next, whisk the egg yolks with the muscovado sugar until combined then add the hot milk mixture slowly while beating. Pour it through a sieve to get rid of any lumps and bumps, mix in the Grand Marnier and stir until combined. Place a napkin directly on the mixture to remove the foam that have formed on top then pour mixture into ramekins/pots until 2/3 full. Place ramekins/pots in a deep pan or roast pan, pour hot water into the pan until half way up the ramekins/pots – also know as hot water bath baking method.
Place in the oven and bake for about 1 hour. Check regularly after 45 minutes. Shake it a little, when the side is set but the center still is moving a little then they are done. Remove from oven and leave to cool. Place a plastic wrap on top and place them in the fridge to set overnight. Serve with Jasmine tea scented Chantilly cream and or chocolate curls.
Crème Chantilly de thé au jasmin - jasmine tea scented Chantilly cream
makes 1 1/2 cup
100g heavy whipping cream, chilled
2tbs caster sugar
1tbs premium loose-leaf Jasmine tea
Combine chilled cream and tea in bowl. Cover and chill overnight. Strain cream-tea mixture through fine strainer into mixing bowl, add caster sugar then using a handheld mixer and beat from low speed and gradually turn to higher speed until peaks form.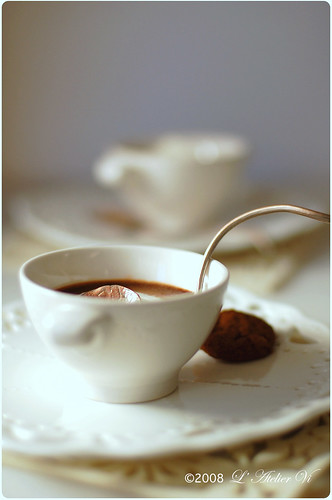
十月壽星的禮物終于送出了﹗很抱歉晚了﹐因為換了工作的緣故﹐這些天忙著趕進度﹐其次是忙著解決生活裡林林總總的煩心瑣碎的事﹐真的夠忙的﹗好不容易逮到空閑﹐急不及待的捲起衣袖做甜點囉=)
說那麼快的秋天已經到臨﹐天氣漸漸的轉涼了﹐讓愛吃清爽冰品的我口味也跟著變了。一到這個季節﹐我就想到巧克力。這是不是他人說的食物屬性呢? Anyways﹐最近做了很多時令水果製成的點心真的怪想念巧克力製的甜點的﹗為了治這饞嘴病只好動手了﹐不多想就決定做土屋公二的Chocolats de Chocolatier 一書裡的巧克力布丁。原因很簡單 – 看起來非常可口的樣子﹗
這道法式布丁﹐名字叫做pot de crème (唸 poh-duh-KREHM)﹐直翻是小罐的奶油(?!)﹐簡單說就是以低溫放熱水浴中慢慢烘烤再放冰箱冷卻凝固的奶酪。只靠蛋黃不加魚膠凝結的緣故﹐無法脫模享用﹐法人就用小巧可愛的耐熱玻璃小容器(glass pot)來盛裝(名字的來源應該就是這樣來的)。傳統的口味是香草﹐後來演變成各式各樣的口味。我的最愛當然就是巧克力口味囉﹗焦糖也很讚^^
巧克力布丁我做過很多次了﹐不過不是照著同一個食譜的﹐因為我在找尋那個有著非常細膩纖柔的精緻唯美質地的夢幻布丁(這樣說會不會太過了呵呵。。)﹗話說嘗試過無數名廚的做法而土屋師傅的布丁是最接近我要的那個口感的。嚐起來不僅僅輕盈還香﹑滑﹑潤。不僅美味懾人﹐做法還簡單到不成﹐看完以下的做法就知道有多簡單了=)
雖然已經很美味了﹐但我這個巧克力狂迷將巧克力份量加重了及微微的改了食譜。還有為了讓布丁口感更豐富﹐可以佐香堤麗奶油一起享用。我覺得巧克力跟茉莉茶很搭配﹐所以將香堤麗奶油做成茉莉口味的。是怎麼的一種滋味呢? 香醇的巧克力味兒裡帶有一點點橙橘酒香﹐口感非常纖細綿軟、雲般輕柔爽淨的慕斯質地,入口即溶。與透著淡雅迷人茉莉茶香﹑質地非常細膩纖柔的的香堤麗鮮奶油顯得極端精緻唯美、豐富﹐令人回味再三,令人難忘。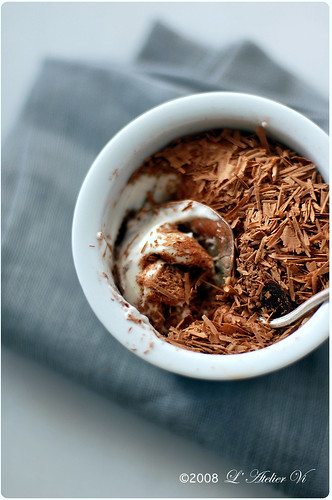
法式巧克力布丁 – 4個布丁
175g 鮮奶油
175g 牛奶
40g 黑糖
2 個 蛋黃
40g 苦甜巧克力﹐64 -66 % 可可亞成份
½ 條 香草豆﹐開半刮籽
1湯匙 無糖Dutch-process 可可粉
1½湯匙 橙橘香甜酒 (Grand Marnier)
事前準備:
- 可可粉過篩1次﹐備用。
- 煮開一壺開水﹐備用。
要注意什麼呢?
- 布丁一定要放冰箱凝固一個晚上才能食用﹐要不然可能無法凝固
把牛奶、鮮奶油混合倒進小鍋裡﹐用小刀將香草豆開半﹐取去其中的籽﹐將籽和香草豆一起放入鍋裡﹐用中火加熱﹐沸騰後轉為小火。倒進切碎的巧克力和篩過的可可粉﹐攪拌至完全融化混合﹐轉中火邊煮邊攪拌以免燒焦﹐再次沸騰後離火﹔丟掉香草豆﹐備用。
預熱烤箱至320°F/160°C。在另一碗裡將蛋黃和黑糖一起用攪拌器打散﹐確實拌勻後﹐邊攪拌邊慢慢地小量地加入溫奶漿﹐待溫奶漿完全跟蛋漿混勻到柔滑後過濾奶漿。加入橙橘香甜酒﹐攪拌至混合均勻﹐然後在奶漿上方鋪上一片餐巾紙﹐輕輕地吸取掉泡沫。最後倒進磁烤杯中至七分滿﹐再將磁烤杯排放在有深度的烤盤裡﹐然後注入熱開水達磁烤杯一半的高度﹐放進預熱過的烤箱裡烘烤60分鐘(45分鐘後要不停的查看以免烤焦)。當搖晃磁烤杯時布丁中央會抖動但週邊不動即烤好了。取出﹐待室溫放涼後﹐蓋上保鮮膜﹐放冰箱凝固一個晚上。食用時佐茉莉香堤麗鮮奶油即可。
茉莉香堤麗鮮奶油 – 約1 ½ 杯份量
100g 鮮奶油
2湯匙 細砂糖
1湯匙 茉莉花茶葉 (品質越上等味道越清香)
鮮奶油與茶葉混合﹐蓋上保鮮膜﹐放進冰箱泡浸一個晚上。過濾鮮奶油後加入細砂糖﹐用電動打蛋器先以低速打發鮮奶油至起泡﹐再轉中速攪打至出現尖角的程度。將鮮奶油放冰箱冷藏10分鐘即完成。


