

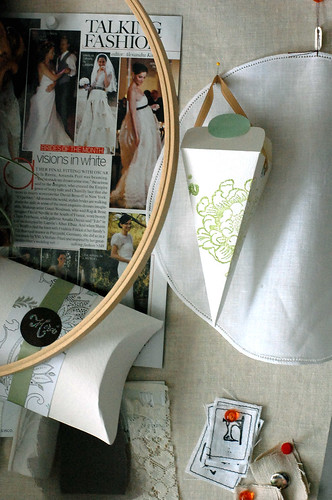
a corner of my work board
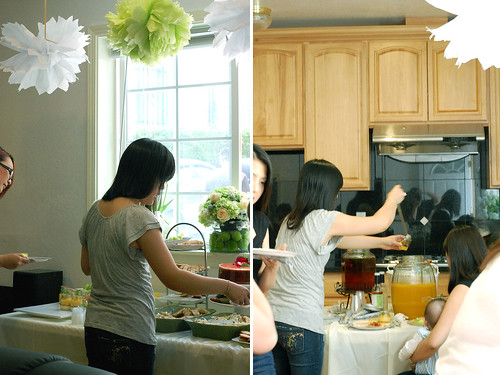
Gosh, I can’t believe another whirlwind week has come and gone! I have been busy playing hostess, wedding planner, and maid of honor to a dear friend whose big day is set for the end of August! You can imagine how full my plate is! However, one of the big things just got checked off. Below is a capture of the bridal shower and bachelorette party that the bridesmaids and I hosted to honor the bride-to-be.
We used a green/ivory/truffle color palette to tie in with the color theme of her wedding. Plus it seems more put together when the same color story is weaves thru out. Almost everything was DIY and homemade. I have to admit that it was a lot of work but the end result was fabulous, don’t you think^^
最近阿Vi忙著籌備朋友的8月婚禮忙的昏頭昏腦不亦樂乎。這次除了當首席伴娘﹐還身兼婚禮顧問及花藝家﹐可想而知有很多東西給我管@_@" 除了婚禮的事﹐在婚禮前﹐身為首席伴娘的我聯同所有的伴娘們可得幫準新娘辦出嫁前最後的一次歡送會(bridal shower)及告別單身聚會(bachelorette party)﹗不知道這是不是美國才有的習俗﹐ 歡送會即是一屋子女人的聚會﹐屬端莊又淑女的活動﹐讓新娘享受最後和姊妹們相聚的的單身時光﹐因為女人一旦走入婚姻﹐大部分會以家庭為主﹐可能沒那麼多自由時間和姊妹聊天了﹗告別單身聚會就比較瘋狂﹐讓新娘在婚前把握最後一次單身和好友們徹夜玩樂的機會﹐有臉紅心跳的話題以及遊戲﹐還有脫衣猛男(如果新娘許可的話)喔^^
差不多所有的東西都是DIY - 從紙吊飾﹑花擺飾﹑回禮的盒子﹑welcome旗子等等。而食物都是伴娘們自己弄的﹐而我當然是負責甜點的部分囉~
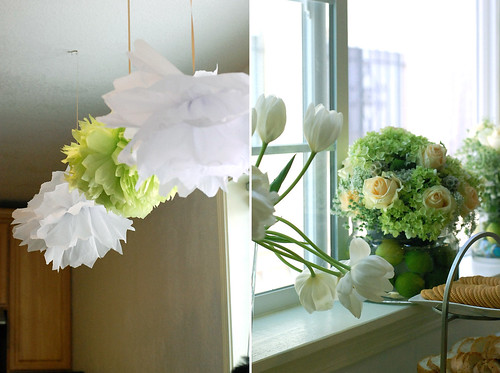
the green & white pom pom took me 10 minutes to make but took someone who-know-how-long to pull and fluff up; I woke up the morning of and went to the flower mart to get the flowers to make these centerpieces, pretty? 
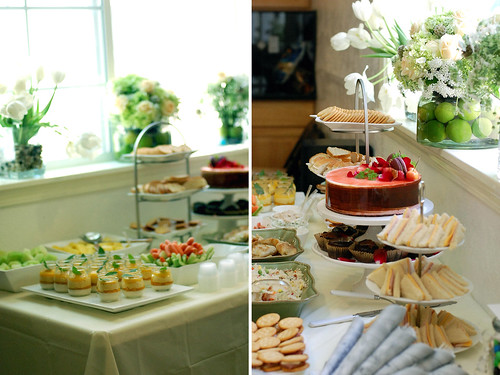
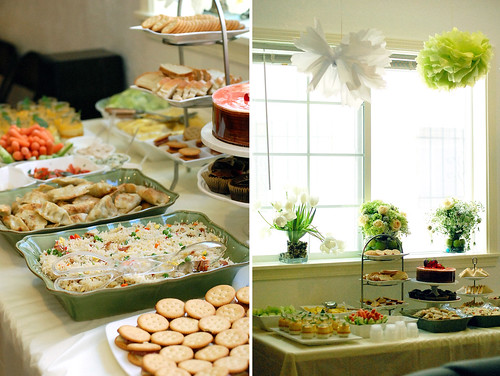
Menu:
Cheese & ham crackers
Tea sandwiches
Bruschetta
Fruit salad
Chinese sausage fried rice
Pot stickers
Veggie stick with dips
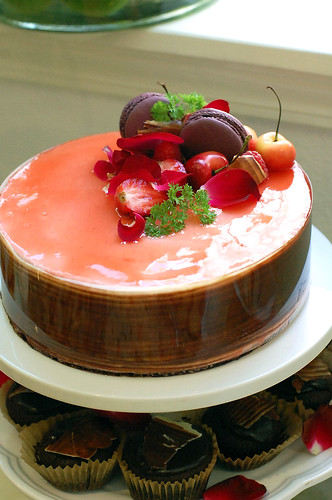
Desserts:
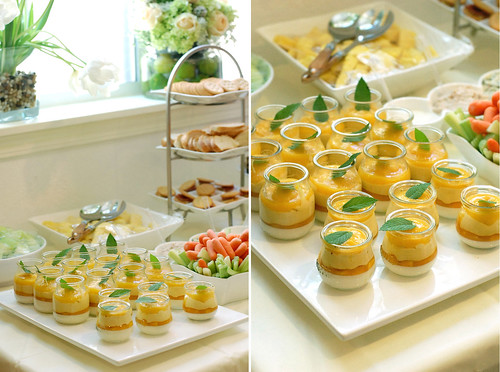
Mango panna cotta cups
Chocolate cupcakes
Strawberry mousse cake
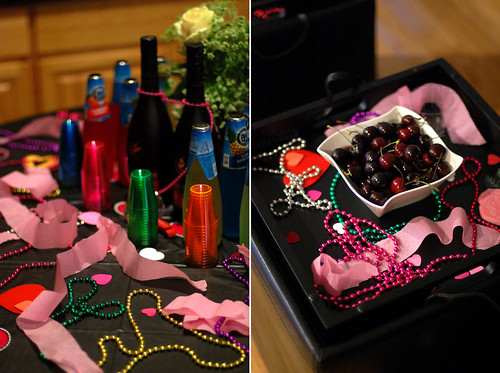
Drinks:
Peach iced tea
Fruit nectar
Mineral sparkling water
Favor to guests:
Benefit makeup
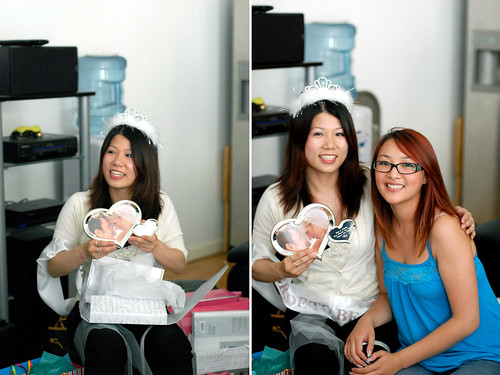
meet the bride-to-be Linda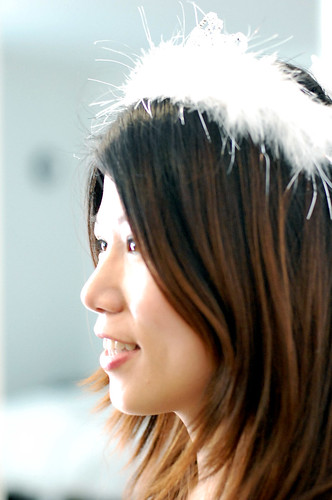
faces of some of the lovely & furry guests at the party

Guests won gifts like fleece blankets, sweets, and movie tickets when they played the games we prepared for them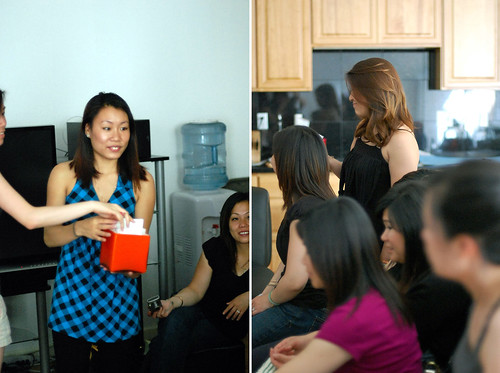


she must had received 2 weeks full of naughty but pretty dainty lingerie among other beautiful gifts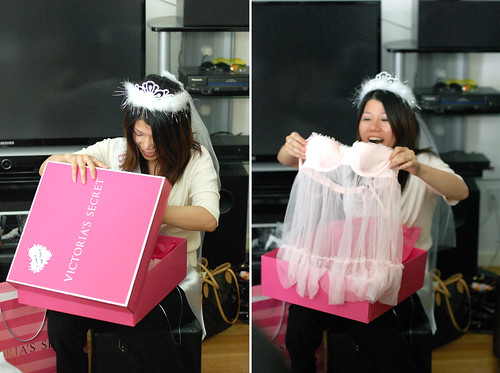
these pillow boxes (25+) took me a day to make, you like?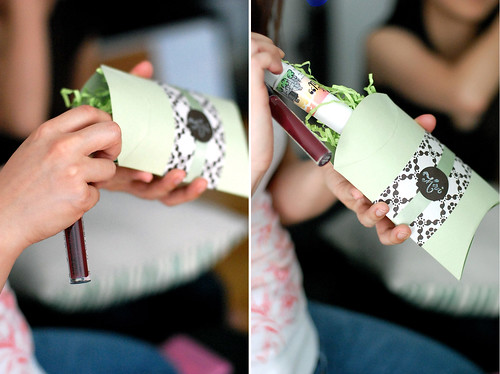
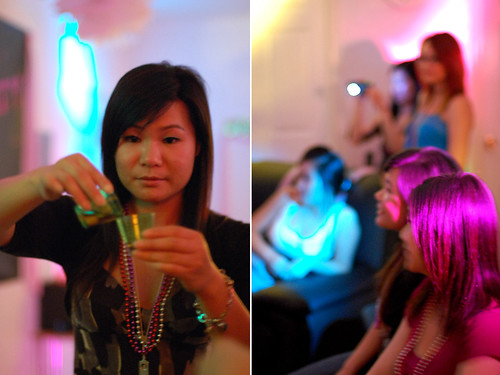
The bachelorette party follows immediately after the bridal shower and the night unfolds with a light dinner at Zen’s. Many giggles later, we went back to the location of the bridal shower, which with some help of some very talented people, have transformed into a VIP lounge and also kick off the night. Unfortunately what happened in that room was not to be disclosed to anyone other than the one who were there that night so we will just leave it here ;p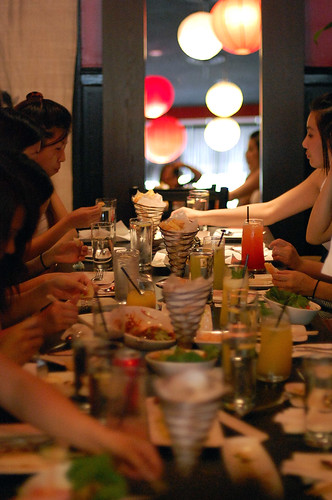
sharing laugh & foods at Zen's


the room transformed into a VIP lounge!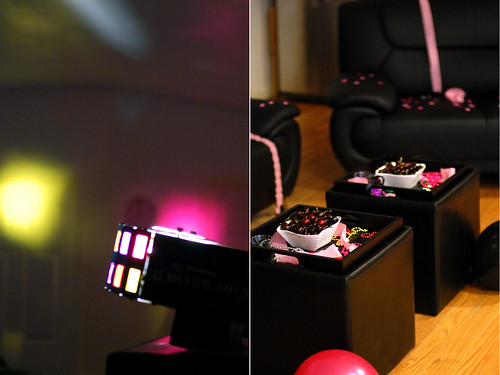

Wednesday, July 29, 2009
Playing hostess ~
Thursday, July 16, 2009
L’ Atelier Vi turned 2 & giveaway!! L’ Atelier Vi 兩歲了之週年慶送禮物 =)

L’ Atelier Vi turned 2!! Time seems to have gone by so quickly! I’d like to thank all the readers of my little blog for your support. I would not have gone this far without you. I’ve been inspired by all your feedback and truly grateful to your kind comments over the year!!
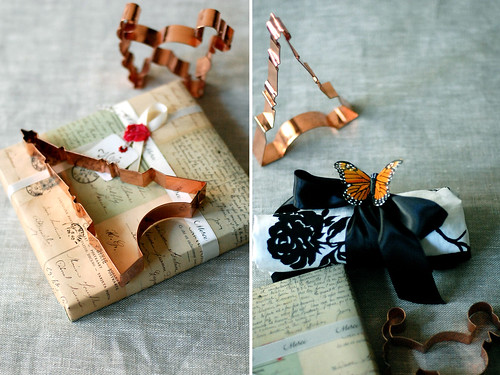
As this being said, it calls for a celebration!! Besides whipping up a little something to celebrate the anniversary, I also got you a little something in return of your continuing support of this little blog of mine. Remember what I did for the 1st anniversary? Well, you don’t have to do anything this time…umm…other than leaving a mark on the comment page of this post so that you can be enter into the drawing by 7/31!!! As for the gifts I picked out for you, there are 2 sets – each consists of a box of 2 copper cookie cutters and a simple apron of black rose pattern (sewn by me). I hope you’ll like them =)
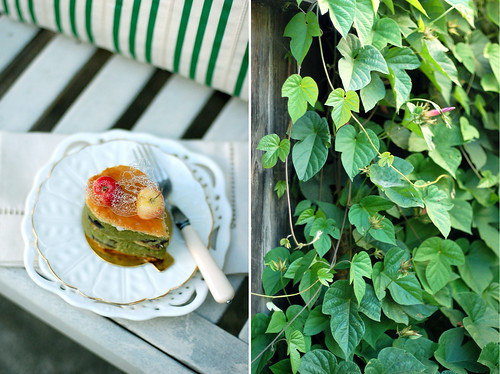
Now, let’s talk about the little something I made for the anniversary. Giving this special occasion, I attempted something from my too-hard-to-do list! A dessert conjured of layers of feullitage and pistachio cream from a pastry book written by Chef Koji Yamamoto of Patisserie Les Planetes. Feullitage or puff pastry as known to most, is not something myself and most people would have the leisure to make regularly given its lengthy method (precise technique too). I have been dragging until this very day to finally give it a try because I was repeatedly told by many baking enthusiasts that all I need to master fabulously flaky feullitage is flour, butter and plenty of time and patience - the repetitive roll-fold-rest process will take up a good amount of time (a day & a half to be exact).You know how people said about good things need time? They were right! Indeed a lot of time but the end result worth every minute of it. The lengthy process yields a layered pastry structure of unparalleled lightness and flakiness and once you take a bite into the ultimate buttery goodness, you’ll be hooked for life!!
As for the pistachio mousseline, it is relatively easy. The hardest part was trying to find the pâte de pistache, which I found here (I just love this place!). As for the griotte cherry in liquor (another hard to find item in the States), I happened to find it in a local specialty shop in Berkeley; however, you can replace this by using Bing cherries or Rainier cherries coated lightly with Kirsch and a sprinkle of vanilla sugar. Because both the pistachio mousseline and mille-feuille are loaded with butter, you can imagine how rich and creamy this dessert is. I suggest serving it with some sorbet high in acidity (like lemon or passion fruit) to cut the creaminess.
Mille-feuille Pistache Griotte (Napolean with Pistachio Mousseline & Sour Cherry) makes 5 single serving cakes
Feullitage
I use tear drop shaped mousse rings to cut out puff pastry and served them as individual cakes as opposed to cutting them into sheets. Yield about 15 tear drops.
185g bread flour
125g cake flour
50g unsalted butter, cubed
5g salt
140g ice cold water
225g blocks of unsalted butter, each thinly sliced lengthways
Crème pâtissière (vanilla custard)
340g whole milk
1 vanilla bean, split & seeds scraped
55g egg yolks
85g granulated sugar
30g cornstarch
Crème mousseline à la pistache (pistachio mousseline)
150g crème pâtissière
50g pâte de pistache (pistachio paste)
75g unsalted butter, room temperature
20 griotte cherry in liquor, cut into halves
For garnish
Some apricot jam, Isomalt sugar decoration, and fresh rainier cherries
For the Feullitage:
Night Before
Arrange the butter slices into a square on a piece of plastic food wrap, put another piece of food wrap on top then mash the butter into 1 big square using a rolling pin; refrigerate it until firm. Make the base also known as a détrempe next. Using a food processor, process flours, cold butter cubes, water and salt until the dough is well combined. Turn onto a lightly floured surface and form dough into a ball. Wrap the dough in plastic food wrap and leave to firm up overnight in the refrigerator.
Next Day
Roll out pastry dough on a floured surface to a square slightly bigger than the butter block then arrange the butter block in the center, pull in all 4 corners toward the center then flip it over and roll it out to a rectangle. Fold the top third of pastry to the middle third then fold up bottom third. Turn counter clockwise so opening is on the right, roll out pastry to a square, cover with plastic wrap, refrigerate until firm (1-2 hours). Repeat 5 more times, resting in between.
Divide the dough into 2 halves, wrap 1 half in plastic food wrap, store it in a airtight container and place it in the freezer, it will keep for months. Roll out the other half of pastry dough to 3mm (1/8 inch) thick, prick dough all over with a fork and let chill for 15 minutes or until the dough is firm enough. Meanwhile, preheat oven to 400°F/200°C. Place dough in a jelly roll sheet pan lined with parchment paper, place a wire rack on top (to prevent dough from puffing) and bake for 30 minutes or till nicely browned and cooked through. Remove and let cool.
For the crème pâtissière:
Combine milk, vanilla pod and seeds in a medium saucepan. Bring to a simmer over medium heat. Meanwhile, in a large bowl, whisk together the egg yolks, sugar until mixture turns pale yellow. Add in the cornstarch and whisk until combined.
Remove the milk mixture from the heat and add a little to the yolk mixture to warm it first, whisking constantly to keep the yolks from cooking. Pour the rest of the hot milk into the egg mixture, whisking constantly as you pour. Strain the mixture into a clean saucepan.
Return the custard to the stove and cook over low heat, whisking constantly. Let the custard cook for 1-2 minutes until it is thick enough to coat the back of a wooden spoon. Using a fine sieve; strain the mixture into a clean bowl. Cover the surface with plastic wrap and refrigerate until chilled.
For the pistachio mousseline:
Using a handheld mixer, beat the chilled crème pâtissière over medium speed until smooth. Fold in the pâte de pistache, beat until combined then fold in the unsalted butter and beat until combined. If not being use immediately, please refrigerate (just whisk until smooth before use).
Assemble:
Place a tear drop shaped mousse ring on top of the puff pastry, trace the outline using a paring knife and cut out 15 pieces. Spoon the pistachio cream inside a piping bag fitted with a round tip. Arrange 5 tear drop shaped mousse rings on a sheet pan, put 1 piece of puff pastry inside each ring, arrange some griotte cherry halves, pipe a layer of cream on top, level with the back of a spoon, put in another piece of puff pastry, press down lightly to release any air bubbles, arrange some more griotte cherry halves, pipe another layer of cream almost to the top, level with the back of a spoon, put another piece of pastry on top and press down lightly to release any air bubbles. Refrigerate until firm.
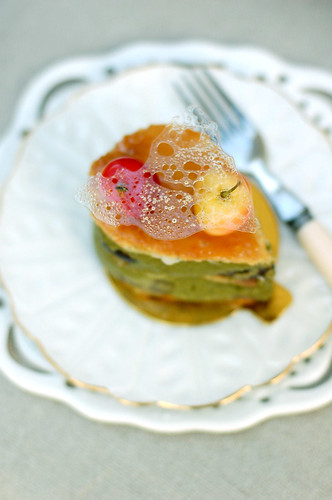
Brush a layer of warm apricot jam on the top then carefully push out the cakes from the rings. Arrange 2 rainier cherries on top then a piece of Isomalt sugar decoration, viola!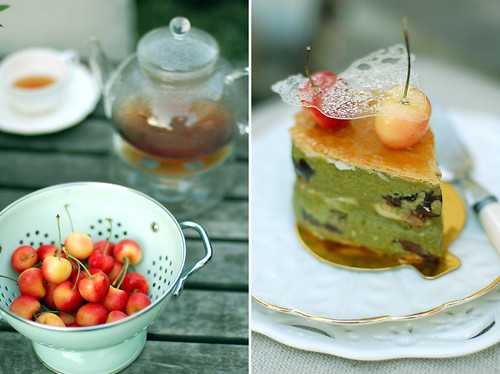
又到七月了﹐也就表示我的部落格邁入第二個年頭了﹗我的天呀﹐兩年過的真快﹐真不敢相信 L’ Atelier Vi已經兩歲了﹗ ﹗希望以後還有無數個兩年可以在這個平臺跟你們分享切磋製作甜點的心得。最重要是不管你是從一路走來的舊友﹐還是剛剛到訪的新知﹐衷心感謝你們不時送上鼓勵加油的話﹐感動死了 ~.~
為了回饋大家的支持﹐阿Vi準備了一點小禮物送你。有別於去年週年慶的競賽﹐今年你無須參加任何比賽﹐因為是以抽獎形式送出。 如果你想收到阿Vi為你準備的禮物﹐只需在美國西岸時間7月31日的限期前在這個post的留言版畫個丫﹐說明你想參加抽獎即可。至於禮物嘛﹐是一套以巴黎為主題的餅乾模和我以黑玫瑰圖樣亞麻布縫製的手工圍裙(有照片喔)﹐共送出2份。希望你會喜歡~
現在來說說為了這個特別的日子製作的甜點吧﹗當在Patisserie Les Planetes 的甜點主廚山本光二師傅著作的書中看到這個以開心果櫻桃組合做成的千層派﹐就深深的迷上這個看起來高雅又帶有清涼感的甜點。可是看到需要自己動手製作千層派皮時卻步想放棄﹐因為我沒耐性挑戰這個高難度﹑耗時﹑需要繁複的製作過程的麵糰。可很多培烘同好不斷地游說說要做出酥脆美味的千層派皮並不如想像中的困難﹐最後被說服決定嘗試磨煉一下自己的能耐。耗了我一天半的時間反覆摺疊製作而成的千層派皮有著超級酥脆的口感﹐無比細膩層次的特質﹐咬下去的瞬間所散發出來的奶油香讓我覺得付出的時間是值得的。現在終於明白人們說好的東西是需要同等的時間去準備的道理了 =)
我是頭一次製作開心果奶油慕斯。開心果奶油慕斯的質地很柔滑﹐味道帶點草腥味﹐頗有個性。不知道是不是先解決了高難度的千層派的關係﹐相比下奶油慕斯製作過程很容易﹐well…除了搜購開心果糊這部分﹗不得不說很多日語書所需的食材在美國是很難找的﹐不過好在自從發現這家店後絕少讓我失望。另外酒漬櫻桃也很難找﹐不過月前無意間在Berkeley的一家market給我找到。若是找不到﹐用以適量櫻桃白蘭地﹑香草砂糖稍微醃漬的新鮮櫻桃代替可不能不加﹐由於千層派和奶油慕斯用上相當份量的奶油﹐口感雖香酥濃郁可對亞洲人來說應該有點厚重﹐而微酸的櫻桃可以中和讓味道清爽一點﹐最好還搭配酸味重一點的冰品享用﹐好讓味道更滋味多元。
櫻桃開心果千層派 – 5個小蛋糕
捨棄傳統的條狀而將它做成小蛋糕主要是為了方便食用。
千層派皮
185g 高筋麵粉
125g 低筋麵粉
50g 冰凍無鹽奶油﹐切成小方塊
5g 鹽巴
140g 冰水
225g 夾入用無鹽奶油
奶油蛋糊
340g 全脂奶
1條 香草荳﹐開半刮籽
55g 蛋黃
85g 砂糖
30g 玉米粉
開心果奶油慕斯
150g 奶油蛋糊
50g 市售開心果糊(膏)
75g 無鹽奶油 - 切成小方塊﹐室溫放軟
20粒 酒漬櫻桃﹐橫的切成兩半
裝飾用
適量的杏果果醬﹑烤糖片裝飾﹑金黃櫻桃
千層派皮的做法
前一晚:
將無鹽奶油縱向的切厚塊﹐放置在一片保鮮膜上成正方形形狀﹐再蓋上一片保鮮膜﹐然後用桿麵棍敲打使其成方磚狀﹐包好冷藏備用。跟著製作千層派皮的外層麵糰基地 (détrempe)。將高﹑低麵粉﹑鹽水﹑丁狀無鹽奶油用食物調理機攪拌勻成奶油糰塊。取出﹐放在撒上少量高筋麵粉的工作台上﹐快速揉成球狀﹐蓋上保鮮膜﹐放進冰箱靜置一個晚上醒麵。
第二天
從冰箱取出奶油麵糰﹐放在撒上少量高筋麵粉的工作台上﹐用桿麵棍桿開成比奶油磚稍微大一點的正方形﹐然後將奶油磚交錯地放置在上﹐再將麵糰的四個角拉向中央。不要讓空氣進入其中地將麵皮拉緊折疊﹐並且將各個邊緣逐一捏緊。將糰塊翻面﹐用桿麵棍各以直向﹑橫向桿開來﹐使麵糰和奶油可以相互緊密結合﹐然後將麵糰從中央向前後桿開成長方形條狀。將麵糰折疊成3折﹐稍壓一下﹐再90度扭轉麵糰 (封口向右)﹐用桿麵棍各以直向﹑橫向稍微拉長﹐用保鮮膜包好﹐放冰箱靜置60分鐘以上醒麵。重複這組各以直向﹑橫向桿開來﹐折疊成3折﹐90度扭轉﹐再直向﹑橫向拉長﹐包好﹐放冰箱靜置的程序5次(合共6次)。
預熱烤箱至400°F/200°C。取出麵糰﹐切半。一半包好冷凍保存﹐一半麵糰桿開成約厚3mm或1/8寸的薄片﹐再用叉子戳刺氣孔﹐放入鋪了烘烤紙的烤盤裡﹐蓋上保鮮膜﹐放進冰箱冷藏約15分鐘定型。取出﹐在麵糰上放上網架(防止烘烤時過度的膨脹)﹐放入烤箱烤30分鐘或至派皮呈金黃色。取去擺放在網架上放涼。
奶油蛋糊的做法
將牛奶﹑香草荳和籽混合倒進小鍋裡,以中火煮至剛沸騰即離火﹐蓋上鍋蓋燜幾分鐘。將蛋黃和砂糖一起攪打至顏色變白﹐再加進玉米粉﹐充份地攪拌均勻。
將熱奶漿逐一加入蛋糊中﹐並同時用打蛋器不間斷地攪打。過濾奶蛋糊﹐再倒回小鍋中以低火加熱。用打蛋器持續不斷地攪拌至變稠﹐並可以在木匙背劃出清晰的線條時(約2分鐘)就完成了。將奶油蛋糊過濾後在表面蓋上保鮮膜(黏著蛋糊)﹐放進冰箱冷藏備用。
開心果奶油慕斯的做法
將奶油蛋糊取出﹐用攪拌機以中速攪打至軟滑﹐拌入開心果糊﹐用橡皮刀源邊往下刮翻切拌勻﹐再拌入室溫放軟的奶油﹐用攪拌機以低速攪打至混合呈光滑狀﹐放冰箱備用。使用前﹐再攪打軟即可。倒進密閉的容器裡﹐放冰箱可存放2個星期。
組合及裝飾蛋糕
事前準備:
- 將千層派皮用淚滴形狀慕斯模切割出約15片派片﹐備用。
將5個淚滴狀慕斯模放置在烤盤上﹐在各個模中鋪放一片派片﹐再隨意的放一些酒漬櫻桃粒﹔備用。將拌軟的開心果糊倒進裝有圓形擠花嘴的擠袋中﹐先擠些開心果糊填滿模具至4分滿﹐用湯匙背推勻鋪平至模具邊緣﹐再在各個模中鋪放一片派片﹐輕輕壓一下釋放氣泡﹐再放些櫻桃粒﹐再擠入一層開心果糊至模具8分滿﹐推平﹐鋪上第三片派片﹐往下輕按﹐然後放入冰箱冷卻定形。
取出蛋糕﹐在派片表面塗抹一層微溫的杏果果醬﹐然後用手指將蛋糕往上推出脫模。在各個蛋糕上擺放2粒金黃櫻桃再放一片烤糖片即可﹐放冰箱冷藏存放。


